Windows Azure PowerShell for Node.js
The Windows Azure PowerShell for Node.js is a command-line tool that allows the Node developers to build and deploy Node.js apps in Windows Azure using Windows PowerShell cmdlets. Using Windows Azure PowerShell for Node.js, you can develop, test, deploy and manage Node based hosted service in Windows Azure.
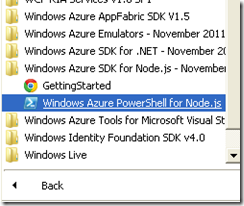
For getting the PowerShell for Node.js, click All Programs, Windows Azure SDK Node.js and run Windows Azure PowerShell for Node.js, as Administrator.
The followings are the few PowerShell cmdlets that lets you to work with Node.js apps in Windows Azure
Create New Hosted Service
New-AzureService <HostedServiceName>
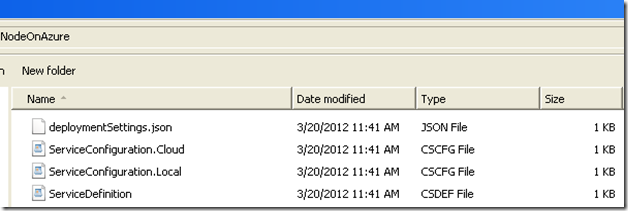
The below cmdlet will created a Windows Aazure hosted service named NodeOnAzure in the folder C:\nodejs and this will also create ServiceConfiguration.Cloud.cscfg, ServiceConfiguration.Local.cscfg and ServiceDefinition.csdef and deploymentSettings.json files for the hosted service.
PS C:\nodejs> New-AzureService NodeOnAzure
The below picture shows the files after creating the hosted service
Create Web Role
Add-AzureNodeWebRole <RoleName>
The following cmdlet will create a hosted service named MyNodeApp along with web.config file.
PS C:\nodejs\NodeOnAzure> Add-AzureNodeWebRole MyNodeApp
The below picture shows the files after creating the web role app.
Install Node Module
npm install <NodeModule>
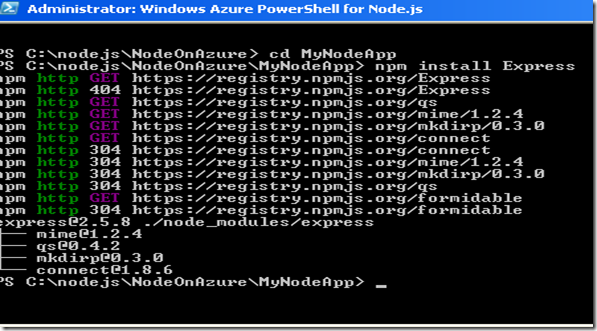
The following command will install Node Module Express onto your web role app.
PS C:\nodejs\NodeOnAzure\MyNodeApp> npm install Express
Run Windows Azure Apps Locally in the Emulator
Start-AzureEmulator -launch
The following cmdlet will create a local package and run Windows Azure app locally in the emulator
PS C:\nodejs\NodeOnAzure\MyNodeApp> Start-AzureEmulator -launch
Stop Windows Azure Emulator
Stop-AzureEmulator
The following cmdlet will stop your Windows Azure in the emulator.
PS C:\nodejs\NodeOnAzure\MyNodeApp> Stop-AzureEmulator
Download Windows Azure Publishing Settings
Get-AzurePublishSettings
The following cmdlet will redirect to Windows Azure portal where we can download Windows Azure publish settings
PS C:\nodejs\NodeOnAzure\MyNodeApp> Get-AzurePublishSettings
Import Windows Azure Publishing Settings
Import-AzurePublishSettings <Location of .publishSettings file>
The following cmdlet will import the publish settings file from the location c:\nodejs
PS C:\nodejs\NodeOnAzure\MyNodeApp> Import-AzurePublishSettings c:\nodejs\shijuvar.publishSettings
Publish Apps to Windows Azure
Publish-AzureService –name <Name> –location <Location of Data centre>
The following cmdlet will publish the app to Windows Azure with name “NodeOnAzure” in the location Southeast Asia. Please keep in mind that the service name should be unique.
PS C:\nodejs\NodeOnAzure\MyNodeApp> Publish-AzureService –name NodeonAzure –location "Southeast Asia” –launch
Stop Windows Azure Service
Stop-AzureService
The following cmdlet will stop your service which you have deployed previously.
PS C:\nodejs\NodeOnAzure\MyNodeApp> Stop-AzureService
Remove Windows Azure Service
Remove-AzureService
The following cmdlet will remove your service from Windows Azure.
PS C:\nodejs\NodeOnAzure\MyNodeApp> Remove-AzureService
Quick Summary for PowerShell cmdlets
| Create a new Hosted Service | New-AzureService <HostedServiceName> |
| Create a Web Role | Add-AzureNodeWebRole <RoleName> |
| Install Node Module | npm install <NodeModule> |
| Running Windows Azure Apps Locally in Emulator | Start-AzureEmulator -launch |
| Stop Windows Azure Emulator | Stop-AzureEmulator |
| Download Windows Azure Publishing Settings | Get-AzurePublishSettings |
| Import Windows Azure Publishing Settings | Import-AzurePublishSettings <Location of .publishSettings file> |
| Publish Apps to Windows Azure | Publish-AzureService –name <Name> –location <Location of Data centre> |
| Stop Windows Azure Service | Stop-AzureService |
| Remove Windows Azure Service | Remove-AzureService |


