A Simple Bootstrap Radio Button for Web Forms
A Simple Bootstrap Radio Button for Web Forms
In a previous post I talked about creating a push-button style of radio button for MVC. This blog post will show how to create the same push-button radio button using Web Forms. There are only a few minor differences in the CSS and, of course, in the use of a Web Forms server control.
Simple Radio Button
As a way to get a better looking radio button, you can wrap a radio button into a button as shown in Figure 1. What is nice about this style of radio button is it wraps the label together with the radio button. In addition, on a mobile device it is much easier to press as the whole button area is clickable.
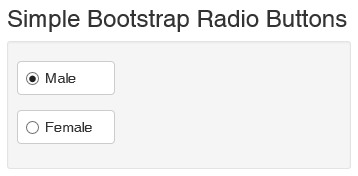
Figure 1: Radio buttons wrapped into a button
To create these radio buttones you wrap the radio button within the normal Bootstrap class “checkbox”. You then add a label element with the classes “btn btn-default” around the radio button as shown in the following code:
<div class="form-group">
<div class="radio">
<label class="btn btn-default">
<asp:RadioButton ID="IsMale" runat="server"
GroupName="gender"
Checked="true"
Text="Male" />
</label>
</div>
</div>
<div class="form-group">
<div class="radio">
<label class="btn btn-default">
<asp:RadioButton ID="IsFemale" runat="server"
GroupName="gender"
Text="Female" />
</label>
</div>
</div>
To make it appear correctly, you have to add the following CSS to align the radio button and the text correctly within the button. That is all there is to it!
<style>
.radio .btn,
.radio-inline .btn {
padding-left: 2em;
min-width: 7em;
}
.radio label,
.radio-inline label {
text-align: left;
padding-left: 0.5em;
}
</style>
Summary
Creating better looking controls for your web page is sometimes very simple and just involves combing a couple of elements together along with a tiny bit of CSS.
Past Blog Content
Blog Archive
-
2015
-
2014 (18)
-
2013 (11)
-
2012 (19)
-
2011 (29)
-
2010 (19)
-
2009 (28)
-
2008 (0)
-
2007 (14)
-
2006 (6)