Placing Model in separate Assembly
Today, I was cruising the forum and i ran across an interesting post where the poster wanted to place the model and ObjectContext in different assemblies. Imagine you have a customer table and you created the Entity Data Model with Customer entity. You wanted your tiers to be as follows
1. Model Project: contains the edmx file
2. Entities Project : contains entities defined on the model
3. Repository Project: contains the repository class and the Object Context.
4. WPF application: Accesses the repository to display list of customers.
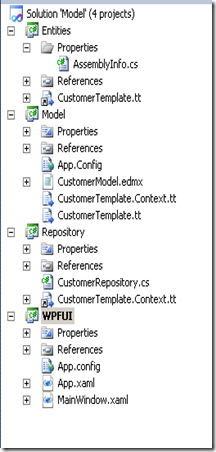
Visually the structure would look some what like this.
The repository project has reference to Model and Entities project and WPF project has reference to Repository and Entities project.
If you try to run the wpf application you would receive runtime exception stating below
Unable to load the specified metadata resource
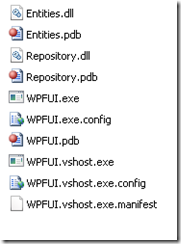
There are two reasons the error occurs. First its because Model dll is not available in the bin directory of WPFUI application. Following is the screen shot for the bin directory for WPFUI application.
The reason Model dll is not available is because the repository project has simply a reference to the Model project but does not use anything from the project. The model project contains the model definition which is embedded as resource. When you build the solution, visual studio sees that there is no class being referenced and hence does not include the Model.dll. There are several ways to solve this problem.
1. You can manually add a reference to Model.dll to WPFUI project and then use Assembly.Load to load the assembly where edmx file reside before spinning up an instance of ObjectContext.
2. Set the Metadata Artifact Processing to Copy to output directory, grap the csdl, msl and ssdl files and put it inside the bin directory of WPF application.
For this posting, I will use solution # 1. Below are steps i used to complete the example.
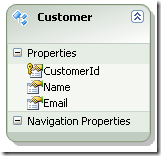
1. Create a class library project. Call it Model and add a new Entity Data Model with Customer entity as shown below.
2. Right click anywhere on the model and Select Add Code Generation Item and select Self Tracking Entity template for code generation.
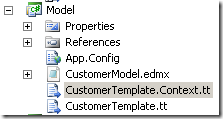
3. Empty out the CustomToolNamespace for CustomerTemplate.tt and CustomerTEmplate.Context.tt.
4. Expand each template and make sure to delete all the code generated files.
5. Add another class library project, give it a name of Entities. Right click on the project and add existing item. Browse to CustomerTemplate.tt t4 template and add it as a link.
6. Add a repository project to the solution. Call it Repository. Add reference to Entities project.
7. Add existing item to the project by selecting CustomerTemplate.Context.tt t4 template as a link.
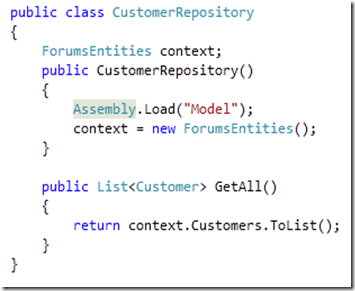
8. Create a very simple repository class that displays list of customers. code below shows the CustomerRepository class.
Notice in the constructor we are calling Assembly.Load to explicitly load the Model.dll assembly. We do this even before instantiating the object context because when you spin up the ObjectContext, Entity Framework would try to locate the csdl, msl and ssdl files from all the assemblies loaded in the app domain.
9. Add a wpf apoplication to the solution and add reference to Entities and Repository project. We also need to add reference the Model Project otherwise the dll wont be available in the bin directory of the project which means the call to Assembly.Load to load Model assembly will fail inside our repository class.
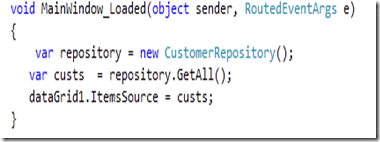
Inside our loaded event for wpf application we can retrieve the customers from our repository and display it in a datagrid.
