The new Visual WebGui integration to Visual Studio
Version 6.2 holds a major change for Visual WebGui (VWG) developers. For the first time Visual WebGui is more than just a project template in Visual Studio it’s fully integrated into Visual Studio. The integration facilitates VWG developer’s interfaces with an easy customization of VWG applications allowing the deployment of the application without having to edit the WebConfig by hand. We’ve added customized menus with new features that save time while developing VWG application.
Let’s go over the changes that were added in Visual WebGui 6.2.
Installation Prerequisites
The only prerequisite for Visual WebGui installation is that the corresponding .Net framework will be installed on the computer. For example if you choose to install the Visual WebGui SDK from .Net 3.5 you first need to install .Net framework 3.5.
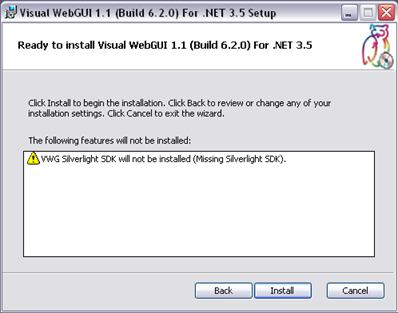
Other than that there are no further prerequisites but there are a few things that can influence the volume of the installation. For example if you haven't installed Silverlight the Visual WebGui SDK will not be installed. If the installation identifies that it cannot install a part of the installation, it will disable it in the customize section and will give a message as to what will not be installed.
Installation
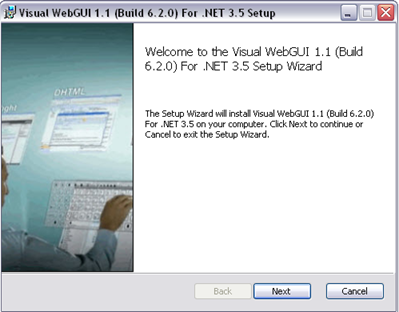
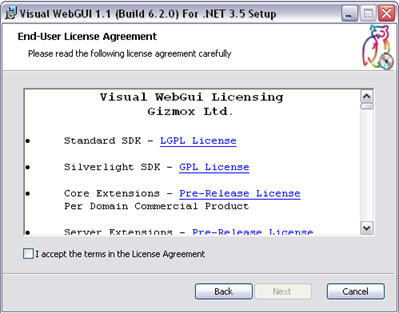
Using Wix we created a much more friendlier install process. Before version 6.2 when you installed VWG you had to download up to 5 different files per .Net framework (SDK, Source, Silverlight, Documentation …). From version 6.2 you have one install file that you need to download for each framework. This installation process installs VWG SDK (DHTML) under LGPL for the selected .Net framework and the Silverlight SDK under GPL. It also installs the current available extensions (such as the scalable server and the Office controls) that allow you to develop for open source and be charged royalty only when you deploy. The new installation includes the new VWG documentation (that will be described t later). The only part that is not installed is the catalog sample app. If you want the catalog application you can download it from here.
The install process allows you to choose what part of the Visual WebGui installation will be installed.
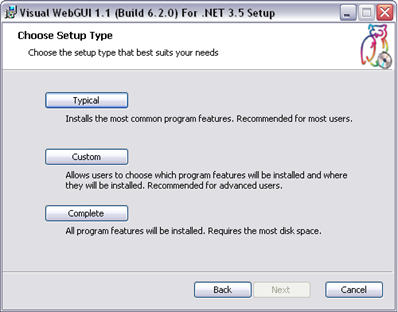
Typical - When you select typical installation you will install the DHTML SDK and extensions but under the old Visual Studio behavior. This means that you will have templates just like you are used to and will continue to work as before.
Complete - The complete installation installs the new Visual Studio integration with the DHTML and the Silverlight SDK, the extensions and the new Visual WebGui documentation.
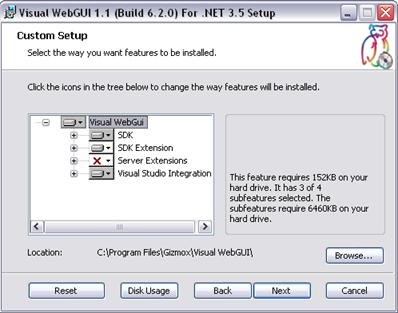
Custom - Using custom install section you can decide what extension will be installed or select not to install the documentation according to your needs. This also allows you to install the DLLs by them self and use VWG with Visual Studio express or SharpDevelop without templates or integration. We will release an article how to work with them in the near future.
File structure
The install process install the files by default in C:\Program Files\Gizmox\Visual WebGUI\SDK3.5\Assemblies. You can select to install the files in a different location using the custom option. All the SDK DLLs and the extensions DLLs are installed in that location.
If you chose to continue to work with the old Visual Studio integration this next parts is not that relevant to you.
Templates
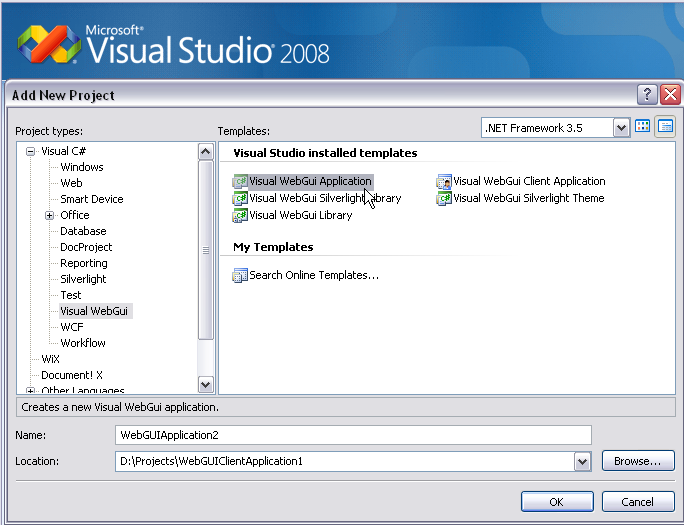
Version 6.2 introduce a change to the VWG templates. Because now the install process installs both the DHTML and the Silverlight SDK we joined the Visual WebGui application template and the Visual WebGui Silverlight application template to one template that allows the developer to chose between both presentation layers while coding once. The rest of the templates remain the same.
Migrating from older version to 6.2
I’m sure that you’re asking yourself “How much it is going to cost me to convert my project that was created before 6.2 to a 6.2 version?” well first of all you don’t have to change your projects to work like 6.2 you can continue working without the integration and doing everything “old school” like your used to. But if you want to try the new Integration this is what you need to do.
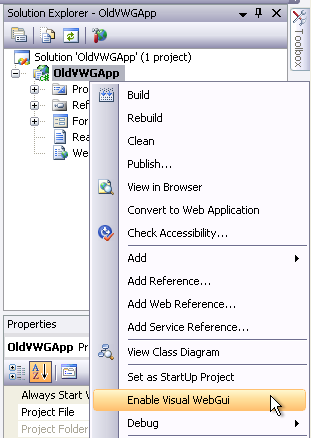
So you finished installing the new 6.2 version and opened your project and what do you see is that noting changed :-). But if you right click on the project you see in the context menu a new addition “Enable Visual WebGui”. Once you click this menu item your project is converted to the new project definitions saving you the process of changing the configurations to fit the new structure. You will be prompt to reload the project and save the WebConfig. And with that we finished going over the conversion of old project to the new project definition.
This feature is also available when you have a regular Asp.Net project and you want to convert it to a Visual WebGui application. Once you select “Enable Visual WebGui” the project converts itself from an Asp.Net project to a Visual WebGui application adding all the assemblies references that are needed and the configuration to the WebConfig.
For VWG Silverlight application there is one more thing that should be done open the project property page and in the Build events section remove the post build event command line.
Creating a new VWG application
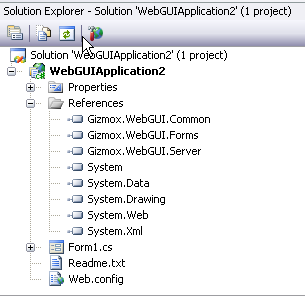
Let’s open a new Visual WebGui application and see the project structure. The first thing you need to do is enable Visual WebGui to add the integration abilities to the project. The new Visual WebGui application template allows you to select in what presentation layer this application will run. We will go later on how to select the presentation layer but for now that the default is just DHTML.
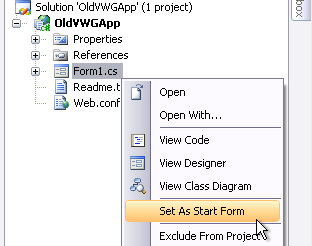
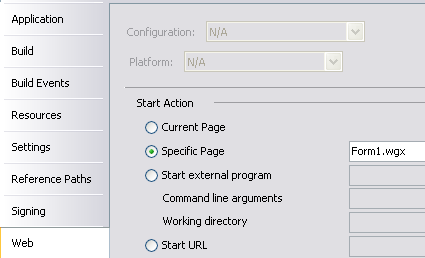
Let’s run our application. First thing we need to do is to set the start up form. Select the form that you want as a start up form and right click on it you will see a menu item “Set as start form" selecting that option will set this page as the start up page of the application. Like in previous version you will be able to edit it manually by right clicking on the project and going to the web section in the project properties pages.
Now we can run our application.
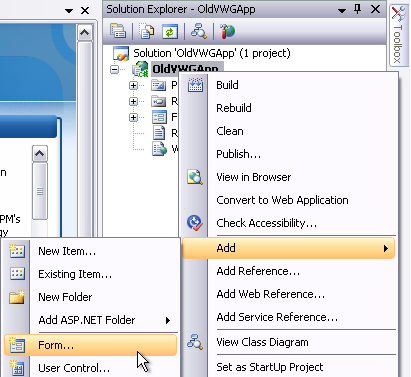
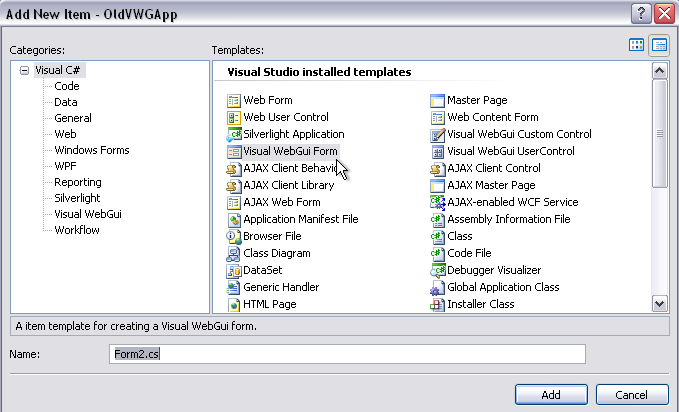
Let’s add another VWG form. Right click on the project go to the “Add” sub menu. In that sub menu you can see the regular options like “New Item”, “Existing Item” and two new menu items “WebGui form” and “User Control”. This allows you to add VWG items much faster.
Now that we added a new form lets change our starting form to this form by right clicking on it and selecting “Set as start form".
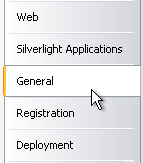
Let’s open the project property page as you can see we’ve added three new section “General“, “Registration”, “Deployment”.
Registration
This new section holds the project definitions for parts of the project that need to be registered in the WebConfig.
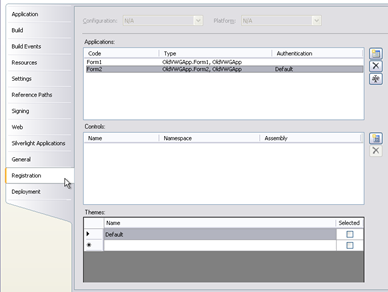
The first part is “Applications” here we can declare the entry point of our application. Each form that we declare as a start up form will be added to this list and will work as an entry point to our application creating different contexts under the same session.
You can add and remove Forms from the list using the Add form button and the delete button
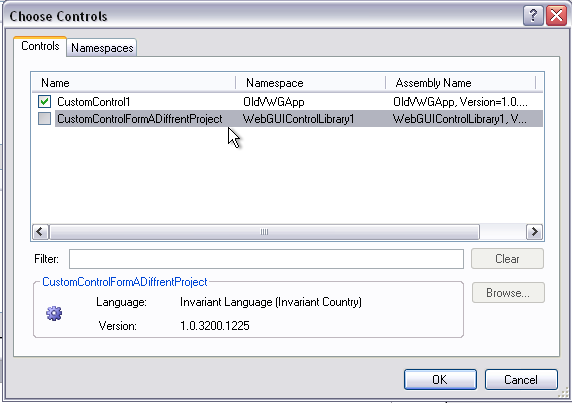
The second part of this page is the “Controls”. When you create custom controls or use controls from a external DLL you need to register that control in the WebConfig, this was done manually in previous versions. To add registration to a control click on the add control button you will be prompt with a form that will display the current controls that are related to the current VWG application by reference or add a DLL with the browse option.
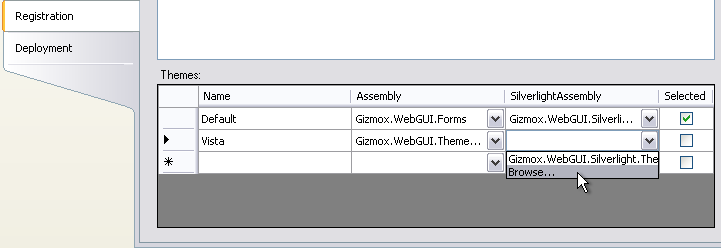
Last part in the “Registration” section is Themes. In this part we register the themes that our application will use. For every presentation layer that was selected you have to set a theme. For example as default the DHTML presentation layer is enabled so when we look at the “Theme” section we se that we need to select only a theme for DHTML. We can add a few themes and change them at run time but one of them has to be the default theme that will be used at the application start up. Use the default check box next to it to mark it as the default.
If we enable Silverlight (We will see how to do this later) we see that for each theme that we selected we have to add a corresponding theme to Silverlight.
Deployment
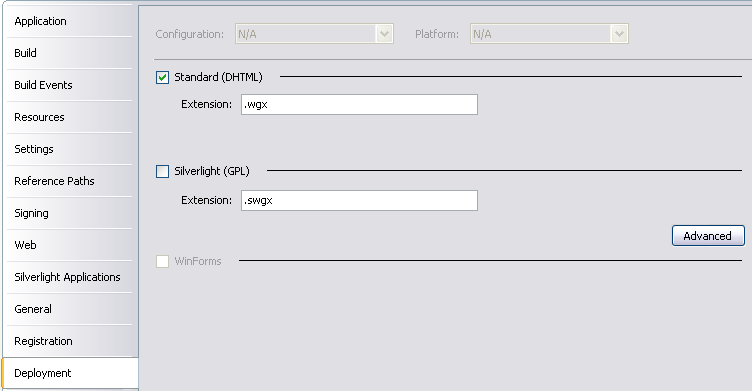
Now let’s open the “Deployment” section. Here you can select what presentation layers will be used with your application.
Once you enable a presentation layer and select the extension you want for it this presentation layer will be available for the end user of the application according to the URL he uses. For now the only available presentation layers are DHTML and Silverlight.
After you enable Silverlight you will need to add a referance to the Gizmox.WebGUI.Server.Silverlight dll by right clicking on the project and select add referance.
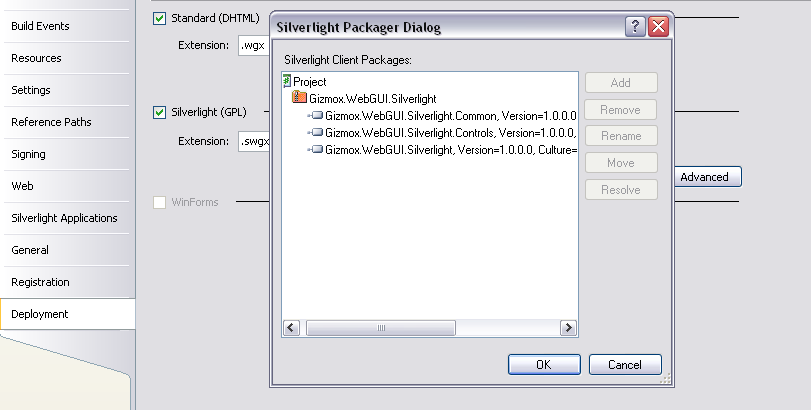
If you enable Silverlight there is one more section you should know and that is the advance option. This option is like the Packager tool that we used to have, this sets the rules to the packages structure of the Silverlight application. When you access a Silverlight (Not just VWG but plain Silverlight as well) application the server downloads packages of code to the browser containing the client side code off the Silverlight application. In VWG this also holds our kernel code that allows us to control the browser.
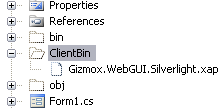
In the advance you can set how the package will be build and create an incremental download of code. The first folder you have in the tool is the default package. This is the main package of the application and will hold our kernel and any DLL that is needed for the main form. Any other package you will add will hold DLL's that are used only in inner form that might not be accessed by the user and there is no needs to down load them at the initial request. For example if part of the controls are used only in inner forms and not in the first you can put these controls DLLS in a secondary package that will be download only after the user created an action that opened that form
General
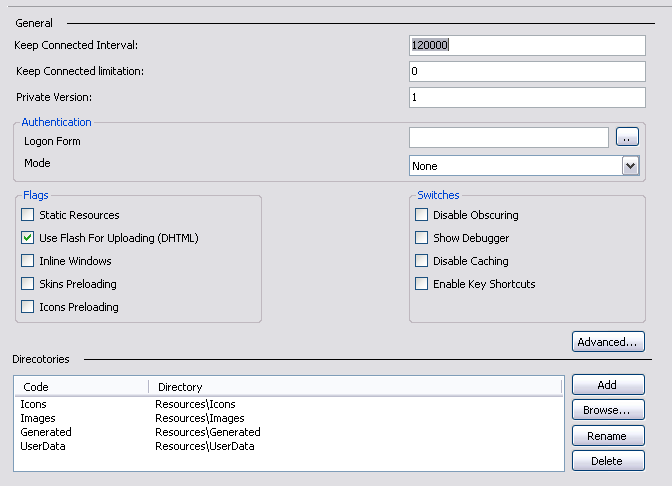
Last new section that was added is the “General”. In this section we have the main configuration of our application.
General
Keep Connected Interval – The KeepConnectedInterval provides the interval between each keep-connected call.
Keep Connected limitation – Provides the allowed number of continuance keep connected calls before timeout occurs.
Private Version – Adds the private version key to the caching key. This key provides a mechanism to invalidate both client and server caching. You should use this key when you want to enforce update of files and resources like updating theme or a new custom control. The server and client caching are per site.
Authentication
Logon Form – Indicates what form that inherits ILogonForm will serve as the logon form of the application.
Mode - At this point we enable only Main this option shows the login form as the main form.
Flags
Static Resources - The static resources mode creates a directory named "Route" and within it files that are accessed directly using the web server instead of dynamically generated files. You should check that there the site can write to that directory. This allows you to boost performance of your site.
Use Flash For Uploading – Set true to use Flash component, false to use browser default.
Inline Windows – Setting this to on forces all popup windows to be rendered as DIVs.
Skins Preloading – This mainly prevents IE loading the same image multiple times.
Icons Preloading - This mainly prevents IE loading the same image multiple times.
Switches
Disable Obscuring - Disables client sources obscuring (Mainly for debugging and developing purposes)
Show Debugger – Show or hides the VWG debugger window.
Disable Cashing - Disables the caching of Visual WebGui resources
Directories
Advanced
General
ASP Compatible Mode - Enables single thread apartment components.
GZip Compression - Set to compress all Responses from server.
Show Client Errors – Allow you to show\hide the client browser errors.
Tracing
Tracing Switch - Provides a mechanism for monitor an application using a debug messages viewer or in debug time in the output window. Remember to turn this feature off in a deployment.
Session Tracing Switch – Allow you to trace create and destroy of session and context.
Tracing Threshold - Performance tracing limited to this threshold
URL
Force Domain -This causes the base URL of each rendered html page to be the specified domain.
Force Port – This causes the base URL of each rendered html page to the port specified value.
Force HTTPS -This causes the base URL of each rendered html page to use the HTTPS protocol.
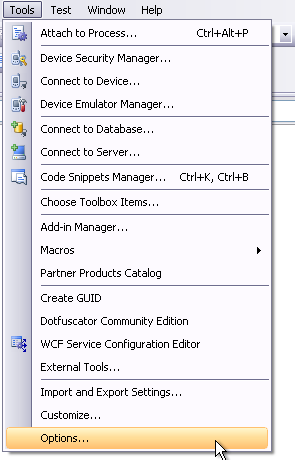
We also added configuration under the option menu. These options are general for all VWG applications.
These options allow you to select what validations will be done by us to your project and show you errors and warnings that are unique to VWG.
Validate Directories - Test if all the directories that where mapped in the General property page are valid.
Validate Controls – Validates that all the controls that are used are registered.
Validate Application – Validates that all the forms that were added in the applications section are attached to valid forms
Create Silverlight client package - Allows you to decide if you want to use our packaging tool to create the Silverlight packages. If you remove this then you should create your own Silverlight packages.
Copy themes assemblies to bin directory – Indicates if the theme assembles that are add in the registration section of the property page be copied to the bin directory.
Documentation
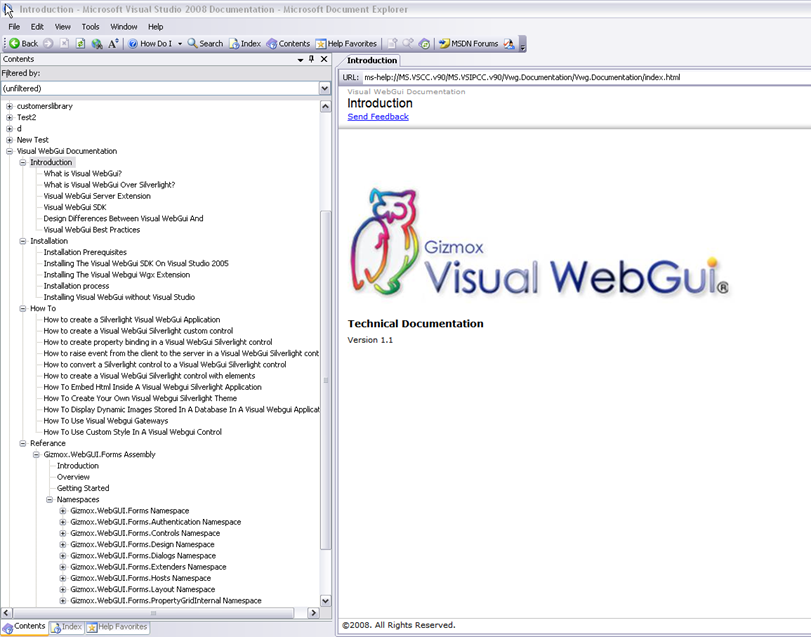
The new install process installs the Visual WebGui documentation. The new documentation includes a short explanation on Visual WebGui and a set of examples. It all so includes a reference to our code documentation. This exposes the structure of our assemblies and allows you to learn Visual WebGui structure. We will continue and broaden the documentation the examples and the code reference just as we continue to enhance the Visual WebGui core.
You can access the documentation from Visual Studio as if it was part of the standard help file by clicking F1 or opening the Visual Studio documentation/
Because this version is such a big change in the design time environment we recommend that you consider if you need to use all the features of the version or just use the new core release. This is why the installation allows you to select just to install the standard core Dll’s or the full Visual Studio integration.
The new Visual WebGui integration to Visual Studio is the new stage in Visual WebGui evolution. Version 6.2 is the start point of many new features that we are planning to add to our developing environment that will allow you to develop much faster and much easier than before. As always our goal is to cut down on your development time.
We hope you find the integration as usefully as we. Let us know how it feels and what can we change to make it more usefully for you.
-- Eyal Albert @ Eyal.Albert (at) Gizmox.com
You can read the original article to here
