Manually wrapping ASP.Net controls without the use of Visual WebGui designer
In this tutorial we will learn how to wrap an ASP.Net control without the use of a designer or wizard and use that control in a Visual WebGui application. The ability to wrap ASP.Net controls allows you to use third party controls for ASP.Net and your own custom controls and to enrich your arsenal of controls to create rich internet applications.
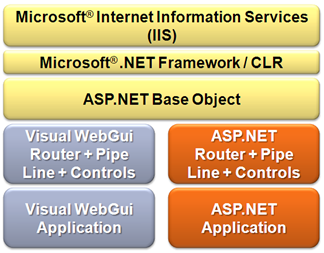
Visual WebGui extends ASP.NET. It extends an ihttp handler and implements its own pipeline. VWG is actually an ASP.NET site. The diagram bellow illustrates the technological hierarchy which puts VWG at the same level as ASP.NET. Since the application and session are shared integration between ASP.NET and Visual WebGui is possible.
Because Visual WebGui extends ASP.NET you can use third party ASP.NET components or your own ASP.NET custom controls in a Visual WebGui application by wrapping the control.
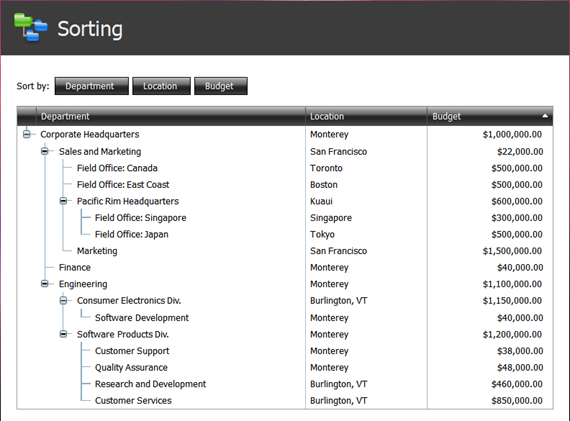
In this demo we will wrap DevExpress Tree list control. This control can display information as a tree or grid like this.

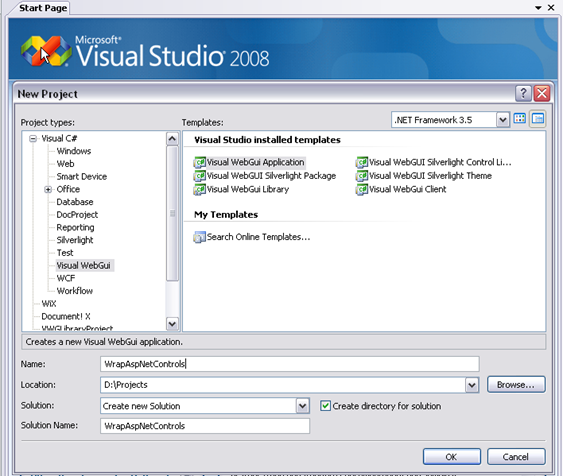
First we will open Visual studio and create a new VWG application.
Next we will add a reference to DevExpress DLLs:
DevExpress.Data
DevExpress.Web.ASPxEditors
DevExpress.Web.ASPxTreeList
DevExpress.Web
and set these assemblies to copy local.
Next let’s add a new class named MyASPxTreeList. This class will inherit from Gizmox.WebGUI.Forms.Hosts.AspControlBoxBase. The AspControlBoxBase provides a base class for creating ASP.NET wrapped controls that can be integrated into VWG as a native control. The class provides services for ASP.NET – VWG communication and using ASP.NET markup code to initialize the ASP.NET control.
public class MyASPxTreeList : Gizmox.WebGUI.Forms.Hosts.AspControlBoxBase
Let’s set the ASP.Net control that will be hosted in our control. We will add a property named HostedASPxTreeList that will return the hosted control casted to a hosted Asp Tree list. This will allow us to expose the hosted control properties and methods.
/// <summary>
/// Get hosted control typed instance
/// </summary>
protected DevExpress.Web.ASPxTreeList.ASPxTreeList HostedASPxTreeList
{
get
{
return (DevExpress.Web.ASPxTreeList.ASPxTreeList)this.HostedControl;
}
}
We will add to our control an attribute that will allow it to display in the tool box in design time.
[System.ComponentModel.ToolboxItem(true)]
Let’s build our application and open form1 in design time. As you can see our new control is in the tool box.

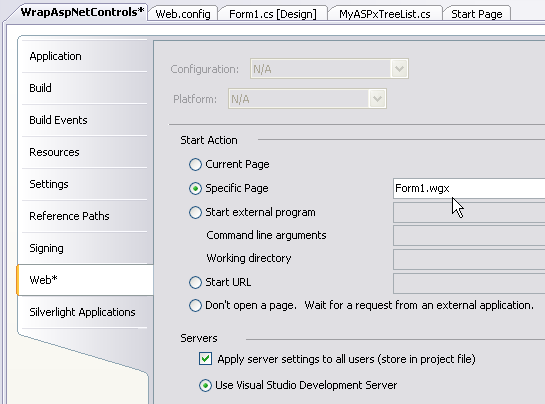
Let’s add the control to the form and run the application. Open the Project property page and set the starting page of the application to Form1.wgx.
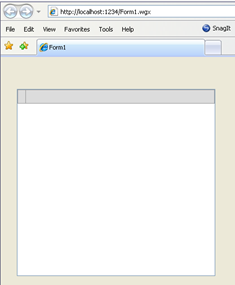
We will see the control without any data.
Let’s open DevExpress demo project and see how the control is used there and copy the behavior to our VWG application. This is the demo it shows the display of a tree list control with data from an access data base and sorting.
All we need to do is use the same code that was used in the demo in our application. For this the AspControlBoxBase expose a property called ControlCode. If you click the ControlCode property in design time an editor is opened. This editor serves as the Aspx designer for markup language.
The code below is copied from the demo project supplied by DevExpress installation for the TreeList control. The code below initializes three columns Department, Location, Budget and a data source AccessDataSource.
<dxwtl:ASPxTreeList ID="treeList" runat="server" AutoGenerateColumns="False"
ClientInstanceName="treeList" Width="100%"
DataSourceID="AccessDataSource1"
KeyFieldName="ID" ParentFieldName="ParentID">
<Columns>
<dxwtl:TreeListDataColumn FieldName="Department" VisibleIndex="0" />
<dxwtl:TreeListDataColumn FieldName="Location" SortIndex="0" SortOrder="Ascending"
VisibleIndex="1" />
<dxwtl:TreeListDataColumn FieldName="Budget" SortIndex="1" SortOrder="Descending"
VisibleIndex="2" DisplayFormat="{0:C}" />
</Columns>
<Settings GridLines="Vertical" SuppressOuterGridLines="true" />
<SettingsBehavior AutoExpandAllNodes="True" ExpandCollapseAction="NodeDblClick" />
<Border BorderStyle="Solid" />
</dxwtl:ASPxTreeList>
<asp:AccessDataSource ID="AccessDataSource1" runat="server"
DataFile="~/App_Data/DataSources/Departments.mdb"
SelectCommand="SELECT [ID], [ParentID], [Department], [Location],
[Budget] FROM [Departments]">
</asp:AccessDataSource>
Take this code and paste it in the ControlCode property.
Because this is a Aspx designer we need to register the control the same way add this registration at the top.
<%@ Page Language="C#"%>
<%@ Register Assembly="DevExpress.Web.ASPxTreeList.v8.2" Namespace="DevExpress.Web.ASPxTreeList" TagPrefix="dxwtl" %>
It will look like this in the end.
Now we need to connect the control that we added in the ControlCode property to the hosted control in the wrapper. Copy the name of the control from the code in our case “treeList” and set it in the ControlID property.
We need to add the DataSource that is referenced in the code section we added. So add a new folder and with the DB from the demo.
Now all we need to do is run the application. Open the project property page Web section and set the specific page to Form1.wgx.
Next run the application and this is the result. You can click on the column header to sort the data.
To summarize:
We have seen how to use third party ASP.Net controls in a Visual WebGui application by manually wrapping the control in a Visual WebGui AspControlBoxBase.
You can read the original how to here
-- Eyal Albert @ Eyal.Albert (at) Gizmox.com
