Developing and deploying a Visual WebGui Silverlight application
This article should give you a general idea how to set up your environment for developing and deploying a Visual WebGui Silverlight application. From Visual WebGui version 6.2 the development experience of Silverlight has changed a bit.
The first thing you should do is make sure that you have Microsoft Visual Studio 2005 or 2008 installed (in order to be able to customize themes and control’s XAML, you will need Visual Studio 2008).
You can chose to install or not to install Microsoft Silverlight SDK. Visual WebGui SDK includes the Silverlight DLL that will be needed to deploy and run the application. But you will not be able to create your own Silverlight or VWG Silverlight controls or create themes.
If you use VS 2008 and want to install the Microsoft Silverlight SDK go to “VWG for VS 2008” section.
If you are using VS 2005 or VS 2008 and don't want to install Silverlight SDK skip to the "VWG for VS 2005” section.
VWG for Visual Studio 2008 with SP1:
If you used Silverlight previous versions (pre-release) with Visual Studio 2008 you need to use the Visual Studio 2008 Service Pack Preparation Tool before you install the Silverlight RC1. You can download the tool here.
Now install Silverlight Tools for Visual Studio 2008 SP1 you can download it from here. This package is an add-on for Visual Studio 2008 SP1 to provide tooling for Microsoft Silverlight 2.
And last but not least install Visual WebGui SDK for .Net 3.5 you can download the SDK here.
VWG for Visual Studio 2005:
There is no install from Microsoft for Silverlight Tools for Visual Studio 2005. All you need to do is install the Silverlight client to view Silverlight on your browser you can download it here.
And now install Visual WebGui SDK for .Net 2.0 (or 3.5 if your working with VS 2008 with out Microsoft SDK) and you can create a VWG Silverlight applications. You can download the SDK here.
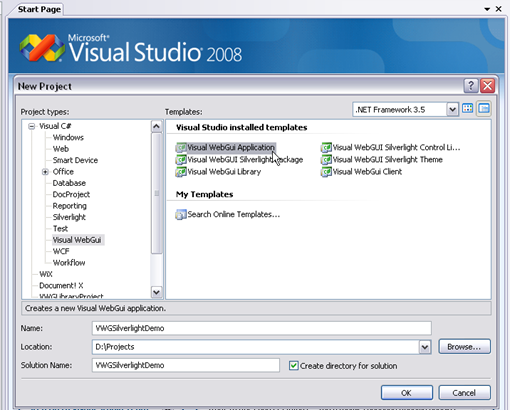
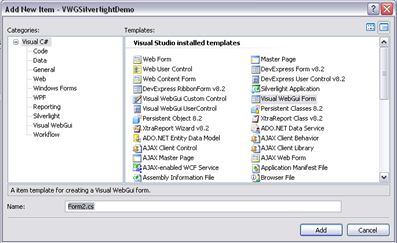
Let’s start creating a Visual WebGui Silverlight application. Open Visual Studio and create a new Visual WebGui application (Since version 6.2 there is just one project template for Visual WebGui and all presentation layers are just a check box click away as we will see later in this article).
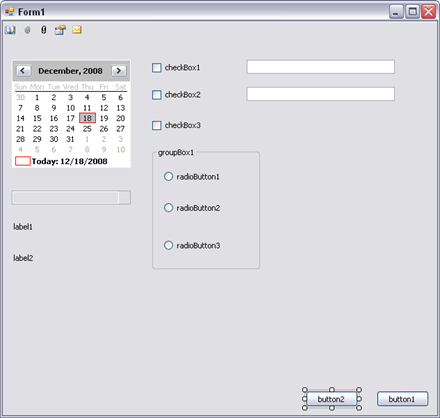
Now that we have our VWG application let’s open Form1 in design mode and add a few controls.
First add a toolbar docked to the top.
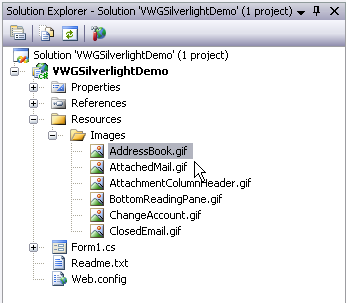
Next I’ve added a Resources folder and Images to the solution and use them for the toolbar buttons.
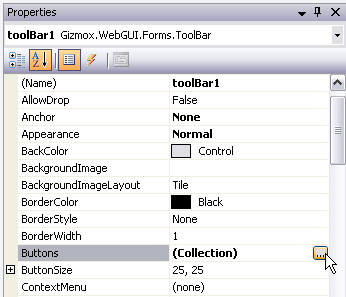
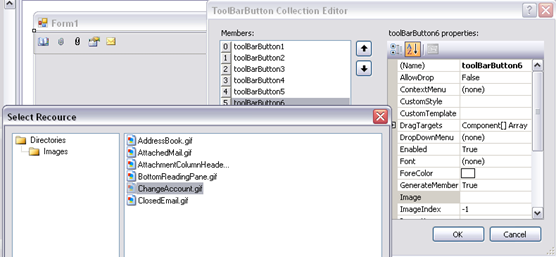
Add a few buttons to the toolbar by clicking the buttons property in the control Properties window and set the button Image property to one of the images we added.
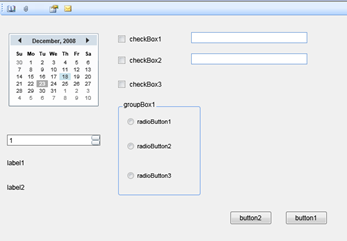
Let’s add few more controls just that our demo application will have some context.
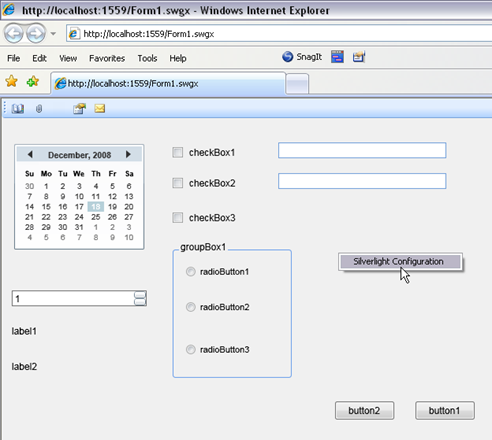
Now let’s run our application and see the result.
From version 6.2 Visual WebGui is fully integrated into Visual Studio. This integration gives you a very easy to use application configuration interface. You can read more about it here.
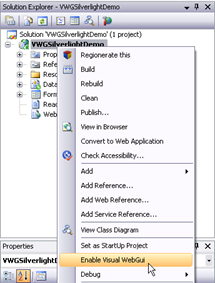
Let’s enable the integration between VWG and VS. Right click on the project and select “Enable Visual WebGui”.
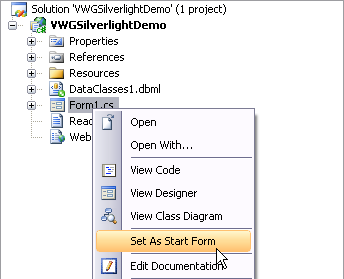
Let’s select the starting form of our application right click on Form1.cs and select “Set As Start Form” this will set the form as the main form and the starting point of the application much like the Main form in WinForms.
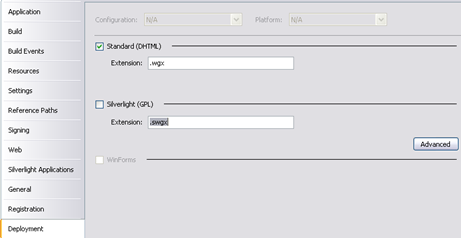
Now to make sure that our application will run as a Silverlight application. Open the project property page in the Deployment section. In this section you can select what presentation layers will be created for the application the default is just DHTML.
Let’s mark Silverlight as a valid presentation layer. This action will add the Server silverlight assembly to our project and will generate the necessary XAP file that holds the Silverlight and VWG assemblies that need to be download to the client.
Visual WebGui uses a WGX extension to rout the requests to the VWG server and the SWGX extension to the VWG Silverlight server. You can customize the extension that you want to use in the Deployment section and later on set this extension in the IIS (We will ses this later on).
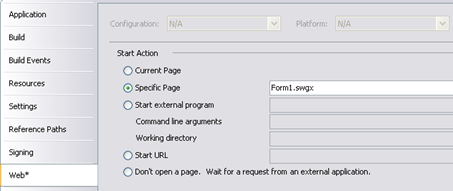
We will leave the default extension and just update the starting form to start with the SWGX extension because we want to see the application as a Silverlight application. Open the project property page in the Web section and set the start page to start with Form1.swgx instead of starting with Form1.wgx and run our application .
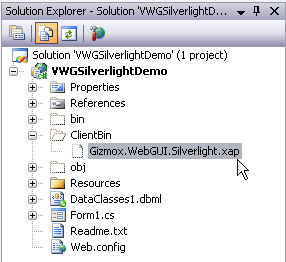
Now that we have our application let’s look in to the packager that creates the XAP file. This file contains the compressed client side assemblies and resources of a Silverlight application. This file is downloaded to the client and runs the application
The XAP file is generated automatically and by default contains six files as described in the app manifest file.
<Deployment EntryPointAssembly="Gizmox.WebGUI.Silverlight" EntryPointType="Gizmox.WebGUI.Silverlight.App"
RuntimeVersion="2.0.31005.0" xmlns="http://schemas.microsoft.com/client/2007/deployment"
xmlns:x="http://schemas.microsoft.com/winfx/2006/xaml">
<Deployment.Parts>
<AssemblyPart x:Name="Gizmox.WebGUI.Silverlight.Common" Source="Gizmox.WebGUI.Silverlight.Common.dll"/>
<AssemblyPart x:Name="Gizmox.WebGUI.Silverlight.Controls" Source="Gizmox.WebGUI.Silverlight.Controls.dll"/>
<AssemblyPart x:Name="Gizmox.WebGUI.Silverlight" Source="Gizmox.WebGUI.Silverlight.dll"/>
<AssemblyPart x:Name="Gizmox.WebGUI.Silverlight.Themes.Default"
Source="Gizmox.WebGUI.Silverlight.Themes.Default.dll"/>
<AssemblyPart x:Name="System.Windows.Controls.Data" Source="System.Windows.Controls.Data.dll"/>
<AssemblyPart x:Name="System.Windows.Controls" Source="System.Windows.Controls.dll"/>
</Deployment.Parts>
</Deployment>
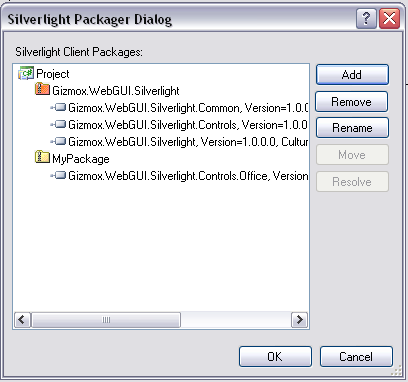
If you open the property page Deployment section you can edit the XAP file structure of your application. Click the advanced button to see XAP package creator.
The default XAP (the orange folder) holds basic Silverlight and VWG Silverlight assemblies. It’s recommended not to remove these files as they are needed to start the application. 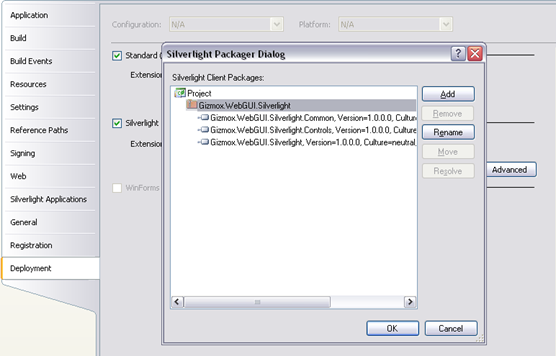
To the default XAP the packager will add any theme DLL that is declared in the registration section as a Silverlight Theme assembly.
If you use in your application controls that are not part of the fifty out of the box controls that come with Visual WebGui you need to register them in the registration section like this.
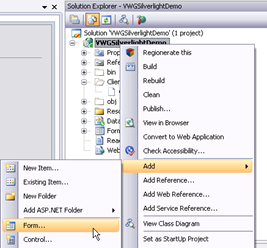
The packager allows you to create more XAP folders. This allows you to create an incremental download of the application DLL’s. Instead of downloading all the application you can download all the necessary DLL according to stages in the application. In the control registration I've added registration to controls from the Gizmox.WebGUI.Forms.Office assembly. Let’s add another form and add the Ribbon bar control to it.
This form will be only if the user clicks button2 in form1.
private void button2_Click(object sender, EventArgs e)
{
Form2 objForm2 = new Form2();
objForm2.ShowDialog();
}
This means that there is no need to this assembly unless the users dose a specific action. There for I will place the assembly not in the default XAP but in a secondary XAP file that I will add by clicking the add button in the packager tool. This XAP file will be downloaded only if the user opens form2.
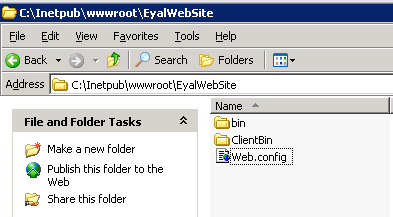
Once we have our application ready we need to deploy it to the server. Open the folder containing the project and select the Bin folder, Client Bin folder and Web.Config file. These are the only files that we need to deploy the application (If you have resources you should add them too).
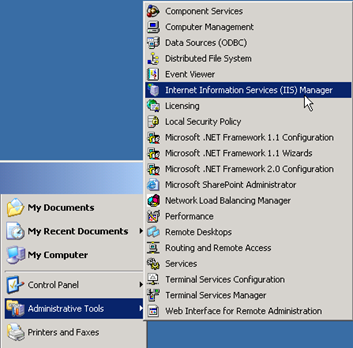
Once you uploaded the files to the server open the Internet Information Services (IIS).
Create a folder under the root directory and place those files in there.
In the IIS right click on the folder and open the folder’s properties. Click on create button and create a new Virtual directory.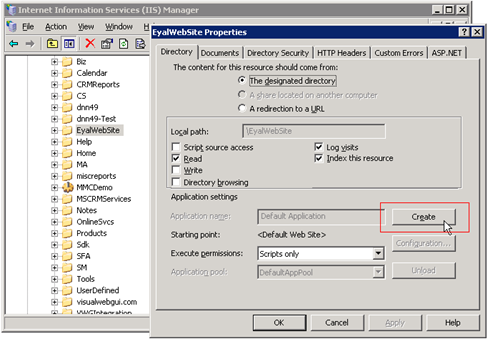
Treat the site as a regular ASP.NET site.
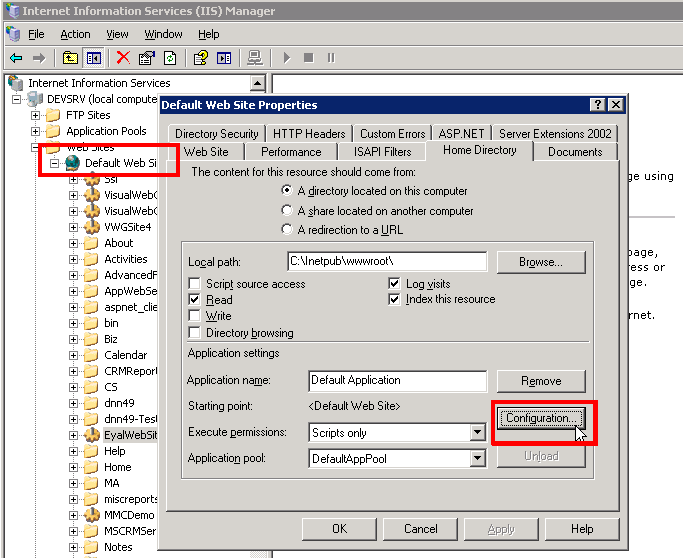
Now we need to register the Visual WebGui extensions under the default site in the IIS. Right click on the default site and click on properties. Go to the “Home Directory” tab and click on Configuration.
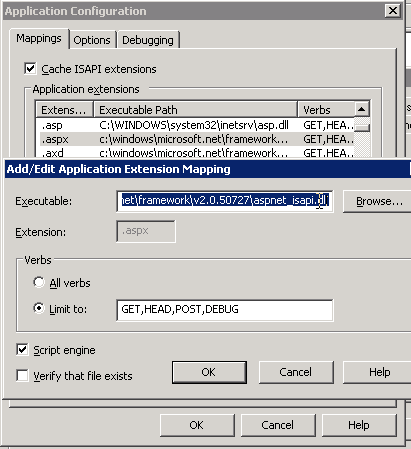
In the application configuration click edit on the .aspx extension and copy the path from the executable textbox. Click the cancel button to close the edit window..
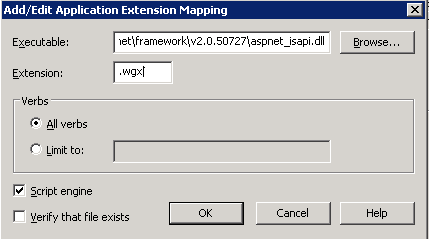
Now click on the Add button to add a new extension. In the executable textbox paste the path that we just copied from the aspx extension and in the Extension text box enter .wgx (don't miss the dot before WGX it’s there for a reason). Last uncheck the Verify that file exists check box. And do the same with the Visual WebGui Silverlight extension .swgx (same here the dot is needed).
If you are asked to apply the extensions on other virtual directories select all and click OK.
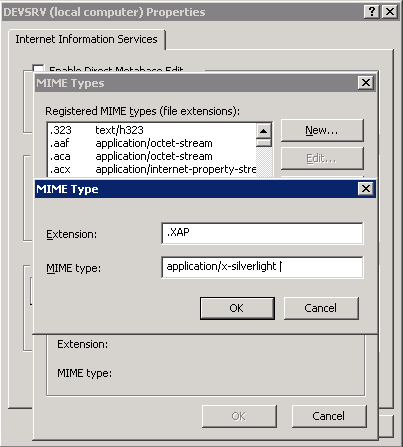
This would be a good place to mention that silverlight applications require that the .XAP file will be registered.
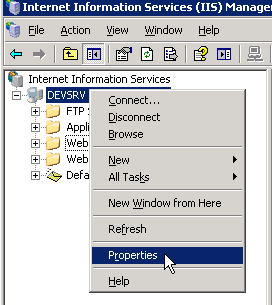
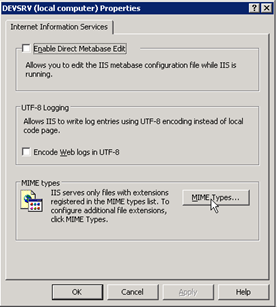
Right-click on the computer name and select Properties. Click on the MIME-Types button to open the list of registered files extensions. Click on the New button to add the MIME-Type if it’s missing. For file extension use .XAP and for the MIME-Type use application/x-silverlight.
Now we can run the application.
To summarize:
We have learned in this article how to create a basic Visual WebGui Silverlight application.
We have seen how to use the application configuration such as the registration of controls and themes and how to configure the application package (XAP) structure.
And finely we’ve seen how to deploy or Visual WebGui silverlight application to the server and how to configure the IIS.
You can read the original how to here
-- Eyal Albert @ Eyal.Albert (at) Gizmox.com
