ASP.NET MVC Application Building #2: Family Video Website – Add the Database
In this series of blog entries, I build an entire ASP.NET MVC application from start to finish. I create a Family Video Website that you can use to host home videos and photographs.
In the previous blog entry, we took our first steps in our Family Video Website project. We managed to complete the following two tasks:
· Enable users to upload pictures to the application
· Display all uploaded pictures
Today, I want to add a database to the Family Videos website. There are two reasons for the database. First, I want to track information about each upload in a database table. That way, a user can add a description for each picture (or video or sound clip) that the user uploads. Also, I’m worried about situations in which two people upload a file with the same name. I don’t want Uncle Greg’s FunnyCat.jpg picture to overwrite Grandma Judy’s FunnyCat.jpg picture. Therefore, I’m going to modify the application so that uploaded files are assigned unique names generated from a unique database Id.
Adding the Database and Database Table
We are going to create a user instance of a Microsoft SQL Express database for our application. There are many benefits that you get from using a user instance of SQL Express. First, SQL Express is free. You can download it from the Microsoft website (it is also included with Visual Studio and Visual Web Developer). Second, you can add an instance of SQL Express directly to your project. If you copy your project from one location to another, your database files are also copied.
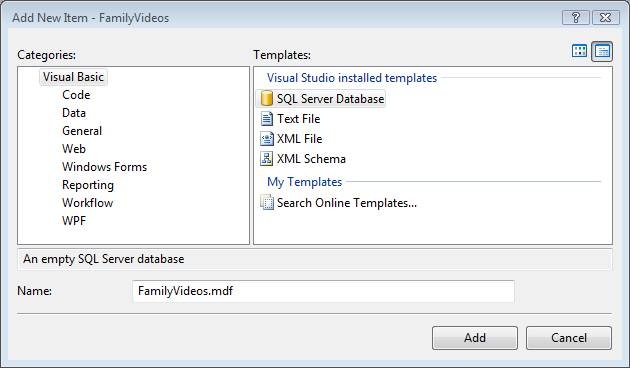
You create a new user instance of SQL Express by right-clicking your App_Data folder and selecting the menu option Add, New Item. Select the SQL Server Database template, and give the database the name FamilyVideos.mdf. Click the Add button to create the new database (see Figure 1).
Figure 1 – Creating a new SQL Server Database
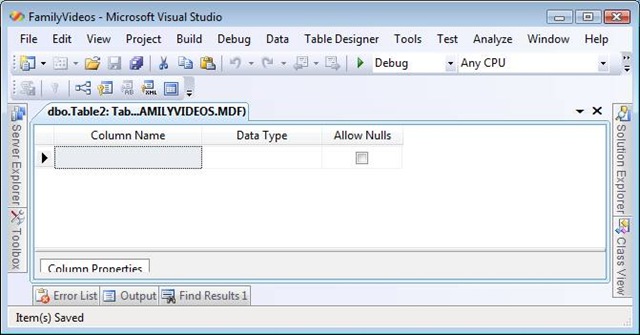
Next, we need to create the database table that will contain the information about the uploaded media. Double-click the FamilyVideos.mdf file in the App_Data folder to open the Server Explorer window (the window is called Database Explorer in Visual Web Developer). Right-click the Tables folder and select the menu option Add New Table. The Table Designer in Figure 2 should appear.
Figure 2 – Table Designer
Add the following columns to the Table Designer:
| Column Name | Data Type |
| Id | Int |
| FileName | Nvarchar(200) |
| Title | Nvarchar(200) |
| Description | Nvarchar(max) |
| EntryDate | DateTime |
None of the columns should allow Null values.
You need to do special things for the Id column. First, mark the column as a primary key column by selecting the column and clicking the Primary Key button (it looks like a key). If you don’t mark the Id column as a primary key column, then you won’t be able to use LINQ to SQL to update or delete records in this table.
Second, you need to mark the Id column as an Identity column (an auto-number column). Under Column Properties, expand the Identity Specification node and double-click Is Identity to change the value of this property from No to Yes.
When you are finished entering the columns, the Table Designer should look like Figure 3:
Figure 3 – Table Designer with columns
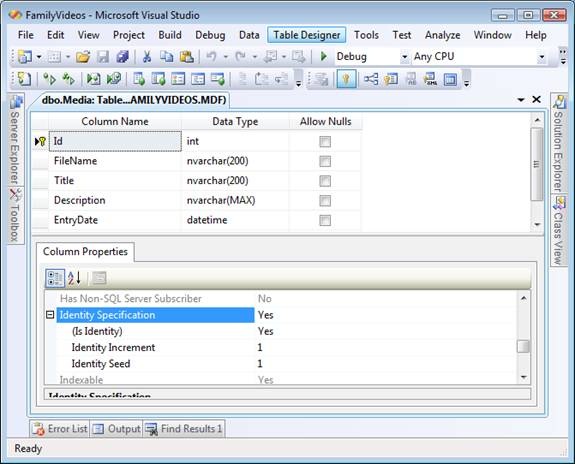
Click the Save button (it looks like a floppy disk) to save the table. Give the table the name Media and click the OK button.
Creating LINQ to SQL Classes
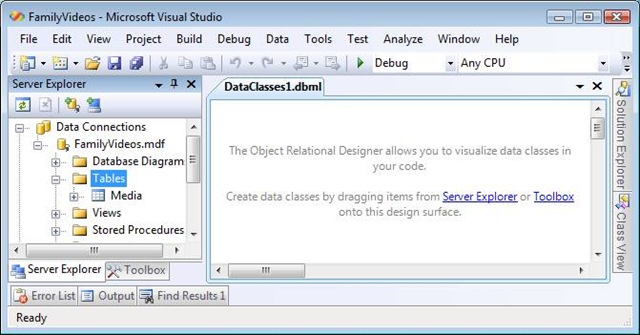
We are going to use Microsoft LINQ to SQL to communicate with our database from our application. The easiest way to create LINQ to SQL classes is use the Visual Studio Object Relational Designer (see Figure 4). Using the Object Relational Designer, you can generate your data access classes simply by dragging database tables onto the Designer surface.
Figure 4 – The Object Relational Designer
However, we aren’t going to use the Object Relational Designer. Instead, we are going to build all of our LINQ to SQL classes by hand. Why do all of the extra work? The goal is to create an application that we can maintain for the long term. Building LINQ to SQL classes by hand takes more work up front, but makes the application easier to maintain.
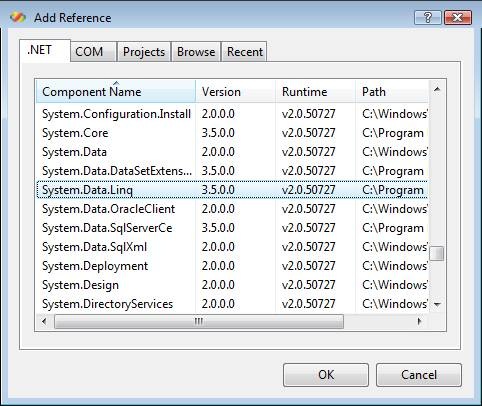
Before we can use LINQ to SQL, we must first add a reference to the System.Data.Linq.dll assembly. Select the menu option Project, Add Reference. Under the .NET tab, select System.Data.Linq and click the OK button (see Figure 5).
Figure 5 – Adding a reference to LINQ to SQL
Now we can create a class that represents a Media entity (a row from the Media table). Right-click the Models folder, and select the menu option Add, Class. Add a class named Media.vb.
The Media class needs to have a property that corresponds to each column in the database. Modify the Media.vb class so it looks like Listing 1 (tip: type prop + tab + tab to add properties quickly).
Listing 1 – \Models\Media.vb
Public Class Media

    Private _id As Integer
    Public Property Id() As Integer
        Get
            Return _id
        End Get
        Set(ByVal value As Integer)
            _id = value
        End Set
    End Property


    Private _fileName As String
    Public Property FileName() As String
        Get
            Return _fileName
        End Get
        Set(ByVal value As String)
            _fileName = value
        End Set
    End Property

    Private _title As String
    Public Property Title() As String
        Get
            Return _title
        End Get
        Set(ByVal value As String)
            _title = value
        End Set
    End Property

    Private _description As String
    Public Property Description() As String
        Get
            Return _description
        End Get
        Set(ByVal value As String)
            _description = value
        End Set
    End Property

    Private _entrydate As DateTime
    Public Property EntryDate() As DateTime
        Get
            Return _entrydate
        End Get
        Set(ByVal value As DateTime)
            _entrydate = value
        End Set
    End Property


    Public ReadOnly Property MediaPath() As String
        Get
            Return String.Format("~/MediaFiles/{0}_{1}", _id, _fileName)
        End Get
    End Property

End Class
There is nothing special about the class in Listing 1. It just consists of a list of properties. This type of class is called a Data Transfer Object (DTO).
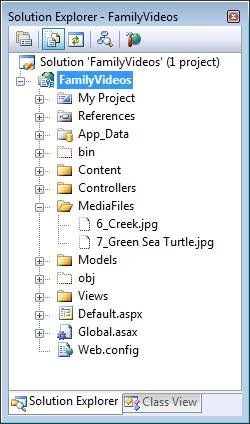
The only property that is slightly special is the MediaPath property. This property generates the file system path to the media. Notice that the unique database Id associated with an uploaded file is used in the path to the file (this guarantees uniqueness). The files in the MediaFiles folder end up looking like Figure 6 (the menu option Project, Show All Files is selected).
Figure 6 – The MediaFiles folder
After you create the Media.vb class, you need to create an XML file that maps the Media.vb class to the right columns in the Media database table. Add the file in Listing 2 to the Models folder.
Listing 2 -- \Models\Media.xml
<?xml version="1.0" encoding="utf-8" ?>
<Database Name="FamilyVideos" xmlns="http://schemas.microsoft.com/linqtosql/mapping/2007">
  <Table Name="dbo.Media" Member="FamilyVideos.Media">
    <Type Name="FamilyVideos.Media">
      <Column Name="Id" Member="Id" IsDbGenerated="true" IsPrimaryKey="true" />
      <Column Name="FileName" Member="FileName" />
      <Column Name="Title" Member="Title" />
      <Column Name="Description" Member="Description" />
      <Column Name="EntryDate" Member="EntryDate" />
    </Type>
  </Table>
</Database>
The XML file in Listing 2 maps database table columns to properties of the Media object. LINQ to SQL uses this XML file to figure out how to retrieve and store instances of the Media class in the database.
Notice that the Id column has both its IsDbGenerated and IsPrimaryKey attributes set to the value true. LINQ to SQL needs this information when performing updates and deletes against the database.
The final data class that we need to create is the MediaRepository class. This class is contained in Listing 3.
Listing 3 – \Models\MediaRepository.vb
Imports System.Data.Linq
Imports System.Web.Configuration
Imports System.Data.Linq.Mapping
Imports System.Web.Hosting

Public Class MediaRepository

    Private _dataContext As DataContext

    Sub New()
        ' Get connection string from web config
        Dim conSettings As ConnectionStringSettings
        conSettings = WebConfigurationManager.ConnectionStrings("con1")
        If IsNothing(conSettings) Then
            Throw New ConfigurationErrorsException("Missing con1 database connection string.")
        End If

        ' Get XML mapping file
        Dim map = XmlMappingSource.FromUrl(HostingEnvironment.MapPath("~/Models/Media.xml"))

        ' Create DataContext
        _dataContext = New DataContext(conSettings.ConnectionString, map)
    End Sub

    Sub Insert(ByVal mediaToAdd As Media)
        _dataContext.GetTable(Of Media)().InsertOnSubmit(mediaToAdd)
        _dataContext.SubmitChanges()
    End Sub

    Function SelectAll() As List(Of Media)
        Return _dataContext.GetTable(Of Media)().ToList()
    End Function

End Class
The constructor for the MediaRepository (the New subroutine) sets up the LINQ to SQL DataContext. The LINQ to SQL DataContext is your gateway to the underlying database.
The MediaRepository exposes two methods: Insert() and SelectAll(). The Insert() method inserts a new Media object into the database. The SelectAll() method retrieves all of the existing Media objects from the database. Notice that you do not need to write any SQL code to interact with the database when taking advantage of LINQ to SQL.
Modifying the Controller Base Class
In the last blog entry, we created a controller base class (named ControllerBase) that contains the common logic that we need across all of our controller classes that interact with Media objects. We need to modify this class so that it supports the MediaRepository. The modified version of this class is contained in Listing 4.
Listing 4 – \Controllers\ControllerBase.vb
Imports System.Web.Configuration

Public MustInherit Class ControllerBase
    Inherits System.Web.Mvc.Controller

    Private _repository As MediaRepository

    Sub New()
        Me.New(New MediaRepository())
    End Sub

    Sub New(ByVal mediaRepository As MediaRepository)
        _repository = mediaRepository
    End Sub

    Public ReadOnly Property Repository() As MediaRepository
        Get
            Return _repository
        End Get
    End Property

End Class
The new version of the ControllerBase class exposes a single property named Repository. The Repository property represents the MediaRepository class that we created in the previous section.
Modifying the Media Controller
The Media controller is responsible for saving new media files that have been uploaded. This class has been modified to work with the MediaRepository. The modified Media controller is contained in Listing 5.
Listing 5 – MediaController.vb
Imports System.IO
Imports System.Web.Hosting

Public Class MediaController
    Inherits ControllerBase

    Function Create()
        Return View()
    End Function

    Function Insert(ByVal title As String, ByVal description As String)
        Dim posted = Request.Files("upload")
        If posted.ContentLength > 0 Then
            ' Add media to database
            Dim fileName = Path.GetFileName(posted.FileName)
            Dim newMedia As New Media()
            newMedia.Title = title
            newMedia.FileName = fileName
            newMedia.Description = description
            newMedia.EntryDate = DateTime.Now
            Repository.Insert(newMedia)

            ' Add media to file system
            posted.SaveAs(HostingEnvironment.MapPath(newMedia.MediaPath))
        End If
        Return RedirectToAction("Index", "Home")
    End Function

End Class
The Create() action displays the form for uploading a new media file (see Figure 7). The Insert() action does two things. First, it creates a new instance of the Media class and saves the instance to the database with the help of the MediaRepository. Second, the Insert() action saves the uploaded media to the file system.
Figure 7 – \Views\Media\Create
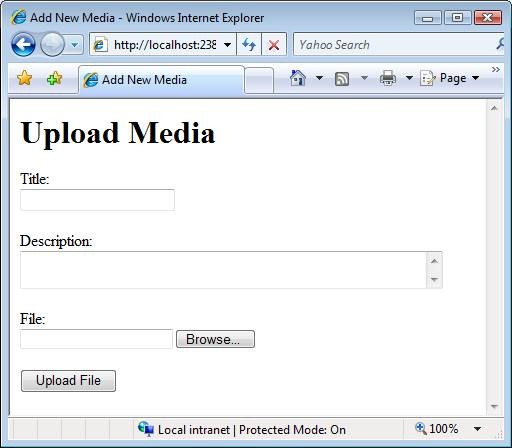
Right now, our application performs no form validation. If you neglect to enter a value in the form, then the application explodes.
Modifying the Home Controller
The Home controller displays all of the existing media items from the database (see Figure 8). Just like the Media controller, the Home controller takes advantage of the MediaRepository to talk to the database.
Figure 8 – The Index View

The code for the Home controller is contained in Listing 6.
Listing 6 – HomeController.vb
<HandleError()> _
Public Class HomeController
    Inherits ControllerBase

    Function Index()
        Dim media = Repository.SelectAll()
        Return View("Index", media)
    End Function

End Class
The Home controller Index() action passes a collection of media items to the Index view through view data. The Index view is contained in Listing 7.
Listing 7 -- \Views\Home\Index
<%@ Page Language="VB" AutoEventWireup="false" CodeBehind="Index.aspx.vb" Inherits="FamilyVideos.Index" %>
<!DOCTYPE html PUBLIC "-//W3C//DTD XHTML 1.0 Transitional//EN" "http://www.w3.org/TR/xhtml1/DTD/xhtml1-transitional.dtd">
<html xmlns="http://www.w3.org/1999/xhtml" >
<head id="Head1" runat="server">
    <title>Family Videos Home</title>
    <style type="text/css">

    h1
    {
        font: bold 14px Verdana;
    }

    div.media
    {
        border-bottom: 1px solid black;
        padding: 10px;
    }

    </style>
</head>
<body>
    <div>
    <div style="background-color:#FFFFE0;padding:5px"><%=ViewData("message")%></div>

    <% For Each m In ViewData.Model%>

    <div class="media">
        <h1><%=Html.Encode(m.Title)%></h1>
        <p>
        <%=Html.Encode(m.Description)%>
        </p>

        <img src='<%= ResolveUrl(m.MediaPath) %>' width="200px" alt="" />

    </div>

    <% Next%>

    <br /><br />

    <%=Html.ActionLink("Add New Media", "Create", "Media")%>

    </div>
</body>
</html>
The Index view iterates through each of the media items represented by the ViewData.Model property. The title, description, and picture associated with each media item is displayed (this application still does not support videos).
The Index view is strongly typed. The code-behind for the Index view is contained in Listing 8. The code behind class casts the ViewData.Model property to a collection of Media objects.
Listing 8 -- \Views\Home\Index.aspx.vb
Partial Public Class Index
    Inherits System.Web.Mvc.ViewPage(Of List(Of Media))

End Class
Summary
This week, we added a database to our Family Videos website application. We took advantage of the database to store additional information about each media item uploaded.
We used LINQ to SQL to communicate with our database. We eschewed the Object Relational Designer in Visual Studio and built our LINQ to SQL entities by hand. We used an XML mapping file to associate the properties of our Data Transfer Objects with the columns in the database.
Next week, we really should tackle the challenge of accepting and displaying videos. Next week, we’ll modify the application so that grandma can play videos through the website.
Download the Code