Installing DotNetNuke on Windows Home Server
So I’m a newbie when it comes to Windows Home Server but I’m quite seasoned when it comes to DotNetNuke, IIS, and that entire stack. I wanted to cover off a the topic of installing DotNetNuke onto your Windows Home Server.
Windows Home Server is essentially Small Business Server, just tweaked for network attached storage (NAS). There are many other NAS solutions available, but I find this one superiour (at least for me) is the fact that it is built on top of the Microsoft solution. I know ASP.NET, I know IIS, I know .NET, etc.. When I first heard of this product I was pleasantly surprised.
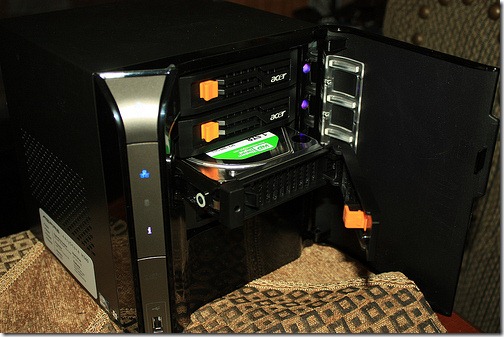
Here is a shot of my Acer Aspire Home Server H340 physical machine.
Enough about me, on with the install!
Throughout this installation I will not be using the WHS Console. I prefer simple RDP (remote desktop). If you want the best RDP client, check out my Terminals project on CodePlex. Once you have RDP access to your WHS installation, continue with this article. All of the subsequent steps will be performed directly on the WHS machine, unless otherwise specified.
Microsoft has genrously provided us with a Tool which automates this entire process for us, its called the Microsoft Web Platform Installer (WPI).
WPI is…
The Microsoft Web Platform Installer 2.0 (Web PI) is a free tool that makes getting the latest components of the Microsoft Web Platform, including Internet Information Services (IIS), SQL Server Express, .NET Framework and Visual Web Developer easy. The Web PI also makes it easy to install and run the most popular free web applications for blogging, content management and more with the built-in Windows Web Application Gallery.
Download and start the installation process now.
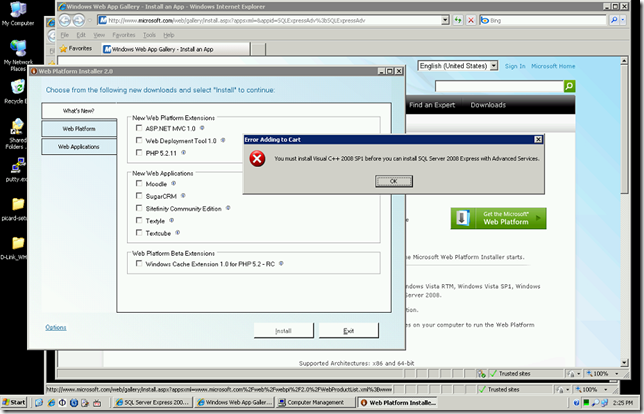
Now, since I’m running a pretty clean WHS install it is also complaining that it requires Visual C++ 2008 SP1 prior to my install, specifically for Sql Server Express.
Lets do that now. After a quick Bing search, here is the download. Its only 4MB and took all of 5 seconds to install, one wonders why Microsoft couldn't have just included it with the WPI tool – or at least link out to it.
Once that is complete you will need to restart the installation process; if you have the WPI open, exit it now. To re-launch the tool, notice the shortcut in your Start->Programs menu.
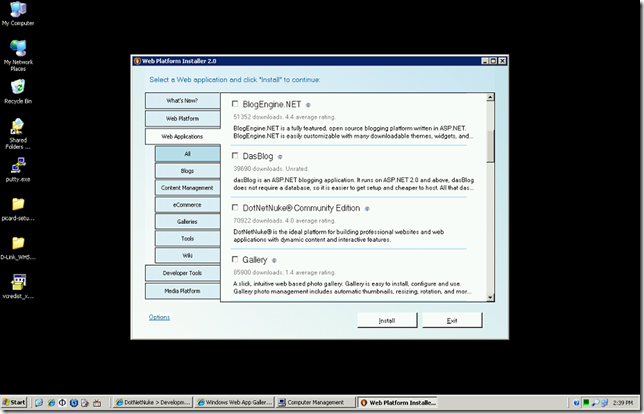
Take time to browse all of the tools which WPI brings to the table. Notice that under the “Web Applications” tab on the left, we see “DotNetNuke Community Edition” as one of the options. Do NOT check that item right now. Lets just focus on getting Sql Server Express installed prior to getting DNN installed.
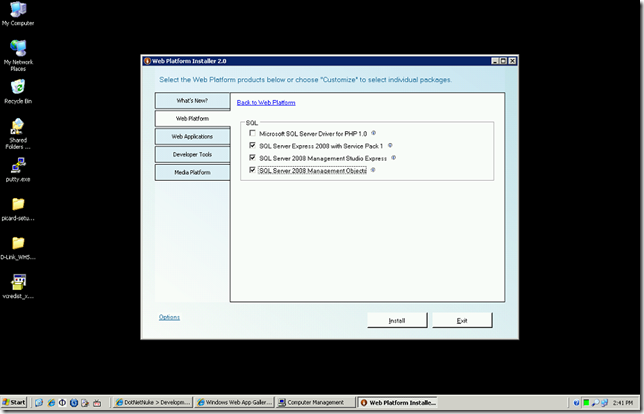
Next under the “Web Platform” tab, you will see “Database” on the right. Choose the “Customize” link in that section.
I chose the Sql Server Express 2008 with Service Pack 1, the Management Studio Express and the Management Objects – maybe I’m greedy, but having the additional tools available will only help later with development and/or troubleshooting.
Lets go ahead and hit install. You are now prompted for confirmation of the installation. Review this list, make sure it is want you agree to, and hit the “I Accept” button.
The first action it takes is to install Sql Server Express. I left it on the default “Mixed Mode” and punched in my super secret password.
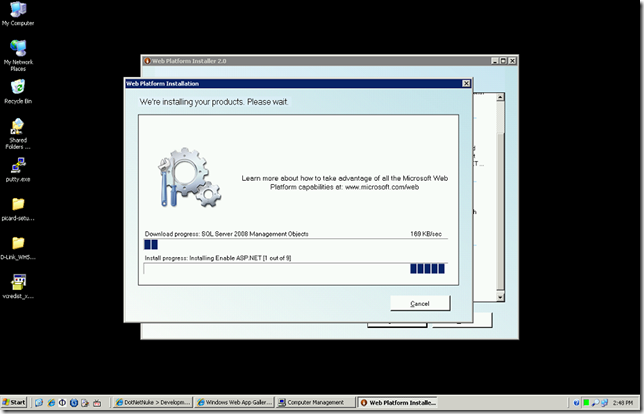
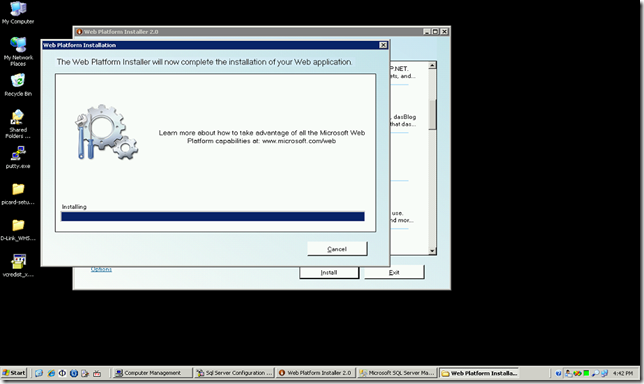
Let the Sql Server Express product install, along with the other various bits it will proceed to install.
Note: You may want to pause any downloads you have (Torrent/NNTP/what have you). Having a slow connection during this process will ultimately delay you getting online in short order. WPI does not ship with all of the independent applications. It needs to download them on the fly.
Sit back, go get a coffee, relax for a bit. On my machine it took about 45minutes to get past this step. Even when the installation seems to just sit there, please be patient. My install sat at the “Finished Downloading”/”Installing” screen for a long long time.
While your downloading, take time to explore the WPI website. I was interested in how often it is updated, specifically with DNN. Should I use WPI to install DNN, or should I do it manually? Here is the DNN specific page which, at the time of writing this, lists 5.1.4 Community Edition as the build. Checking out the DNN CodePlex downloads page, that is indeed the current recommended release. Quite pleasing to see that Microsoft is actually maintaining this resource for us.
If you have any issues with this installer at this point, you might want to actually try hitting cancel, then re-launch WPI, and validate which components did and did not get installed.
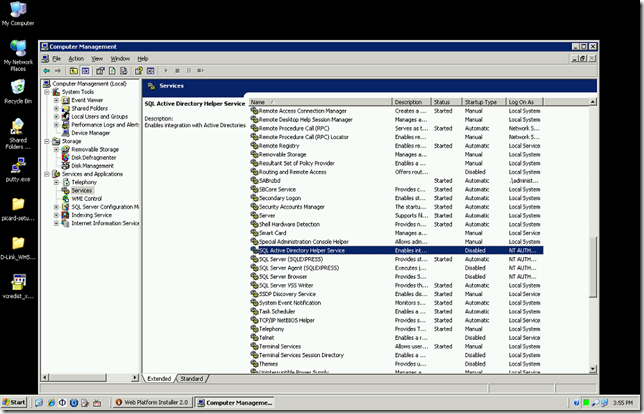
Ok, so we now have Sql Server Express installed. Lets verify that it is running. If you right click on My Computer, and choose “Manage”, then expand “Services and Applications” you will see a node for “Services” Click that node. Scroll down until you find the “Sql Server (SQLEXPRESS) service, take notice if its status (should be Started), and Startup Type (should be Automatic). Notice in the screen shot below, it is the item just under the selected service.
So now that we have Sql Server Express properly installed, lets shift our focus to DotNetNuke. If you closed WPI, launch it.
Navigate back to the “Web Applications” tab, and check “DotNetNuke Community Edition”, and then hit install.
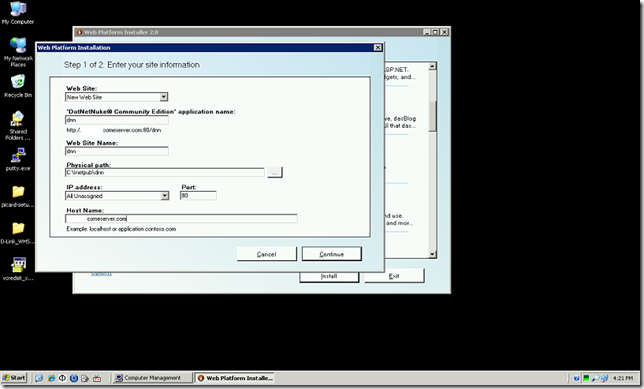
So during the DotNetNuke installation you will be prompted for all the basics which is needed to configure IIS and DNN so they play together, here are the values which I used:
Web Site: “Default Web Site”
Web Site Name: dnn
Physical Path: c:\inetpub\
IP Address: All Unassigned
Port: 80
Host Name:myservername.homeserver.com (do NOT put http:// prefix here)
Now, the above setup is pretty strange and not exactly 100% clear as to what is happening in IIS and on the File System. You may need to crack open IIS Management (Right Click My Computer, Manage, Services and Applications node,
Step 2 of 2 includes pointing the DNN Installation to your fresh Sql Server Express installation. Take a second to review the page, you will notice it needs specific login details for the administrative and user accounts. Lets jump into the Sql Server Management Studio to setup those accounts. (Start, All Programs, Microsoft Sql Server 2008, Sql Server Management Studio).
As you launch the application for the first time, it will setup help and other stuff, let that happen. Once it is complete, you will be prompted to login to the default instance of Sql Express, all you should need to do is hit Connect, do not change any values here.
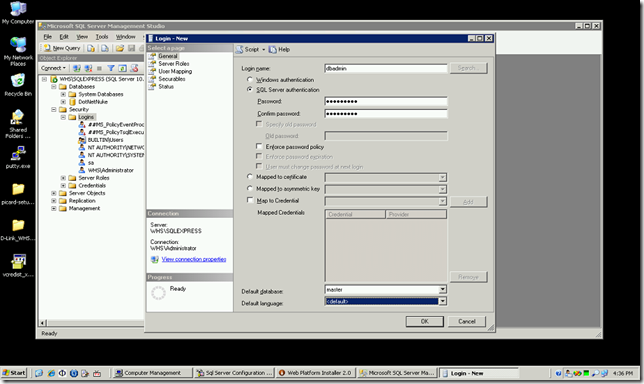
You should now see a tree on the left, expand the Security node, and then right click Logins, New User. Here is what I used:
Login Name:DBAdmin
Sql Server authentication
Password: another super secret password
I unchecked the password policy rules as well. I don't want to be hassled.
Under Server Roles, give the user “sysadmin”. (Both public and sysadmin should be checked).
Hit OK and feel free to exit the Sql Management Studio, and lets get back to Step 2 of 2.
Here is what I used:
Choose Your Database: Sql Server
Create a new or use an existing database:Create new database
Database Administrator:dbadmin
Password:that same super secret password
Database User Name: dnnuser
Database Password/Confirm: yet another super secret password
Database Server: leave it alone (.\SQLExpress). Thats the default instance of Sql Server Express
Database Name: leave it alone (DotNetNuke)
Now you may hit Continue and let the installer work its magic.
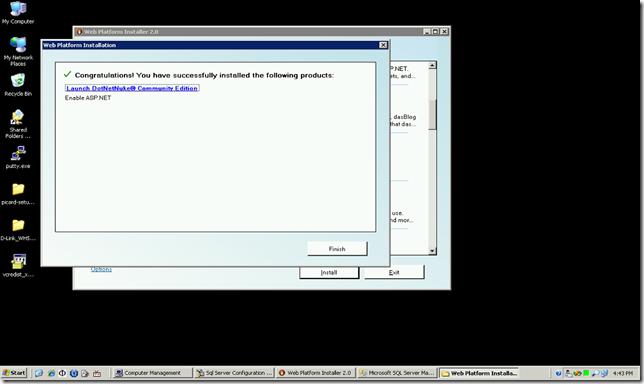
Finally (and hopefully) you should see…
Finish, and exit the WPI tool.
Browsing our DNN site for the first time is critical to get it setup right. Open your web browser and point it to your public facing url. http://someserver.homeserver.com/dnn
Please be patient. The first time a ASP.NET application is hit, it needs to do a bunch of startup tasks, this will take some time. Avoid hitting refresh until the page fully loads.
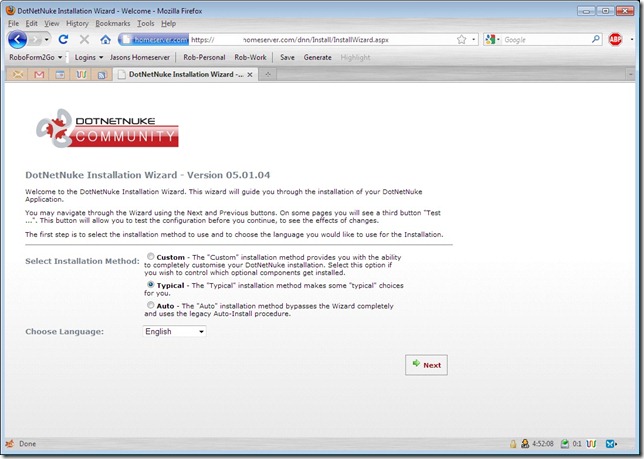
With any luck you will see the DNN Install wizard:
Now lets go through the “Custom” install. Be sure to actually change the option to “Custom” and then hit next.
First step is to check the file security permissions, this should just work. Click the “Test Permissions” button, and hopefully you will see green! If you do NOT see green, and there is an error simply read the information near the top of the page to resolve the issue.
Once permissions gives you all green, hit Next.
So you are now prompted with another screen asking you for the database credentials. This is because DotNetNuke is typically installed WITHOUT the WPI tool. Use the same details as you used previously. Always “Test Database Connection” prior to proceeding.
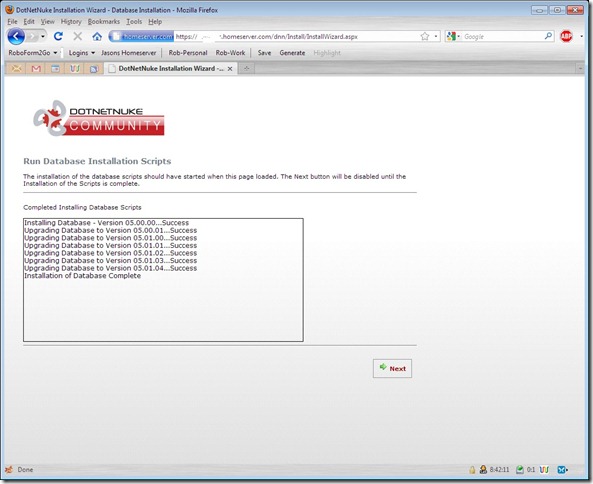
Finally it goes ahead and performs the actual database installation. The majority of this work is done via a bunch of Sql Scripts being executed against the database. Let it take its course and complete.
Now its time to setup the default Host and Admin credentials. If you are unfamiliar with DotNetNuke, essentially the HOST account is global to all portals (web sites). The ADMIN account i limited to the single portal which it is available on.
If you want to set your portal up to use GMail, use..
Server: smtp.gmail.com:587
Authentication:Basic
Enable SSL: Checked
Username:youruser@gmail.com
Password: your password
Test the SMTP Settings, and if you get a green light, hit next.
You now are presented with a plethora of modules to install. Here is my recommended list:
Documents - easy way to share documents with friends and family
Links - nice way to setup additional navigation for your site
Media – easily expose media content
Map – Hey, why not allow friends and family to always be able to get your home address?
Blog – Use it, create a home blog!
IFrame – Handy for linking in other stuff, like the standard WHS Console
Survey – Survey your friends and family!
Hit Next, once you have made your selection.
At this point your browser will sit and spin for a little while. Let it work itself out; do NOT hit refresh, do NOT load up a new browser and hit the site. It is going through the process of installing all of the modules you have chosen. The more modules you picked, the longer it will take.
Installing Skins and Containers – Defaults are fine, just hit next.
Language Packs and Languages – this revision did not include any, so just hit next.
Authentication Systems – Since your using WHS, you most likely do NOT use a Domain Controller (Active Directory). Keep the defaults and lets move on.
Install Providers – Keep the defaults, and hit next.
At this point your probably thinking, holy crap there are so many steps to install DotNetNuke. So many things to configure, and so many extensibility points. This is a massive advantage DotNetNuke has over all of its competitors. It has had such a long and healthy life in the community that there are literally thousands of developers contributing to the project.
We now are presented with the initial Portal Setup. Each portal needs an administrator account, so plugin your details for this. Typically, if you are only going to use one portal, I usually avoid using the Admin account and actually forget the password. I will just use the Host account. With that said, if you plan on delegating any web admin to anyone else, this would be a great account to do that with.
The most important piece here is the Portal Title. For consistency I would probably give it the same name as the actual homeserver.com domain.
For example, if your homeserver URL is:
rob.homeserver.com
I would go with
Robs DNN Home Server
Template, well there is only one option. Skip it and hit next – oh, and play the waiting game once again.
Congratulations, your finished!
3 Comments
Comments have been disabled for this content.
Lee Drake said
Can you combine DNN and a Windows XBMC install? Or does XBMC interfere with windows home server media services.
Rob Chartier said
Lee, You probably would NOT want to install WHS on the same machine as XBMC. Typically WHS is actually headless. Meaning no Monitor, heck my WHS doesnt even have a VGA port. AFAIK you can, but for me at least, I like keeping them separate.. I guess it depends on your budget and resources.
Jared said
Rob, love the walk through. One problem. I am getting the infamous app error when I visit my website. I may have screwed up chosing to install DNN on my D:\ drive rather than the C:\ drive? One other thing is I am changing the web.config customerrors to =Off and I still can't view the actual errors it's having. Any help would be great!