Pin My Friends Application (using Google Maps and Facebook APIs) – Part 1: Introduction
- Part 1 – Introduction
- Part 2 – Displaying the friends list
- Part 3 – Displaying the friends on the map
Because I’m on a business trip and I have some free time on my hands when I’m back in the hotel room, I have decided to join the UbiChallenge coding competition on the last 100m. The final submission date is 15th of November and I’m planning of finishing it in 36 hours including the blog posts (I’ve started this Friday 11.11.11 at 11:11:11 PM – well not right to the minute and second but the combination is nice, and plan to end it by Sunday 13.11 at 11 PM. I think that 12 hours of boring activities like eating, sleeping and some other stuff will be more than enough). Monday 14.11 I’ll probably spend a couple of hours reviewing and posting the solution. If someone wonders: I’m kind of frustrated because I’ve missed the Yahoo! OpenHack EU from Bucharest this year so this is the perfect opportunity to create a HackDay for myself (not so much fun coding alone but….).
There are there coding problems in the competition and in order to participate one has to choose one of them:
- Multiplayer TicTacToe:
Implement and ASP.NET and HTML5 application that allows a user to play TicTacToe with other users. A user can open a new TicTacToe session and wait for other user to join the session or join an existing session. The user that opens the session will be the one starting the game and as in a normal TicTacToe game the opponent will move after and so on. The application should automatically inform the user when he’s turns comes and decide who the winner is (or if it is a even match).
- Scratch Card
Implement a Scratch Card application (scratch and win). The UI must use jQuery and not Flash. The client side must call a web service (WCF) that generates a random code that can be winning or not. That code (with the form XXX-XXX-XXXX) must be saved in the database along with date / time of generation and its status (winner / loser). The system must be secure so no one could just call the web service in order create codes in the database. After scratching on the card there should be a message saying WINNER/LOSER and under it the generated code.
- My Friends Application
Implement and application called MyFriends that will any user to log in with his Facebook account; the application will read the location of all the user’s friends and then display on a map (Google Maps Mashup) their position, using blue dots for men and red for women. Mouse over a dot will display the friend’s Facebook picture.
There is nothing to complicated in either of them but the Google Maps + Facebook seems the most interesting by far so this is my pick (this and the fact that I’ve always wanted to do a blog post about Google Maps). The application name will be PinMyFriends (not very original but I don’t plan to sell it ).
So, let’s define the first tasks:
- T.1 - Setup solution and development environment:
- T.2 - Display the Google Map
- T.3 - Allow the user to login using Facebook and display user information (name and picture)
T.1 – Setup solution and development environment
We’ll be using Visual Studio 2010 SP1 for this project (the edition doesn’t really matter) and ASP.NET MVC3 (make sure you have ASP.NET MVC3 Tools Update installed):
- Start Visual Studio with administrative rights
- Create an empty solution called PinMyFriends.Solution
- Add an empty MVC3 project to the solution and name it PinMyFriends.UI
- Add or update the following NuGet packages:
- EntityFramework 4.2
- jQuery 1.7
- jQuery.UI.Combined 1.8.16
- jQuery.Validation 1.9
- jQuery.vsdoc 1.6
- Modernizr 2.0.6
- T4MVC 2.6.64
-
- Create a GeneratedCode folder in the project and move T4MVC.tt and T4MVC.tt.settings.t4 there
- Add the HomeController and the Index view
- Double click the Properties folder in the Solution Explorer and click the Web tab
- In the Servers section click Use Local IIS Web Server and enter http://localhost/PinMyFriends.UI in the Project Url (should be already there).
- Click Create Virtual Directory (this is the reason Visual Studio 2010 must be started with administrative privileges).
- Hit F5 and you should see the Index view
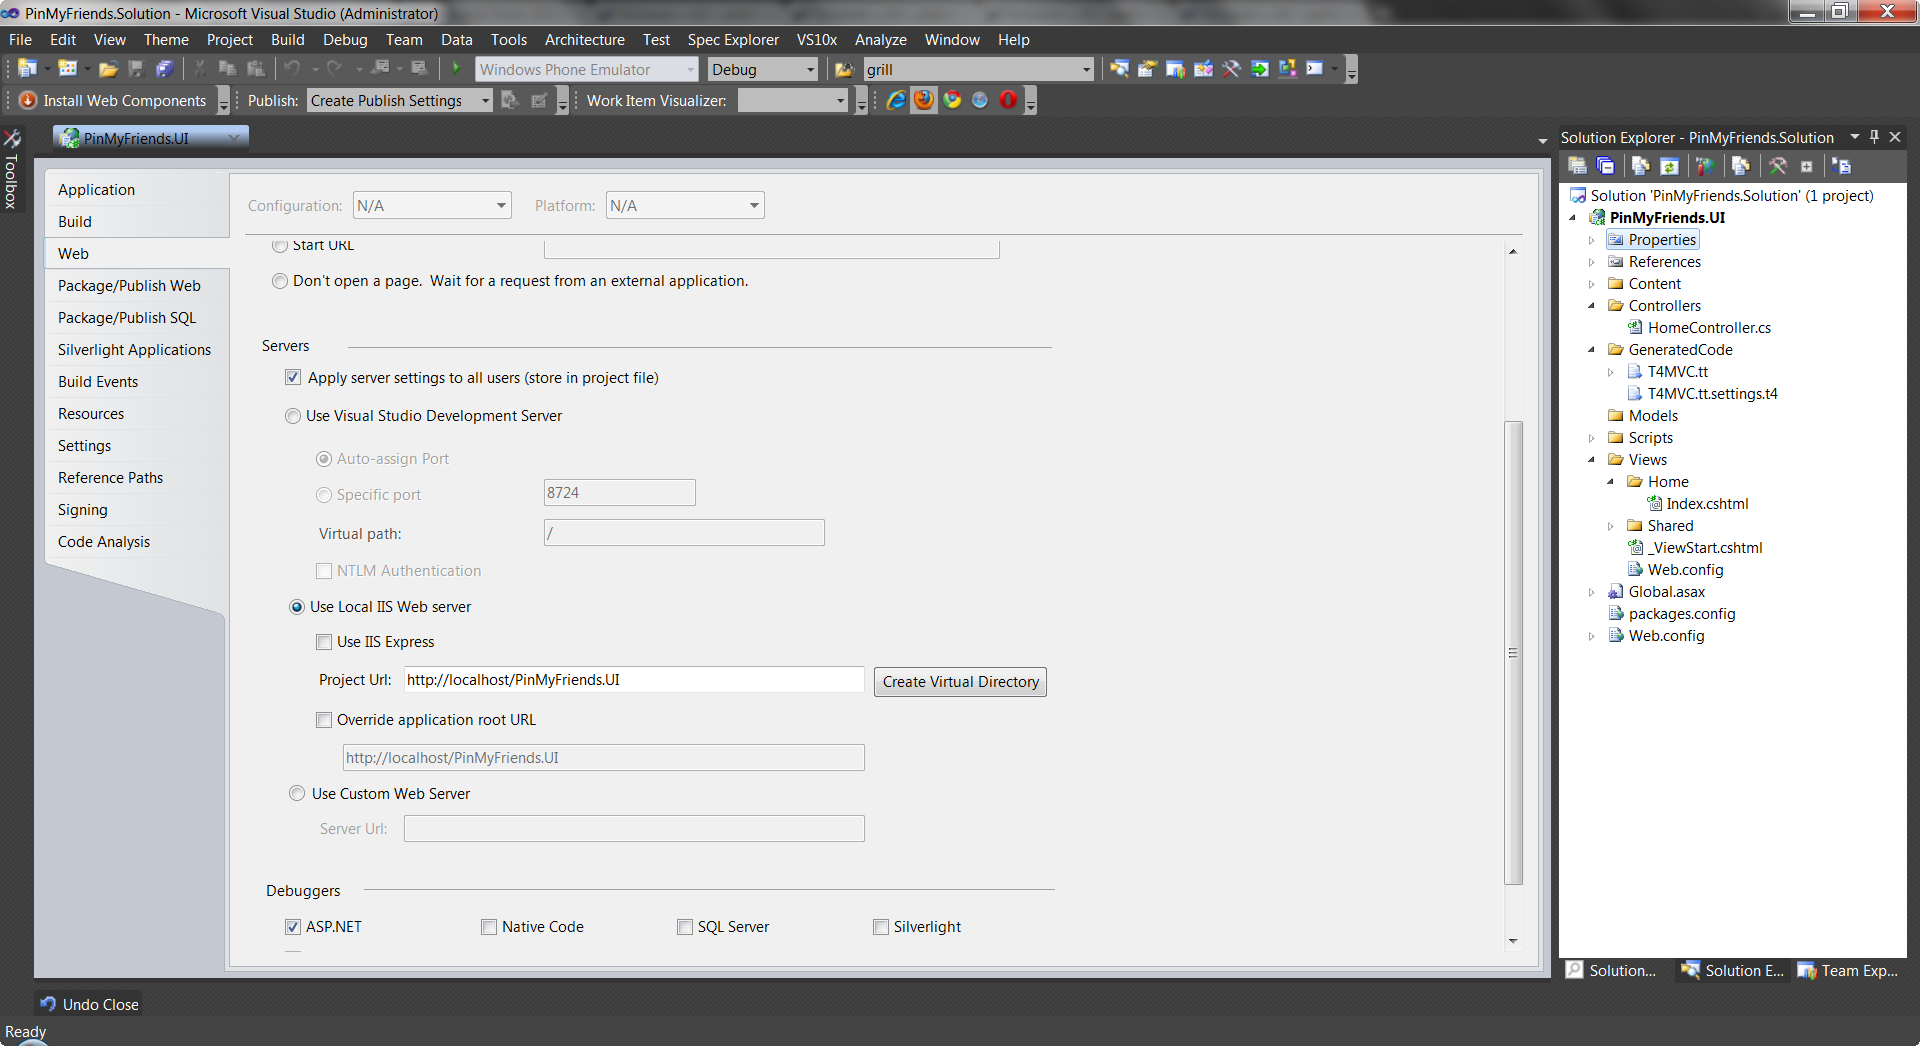
Figure 1-1. This is how the project should look at this stage
T.2 – Display the Google Map
In order to display a Google Map we need to do a few things:
- Reference the Google Maps APIs:
<script type="text/javascript" src="http://maps.google.com/maps/api/js?sensor=false"></script>
- Add a the following div in the Index.cshtml:
<div id="map"></div>
-
Add the following styles in Site.css
html
{
    height: 100%;
}

body
{
    margin: 0;
    padding: 0;
    height: 100%;
}

#map
{
    height: 100%;
}
-
Add the following JavaScript snippet in the Index.cshtml
<script>
    $(document).ready(function () {
        // Setup the map
        var mapCenter = new google.maps.LatLng(0, 0);
        var mapOptions = {
            zoom: 3,
            center: mapCenter,
            mapTypeId: google.maps.MapTypeId.ROADMAP,
            mapTypeControl: false,
            keyboardShortcuts: false,
            streetViewControl: false,
            scrollwheel: true,
            scaleControl: false,
            navigationControl: false
        };
        // Show the map
        map = new google.maps.Map(document.getElementById("map"), mapOptions);
    });
</script>
The map center and zoom level are set in order to have a good look at all continents. Also all map controls are removed and the map type is set to Roadmap. If everything is set correctly by pressing F5 the Index view should look like this:

Figure 1-2. Displaying the Google Map
T.3 - Allow the user to login using Facebook
In order to integrate our application with Facebook we first need to go to the Developers section in Facebook and create a new application there:
-
Navigate to https://developers.facebook.com/apps (requires Facebook account) and click Create New App:
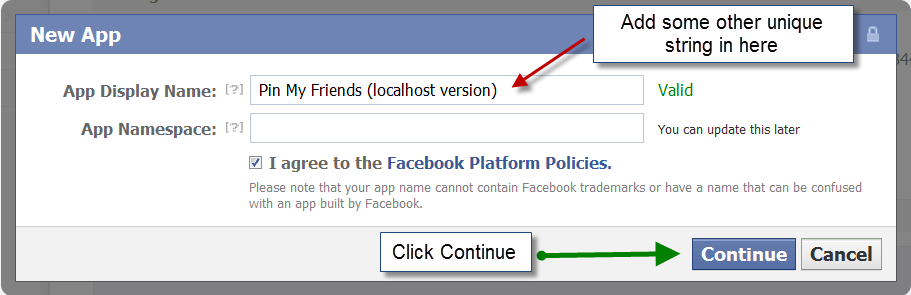
Figure 1-3. Create application dialog
-
Set the application’s basic information like below and write down the App Key and the App Secret:
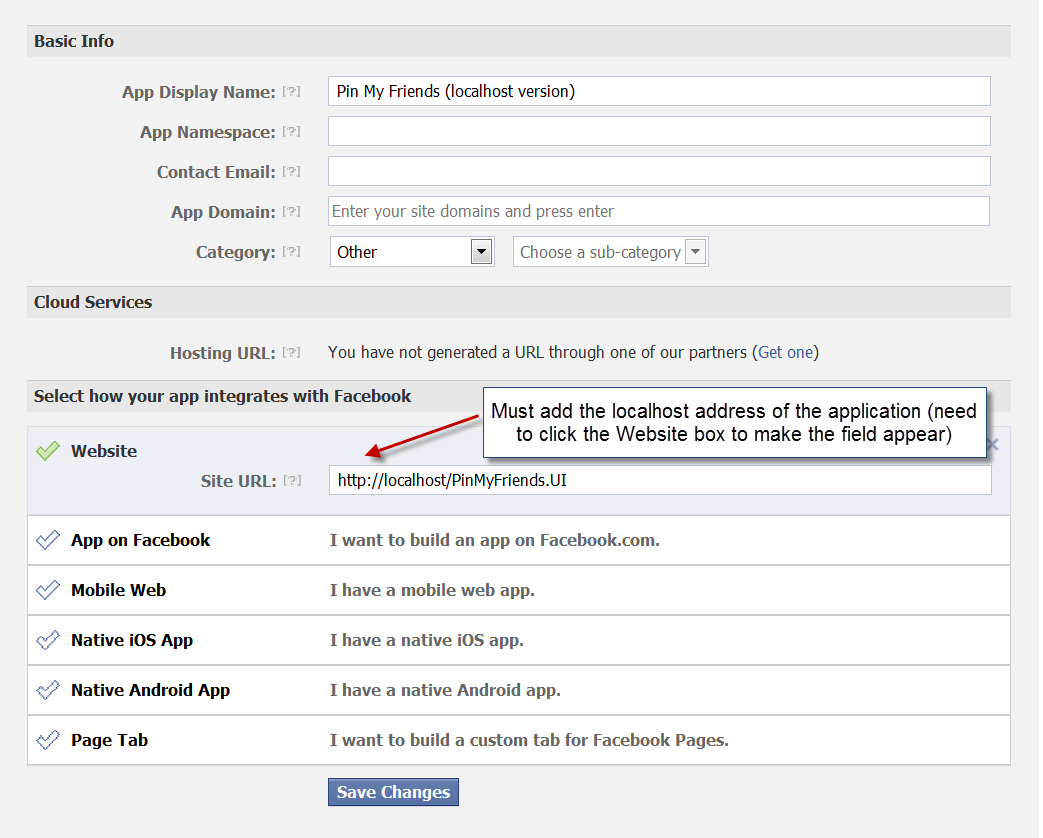
Figure 1-4. Application's basic info page
-
Click the Auth Dialog link under Settings and set the following (we will return to this screen later):
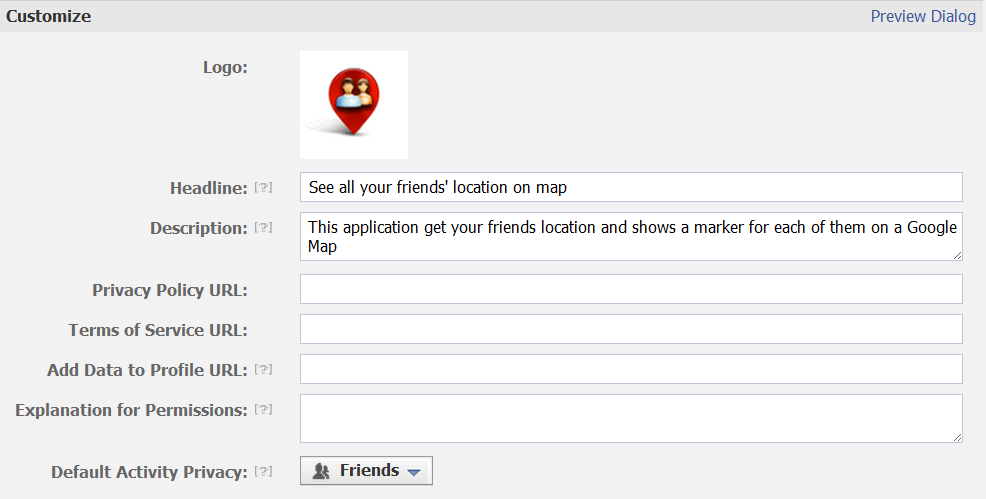
Figure 1-5. Customize the Authentication Dialog
-
There are several ways of integrating Facebook in the application. As there is no specific requirement for this competition I’ll use the Facebook C# SDK CodePlex project:
-
Add the necessary NuGet packages
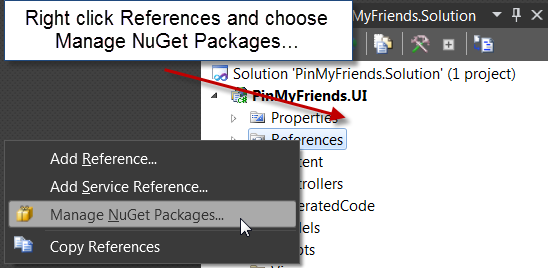
Figure 1-6. Quick access to NuGet packages.

Figure 1-7. NuGet packages to install.
-
Set the AppID and App Secret in web.config
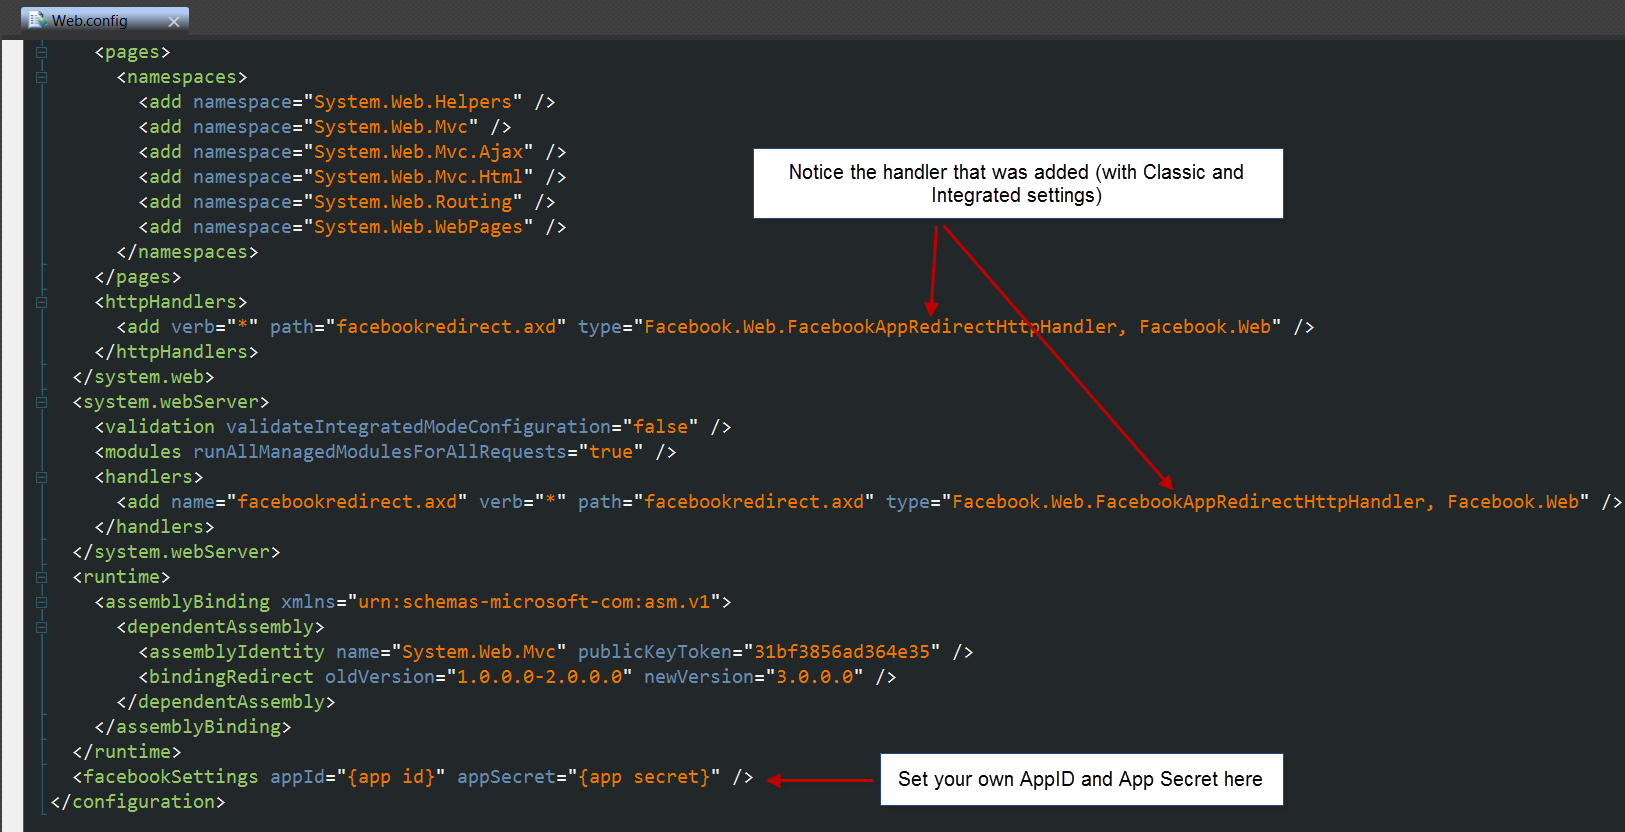
Figure 1-8. Web.config Facebook specific settings
-
- A partial view called _FacebookInit.cshtml is added with the package. Some adjustments are needed:
<div id="fb-root"></div>
<script>
    window.fbAsyncInit = function () {
        FB.init({
            appId: '@Facebook.FacebookApplication.Current.AppId', // App ID
            channelURL: '@Request.Url.Scheme://@Request.Url.Authority@Url.Content("~/fbchannel.ashx")', // Channel File
            status: true, // check login status
            cookie: true, // enable cookies to allow the server to access the session
            xfbml: true, // enable OAuth 2.0
            oauth: true  // parse XFBML
        });

        // Run once with current status and whenever the status changes
        FB.getLoginStatus(updateButton);
        FB.Event.subscribe('auth.statusChange', updateButton);
    };

    // Load the Facebook SDK Asynchronously
    (function (d) {
        var js, id = 'facebook-jssdk'; if (d.getElementById(id)) { return; }
        js = d.createElement('script'); js.id = id; js.async = true;
        js.src = '//connect.facebook.net/en_US/all.js';
        d.getElementsByTagName('head')[0].appendChild(js);
    } (document));
</script>
Because I’m not planning to go back to the server and then make a call to the Facebook API just to get the logged user name and picture I’ve removed the window.location.reload(); and replace it with a JavaScript function call.
-
Add a partial view called _UserProfile to the Views\Shared folder that will display the user picture, name and login status:
<script src="@Links.Scripts.facebook_js"></script>
<img class="left" id="userPicture" class="profilePicture" src="@Links.Content.images.unknown_user_png"
    alt="User picture" title="User picture" />
<div class="right">
    <div id="userName" class="profileName"></div>
    <div class="facebook_login">
        <a class="fb_button fb_button_medium" id="facebook_login_button"><span class="fb_button_text">LogIn with Facebook</span></a>
    </div>
</div>
-
Add the necessary code to the _Layout.cshtml
<!DOCTYPE html>
<html>
<head>
    <meta charset="utf-8" />
    <title>@ViewBag.Title</title>
    <link rel="shortcut icon" href="@Links.Content.images.favicon_ico"/>
    <link rel="stylesheet" href="@Links.Content.Site_css" />
    <script src="@Links.Scripts.jquery_1_7_js"></script>
</head>
<body>
    <div id="userProfile">
        @Html.Partial(MVC.Shared.Views._UserProfile)
    </div>
    @RenderBody()
    @Html.Partial(MVC.Shared.Views._FacebookInit)
</body>
</html>
-
Add new styles to Site.css
body
{
    height: 100%;
    margin: 0;
    padding: 0;
}

html, #map
{
    height: 100%;
}

#userProfile
{
    position: absolute;
    right: 5px;
    top: 5px;
    z-index: 500;
    background-color: rgba(98,122,172,0.5);
    border-radius: 10px;
    height: 64px;
}

.profilePicture
{
    border-radius: 10px 0 0 10px;
    border: 0;
    width: 64px;
    height: 64px;
}

.profileName
{
    font-size: 22px;
    color: #fff;
    font-weight: 700;
    height: 20px;
    margin: 5px;
}

.left
{
    float: left;
}

.right
{
    float: right;
}

.facebook_login
{
    margin: 10px 5px 5px;
}
-
Add a new script file called facebook.js
function updateButton(response) {
    var loginButton = $('#facebook_login_button');
    var loginText = $('#facebook_login_button span');

    if (response.authResponse) {
        //The User is already logged in and connected
        showFacebookProfile();
        // Change login button text
        loginText.html('Logout from Facebook');
        loginButton.unbind('click');
        loginButton.bind('click', function () {
            hideFacebookProfile();
        });
    } else {
        //user is not connected to your app or logged out
        loginText.html('Login with Facebook');
        loginButton.unbind('click');
        loginButton.bind('click', function () {
            FB.login(function (response) {
                if (response.authResponse) {
                    showFacebookProfile();
                }
            });
        });
    }
}

function showFacebookProfile() {
    FB.api('/me', function (response) {
        var userPicture = $('#userPicture');
        var userName = $('#userName');
        //Show the picture
        var userPictureSrc = 'http://graph.facebook.com/' + response.id + '/picture';
        userPicture.prop('src', userPictureSrc);
        //Show the name
        userName.html(response.name);
    });
}

function hideFacebookProfile() {
    FB.logout(function (response) {
        var userPicture = $('#userPicture');
        var userName = $('#userName');
        //Show unknown user picture
        var userPictureSrc = 'Content/images/unknown_user.png';
        userPicture.prop('src', userPictureSrc);
        //Clear the user name
        userName.html('');
    });
}
-
The result:
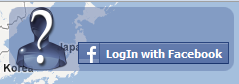
Figure 1-9. No logged in user display

Figure 1-10. Logged in user display
References
Google Maps JavaScript API V3 | facebook DEVELOPERS | Facebook C# SDK | Getting Started with an ASP.NET MVC 3 Website (With Javascript SDK)