ASP.NET MVC 3: Using AppFabric Access Control Service to authenticate users
I had Windows Azure training this week and I tried out how easy or hard it is to get Access Control Service to work with my ASP.NET MVC 3 application. It is easy now but it was not very easy to get there. In this posting I will describe you what I did to get ASP.NET MVC 3 web application to work with Access Control Service (ACS). I will show you also some code you may find useful.
Prerequisites
To get started you need Windows Azure AppFabric Labs account. There is free version of Access Control Service you can use you try out how to add access control support to your applications. In your machine you need some little things:
- ASP.NET MVC 3 RC2
- Windows Azure Tools for Visual Studio 1.3
- Windows Azure platform AppFabric SDK V2.0 CTP - October Update
- Microsoft Windows Identity Foundation Runtime
- Microsoft Windows Identity Foundation SDK
After installing WIF runtime you have to restart you machine because otherwise SDK cannot understand that runtime is already there.
Setting up Access Control Service
When all prerequisites are installed you are ready to register your (first?) access control service. Your fun starts with opening the following URL in your web browser: https://portal.appfabriclabs.com/ and logging in with your Windows Live ID. I don’t put up pictures here, if you want to guide with illustrations feel free to check out ASP.NET MVC example from AppFabric Labs sample documentation.
I will show you one screenshot in this point and this is the most important one – your ACS control panel where you find all important operations.
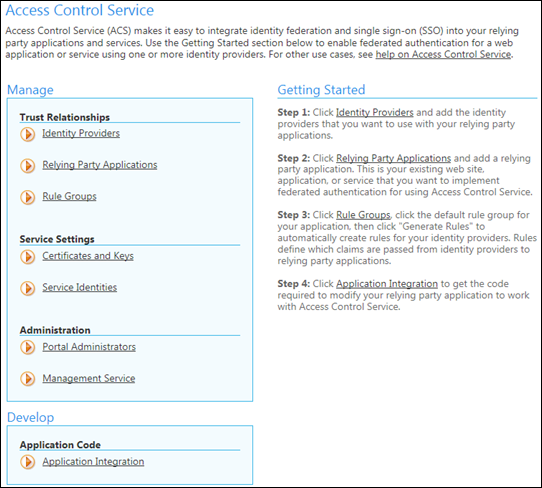
Click on image to see it at original size.
In short the steps are as follows.
- Add new project and give it meaningful name.
- If ACS is not activated after creating project then activate it.
- Navigate to ACS settings and open Identity Providers section (take a look at screenshot above).
- Add Google as identity provider (Windows Live ID is already there and you cannot remove it) and move back to ACS control panel.
- Click on Relaying Party Applications link and add settings for your application there (you can use localhost too). I registered http://localhost:8094/ as my local application and http://localhost:8094/error as my error page. When you application is registered move back to ACS control panel.
- Move to Rule Groups section, select default rule group that was created when you registered your application and click on Generate Rules link. Now all rules for claims will be created and after that you can move back to ACS control panel.
- Now move to Application Integration section and leave it open – you need soon one link from there.
Follow these steps carefully and look at sample documentation if you need. Don’t miss step nr 6 as this is not illustrated in sample documentation and if you are in hurry then you may miss this step easily.
STS references
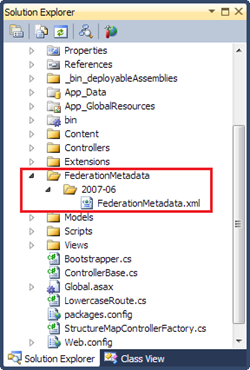 Now comes the most interesting and annoying part of the process you have to perform every time before you deploy your application to cloud and also after that to restore STS settings for development environment.
You can see STS reference on the image on right in red box. If you have more than one environment (more than one relaying party application) registered you need reference for every application instance. If you have same instance in two environments – common situation in development – then you have to generate this file for both environments.
The other option is to run STS reference wizard before deploying your application to cloud giving it cloud application URL. Of course, after deployment you should run STS reference wizard again to restore development environment settings. Otherwise you are redirected to cloud instance after authenticating your self on ACS.
Adding STS reference to your application
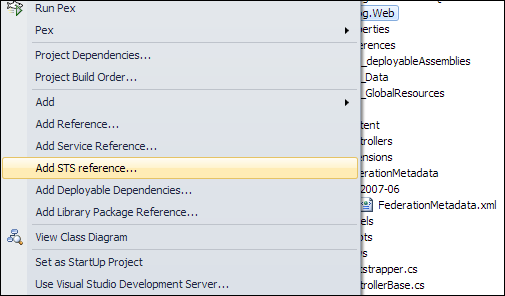
- Now right-click on your web application project and select Add STS Reference…
- Now you are asked for location web.config file and URL of your application for which you are adding STS reference.
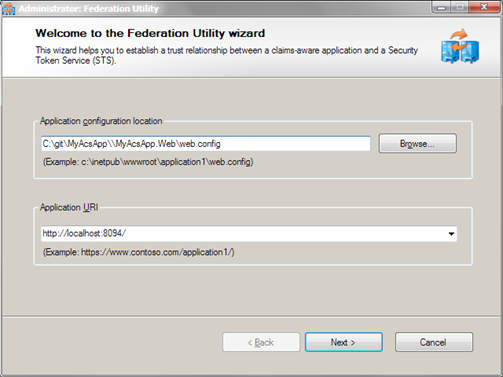
web.config location is filled automatically, you have to insert application URL and click Next button.
- You get some warnings about not using SSL etc but keep things as simple as possible when you are just testing. The next steps asks you about location of STS data.
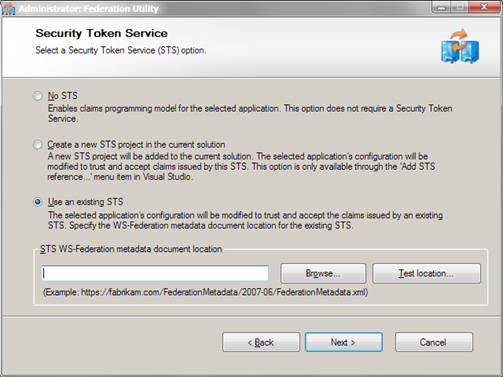
Select Use an Existing STS and insert URL from AppFabric settings (WS-Federation Metadata is the correct URL). Click Next.
- You are asked about certificated and other stuff in the following dialogs but right now you can ignore these settings. Just click Next until STS reference wizard has no more questions.
Okay, now you have STS reference set but this is not all yet. We need some little steps more to do before trying out our application.
Modifying web.config
We need some modifications to web.config file. Add these two lines to appSettings block of your web.config file.
<add key="enableSimpleMembership" value="false" />
<add key="autoFormsAuthentication" value="false" />
Under system.web add the following lines (or change existing ones).
<authorization>
<deny users="?" />
</authorization>
<httpRuntime requestValidationMode="2.0" />
If you get form validation errors when authenticating then turn request validation off. I found no better way to get XML-requests to my pages work normally.
Adding reference to Windows Identity Model
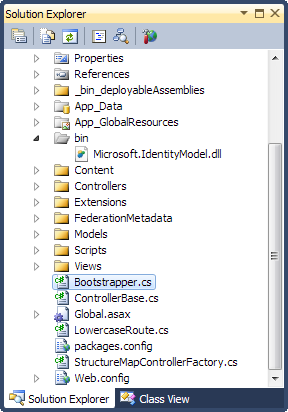 Before deploying our application to Windows Azure we need local reference to Microsoft.IdentityModel assembly. We need this reference because this assembly cannot be found in cloud environment.
If you don’t want to reference this assembly in your code you have to make it part of web application project so it gets deployed.
I have simple trick for that – I just include assembly to my project from bin folder. It doesn’t affect compilation but when I deploy my application to cloud the assembly will be in package.
Adding error handler
Before we can test our application we need also error handler that let’s us know what went wrong when we face problems when authenticating ourselves.
I added special controller called Error to my web application and defined view called Error for it. You can find this view and controller code also from ACS sample projects. I took them from there.
Testing application
Run your application now. It should you redirect to authentication providers page show on following screenshot. This page is part of ACS.
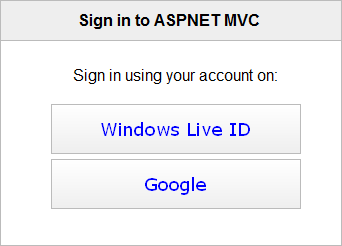
Select Google and log in. You should be redirected back to your application as authenticated user. You can see corner of my test page on the following screenshot.

NB! For Windows Live ID you will get empty username and this seems to be issue that is – of course – by design. Hopefully MS works things out and makes also Live ID usable in ACS but right now – if you are not level 400 coder, don’t touch it – it means more mess than you need.
Conclusion
Adding AppFabric ACS support to ASP.NET MVC 3 web application was not such an easy thing to do like I expected. ASP.NET MVC 3 has some minor bugs (that’s why we needed to parameters to appSettings block) and in the beginning we are not very familiar with Winodws Identity Foundation. After some struggling on different problems I got it running and I hope you can make your applications run too if you follow my instructions.
AppFabric ACS is still in beta but it looks very promising. There is also Facebook and Yahoo! support available and hopefully they add more authentication options in the near future. ACS helps you identify your users easily and you don’t have to write code for each identity provider.