Free all the way: Using Visual WebGui with SharpDevelop and Visual Studio Express
From version 6.2 we’ve added to Visual WebGui (VWG) install process the option to install the Visual WebGui SDK without the prerequisite of having Visual Studio installed on your computer. This option allows you to work with other IDE then Visual WebGui like SharpDevelop, Visual Studio express or notepad. In this article we will focus on how to use SharpDevelop and Visual Studio express.
This topic assumes that you have some basic knowledge of Visual WebGui. You can find more information on how to use Visual WebGui in the “Learn” section of our site here.
Installation Prerequisites
The only prerequisite for Visual WebGui installation is that the corresponding .Net framework will be installed on the computer. For example if you choose to install the Visual WebGui SDK from .Net 3.5 you first need to install .Net framework 3.5.
Other than that there are no further prerequisites but there are a few things that can influence the volume of the installation. For example if you haven't installed Silverlight the Visual WebGui SDK will not be installed.
Installation
To read a full article on Version 6.2 install process go to here.
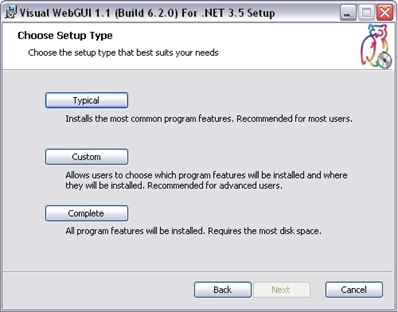
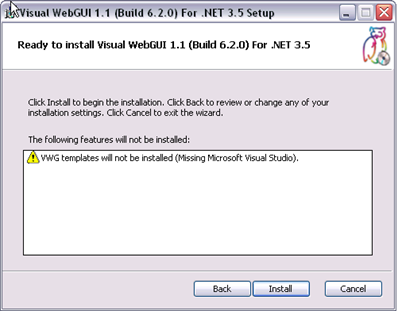
To install Visual WebGui without Visual Studio run the installation process. If you select typical the VWG core SDK and extensions will be installed and a message that states that the Visual Studio templates will not be installed.
SharpDevelop
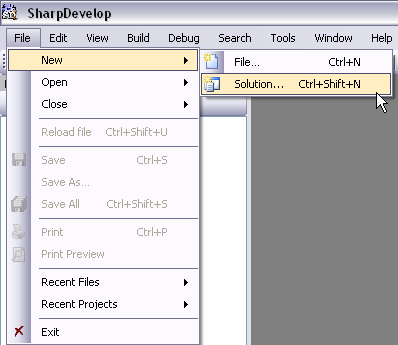
Let’s open SharpDevelop and create a new solution.
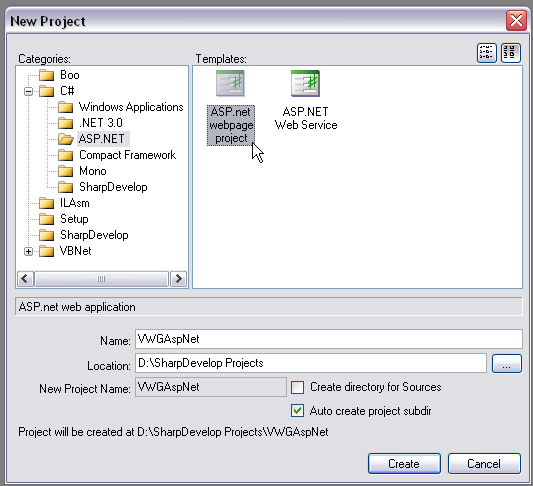
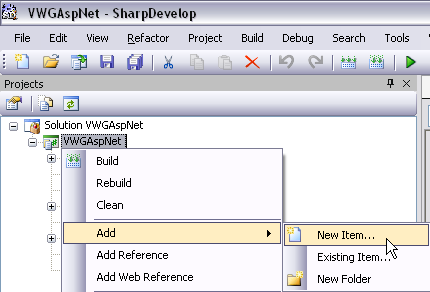
We will add an Asp.Net project.
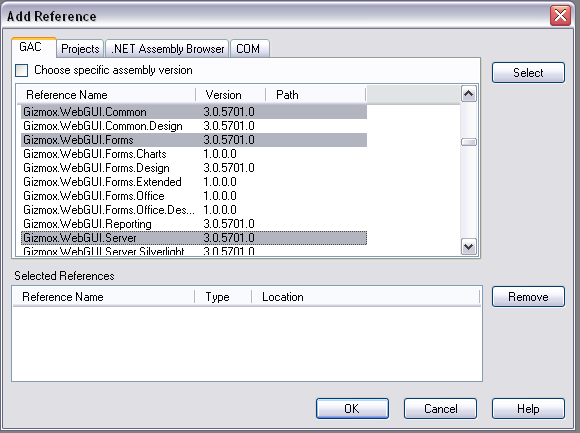
First we will add to the C# class reference to Gizmox.WebGUI.Common, Gizmox.WebGUI.Forms and Gizmox.WebGUI.Server.
Now we will add to the WebConfig the default sections of VWG. First will add this config section that will declare the VWG section.
<configSections>
<section name="WebGUI" type="Gizmox.WebGUI.Common.Configuration.ConfigHandler, Gizmox.WebGUI.Common, Version=3.0.5701.0, Culture=neutral, PublicKeyToken=263fa4ef694acff6" />
</configSections>
Next will add the WebGui section that will hold most of the application configuration like Applications,Controls,Themes and more.
<WebGUI>
<!-- WEBGUI AUTHENTICATION MANAGEMENT
This section defines the application authentication mode.
Example:
<Authentication Mode="Dialog" Type="Ifn.W2.Web.POC.Forms.Logon, Ifn.W2.Web.POC" />
Example Help:
Mode:
Dialog - Authentication is done in a popup window
Type:
A full type name to handle logon (This class should inherit from the LogonForm)
-->
<!--Authentication Mode="Main" Type="Gizmox.WebGUI.Sample.Forms.Logon, Gizmox.WebGUI.Sample" /-->
<!-- WEBGUI APPLICATION MANAGEMENT
This section maps pages to application forms.
Example:
<Application Code="MainForm" Type="MyNameSpace.MainForm, MyAssemblyName"/>.
Example Help:
The current application definition maps the full qualified class name to the
specifiec page code. This means that the link http://[host]/MainForm.wgx will
be handles by the givven application form.
-->
<Applications>
<Application Code="Form1" Type="TestingIGatewayComponent.Form1, 'TestingIGatewayComponent'"/>
</Applications>
<!-- WEBGUI CONTROL MANAGEMENT
This section registers controls so that the webgui server can expose there resources.
-->
<Controls>
<Control Type="TestingIGatewayComponent.PieControl, TestingIGatewayComponent"/>
</Controls>
<!-- WEBGUI THEMES MANAGEMENT
Selected - The currently selected scheme
-->
<Themes Selected="Default">
<!-- <Theme Name="MyTheme" Assembly="MyThemeAssembly" /> -->
</Themes>
<!-- WebGUI RESOURCE MANAGEMENT
Icons - This maps the icon directory (Absolute\Relative path).
Images - This maps the images directory (Absolute\Relative path).
Generated - This maps the generated resources directory and is requiered for using custom controls (Absolute\Relative path).
Data - This maps the data directory which should contain data related files (Absolute\Relative path)
-->
<Directories>
<Directory Code="Icons" Path="Resources\Icons" />
<Directory Code="Images" Path="Resources\Images" />
<Directory Code="Generated" Path="Resources\Generated" />
<Directory Code="UserData" Path="Resources\UserData" />
</Directories>
<!-- WEBGUI STATIC RESOURCES MANAGMENT
The mechanism should be used in a deployment scenario to boost performance. The static
resoruces mode creates a directory named "Route" and with in it files that are accessed
directly using the web server instead of dynamicly generated files. You should check that
there the site can write to that directory.
-->
<StaticResources Mode="Off"/>
<!--
WEBGUI PRIVATE VERSION
Adds the private version key to the caching key. This key provides a mechanism to invalidate
both client and server caching. You should use this key when you are delpoying a theme or
a new custom control. The server and client caching are per site.
-->
<PrivateVersion Value="12"/>
<!--
WEBGUI PRELOADING
Changing the Mode to "On" enables icon preloading mechanism. This mainly prevents IE
loading the same image multiple times.
Example:
<IconsPreloading Mode="Off"/>
<SkinsPreloading Mode="Off"/>
-->
<IconsPreloading Mode="Off"/>
<!-- WEBGUI CONNECTION MANAGEMENT
Setting the session timeout to a specified time will count the "idle" (non-active) time and redirect the client to a "session timed-out" page (which is currently embedded in the Gizmox.WebGUI.Forms assembly).
There should not be any push capabilities from the server to the client, since the KeepConnected itself is a request that comes from the client and can return any command (such as redirection) back to the client.
In order to enable session timeout you should use a combination of the following configurations:
<KeepConnectedInterval Value="5000" />
<KeepConnectedLimitation Value="3" />
The KeepConnectedInterval provides the interval between each keep-connected call. The KeepConnectedLimitation provides the allowed number of continuance keep connected calls before timeout occurs.
-->
<!-- WEBGUI URL MANAGEMENT
ForceDomain causes the base url of each rendered html page to be the specified domain.
Example:
<ForceDomain Value="www.ccast.edu.ps" />
ForcePort causes the the base url of each rendered html page to the port specified value.
Example:
<ForcePort Value="8080" />
ForceHTTPS causes the base url of each rendered html page to use the HTTPS protocol.
Example:
<ForceHTTPS Mode="Off" />
-->
<!-- WEBGUI WINDOW TYPE MANAGEMENT
Setting On forces all popups to be rendered as DIVs
Example:
<InlineWindows Mode="Off" />
-->
<!-- WEBGUI THREAD APARTMENT MANAGEMENT
AspCompat enables single thread apartment components
Example:
<AspCompat Mode="Off" />
-->
<!-- WEBGUI FILE UPLOAD COMPONENT MANAGEMENT
Set true to use Flash compontent, false to use browser default
Example:
<UseFlashForUpload Mode="On"/>
-->
<!-- WEBGUI RESPONSE COMPRESSION MANAGEMENT
Set to compress all Responses from server
Example:
<GZipCompression Mode="Off" />
-->
</WebGUI>
We will add the system diagnostics section. This section holds a few of the applications switches.
<system.diagnostics>
<switches>
<!--
Provides a mechanism for monitor an application using a debug messages viewer or
in debug time in the output window. Remember to turn turn this feature off in
a deplyment scenario.
0 - Disabled
1 - Gives error messages
2 - Gives errors and warnings
3 - Gives more detailed error information
4 - Gives verbose trace information
-->
<add name="VWG_TracingSwitch" value="0" />
<!--
Performance tracing limited to this threshold
-->
<add name="VWG_TracingThresholdSwitch" value="10" />
<!--
Disables the caching of Visual WebGui resources
-->
<add name="VWG_DisableCachingSwitch" value="0" />
<!--
Disables client sources obscuring (Mainly for debugging and developing purposes)
0 - Disabled
1 - Enabled
-->
<add name="VWG_DisableObscuringSwitch" value="0" />
</switches>
</system.diagnostics>
And the last part we will add to the system.web section the httpHandlers section that will hold the http handler router declaration.
<system.web>
<httpHandlers>
<!-- WebGUI ROUTER HANDLER
This http handler routes the requests to Modules/Icons/Images/Css/Xslt/Resoureces.
Client events are sinked through this router as well.
-->
<add verb="*" path="*.wgx" type="Gizmox.WebGUI.Server.Router,Gizmox.WebGUI.Server,Version=3.0.5701.0
,Culture=neutral,PublicKeyToken=3de6eb684226c24d" />
</httpHandlers>
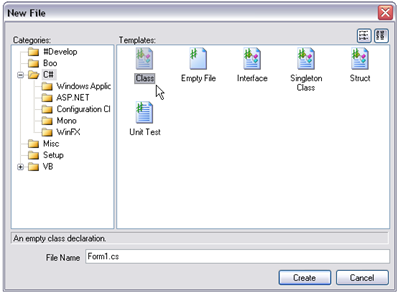
Let’s add a new class and call him Form1.
We will add the required references to the class to resemble to a VWG Form.
#region Using
using System;
using System.Collections.Generic;
using System.ComponentModel;
using System.Data;
using System.Drawing;
using System.Text;
using Gizmox.WebGUI.Common;
using Gizmox.WebGUI.Forms;
#endregion
Now we will make the Form1 class inherit from Gizmox.WebGUI.Forms.Form.
public partial class Form1 : Form
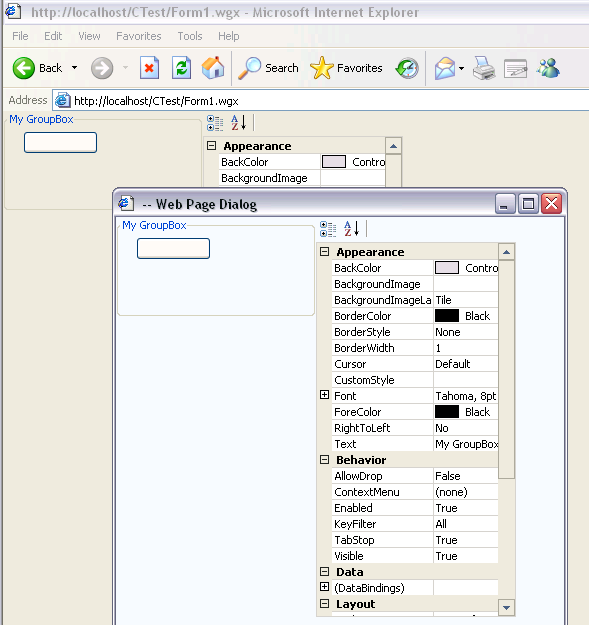
We will add a constructor to the Form1 class and add a few controls in it.
public Form1()
{
GroupBox GroupBox1 = new GroupBox();
GroupBox1.Text = "My GroupBox";
this.Controls.Add(GroupBox1);
Button Button1 = new Button();
Button1.Click += new EventHandler(OnClick);
Button1.Location = new Point(20, 20);
GroupBox1.Controls.Add(Button1);
PropertyGrid PropertyGrid1 = new PropertyGrid();
PropertyGrid1.SelectedObject = GroupBox1;
PropertyGrid1.Left = 200;
PropertyGrid1.Height = 400;
PropertyGrid1.Width = 200;
this.Controls.Add(PropertyGrid1);
}
public void OnClick(object a, EventArgs b)
{
Form1 form1 = new Form1();
form1.Height = 400;
form1.Width = 200;
form1.BackColor = Color.AliceBlue;
form1.ShowDialog();
}
In the WebConfig change the application start up form to the form1 class.
<Applications>
<Application Code="Form1" Type="VWGTest.Form1, VWGTest" />
</Applications>
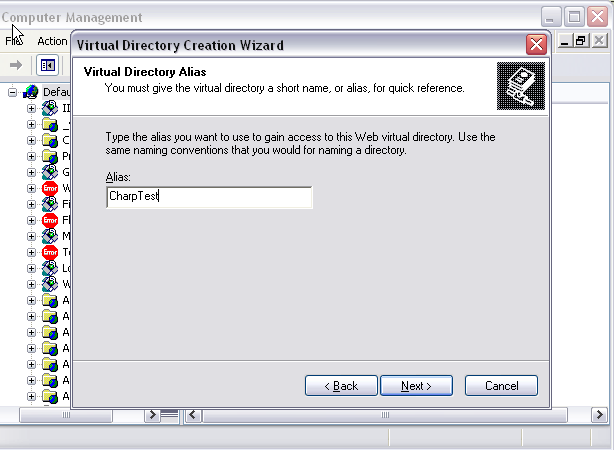
To run our application we will create a new virtual directory in our IIS. Open your IIS right click on the default web site and select New\Virtual Directory. Set the Directory alias.
Select the folder that the application is saved. 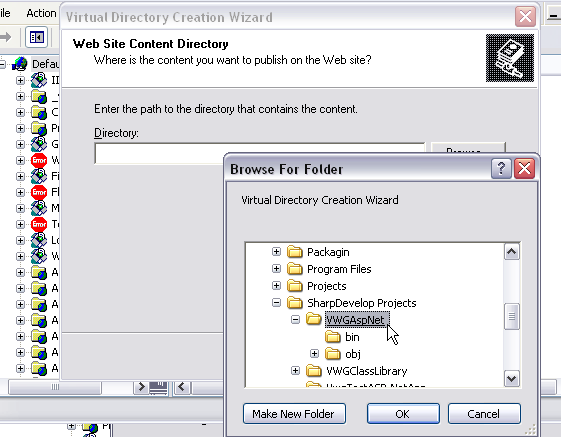
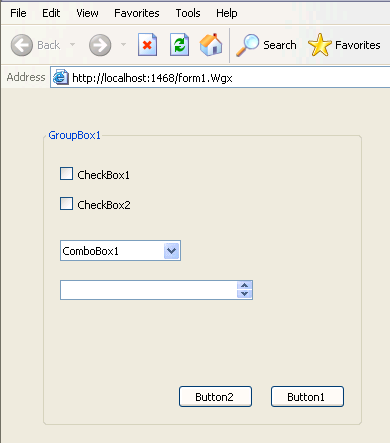
Select the new virtual directory we created and right click on the default.aspx page and select browse. This will open the asp.bet site in the browser. Now change the default.aspx url to form1,wgx and see our VWG application.
Microsoft Visual Web Developer Express Edition
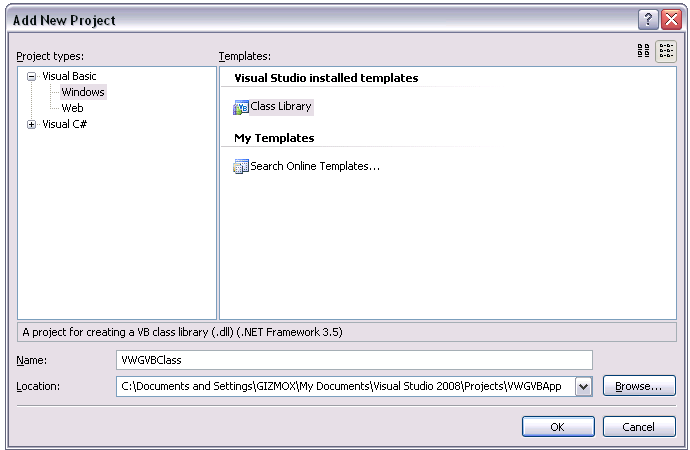
After installing Microsoft Visual Web Developer 2008 Express Edition open it and create a new Asp.Net Web application. 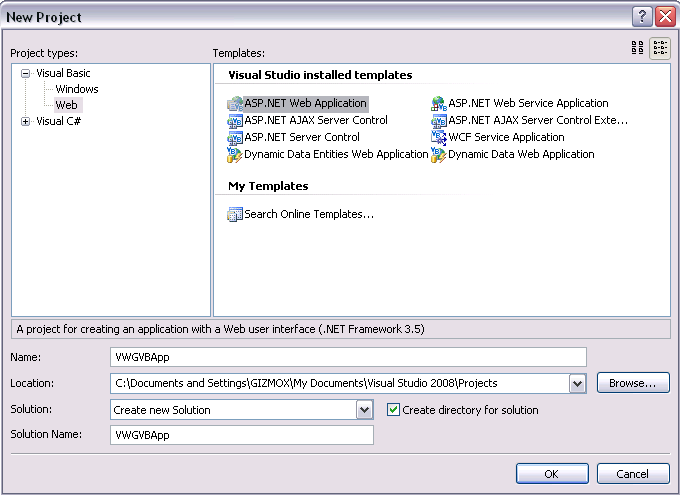
If you are using Microsoft Visual Web Developer Express 2008 Edition you can skip this section and do everything in the asp.net web project. But if you’re using Microsoft Visual Web Developer Express 2005 Edition another project a windows class library
We will need to update the WebConfig just like we did before just make sure you delete the configSections and the httpHandlers before so you won’t have them doubled.
Next we will add a reference to the web project to the Gizmox.WebGUI.Server assembly and add to the class library a reference to Gizmox.WebGUI.Common and Gizmox.WebGUI.Forms. Also add a reference in the class library to System.Drawing.
Add a new class to the Class library named Form1.
Open Form1 and add the using section to the file.
Imports System
Imports System.Collections.Generic
Imports System.ComponentModel
Imports System.Data
Imports System.Drawing
Imports System.Text
Imports Gizmox.WebGUI.Common
Imports Gizmox.WebGUI.Forms
This class should inherit from Gizmox.WebGUI.Forms.Form
Public Class Form1
Inherits Gizmox.WebGUI.Forms.Form
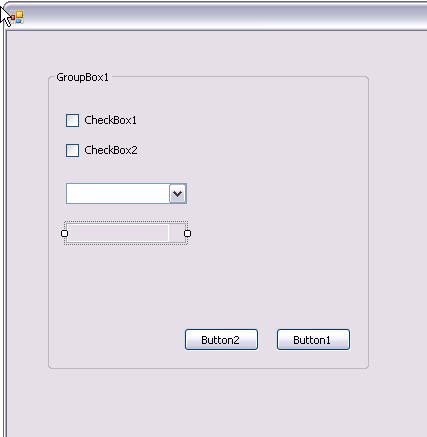
Next open Form1 but this time in designer mode and just open a few controls.
Add this to Form1 so the InitializeComponent will be executed.
<Global.Microsoft.VisualBasic.CompilerServices.DesignerGenerated()> _
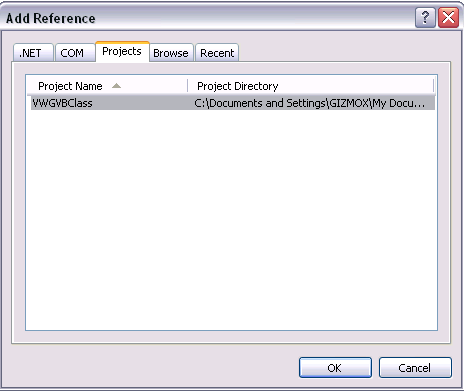
Right click on the web project and add reference to the class library project.
In the WebConfig we’ve set the start point of the application to the Form1 class like this.
<Applications>
<Application Code="Form1" Type="VWGVBClass.Form1, VWGVBClass" />
</Applications>
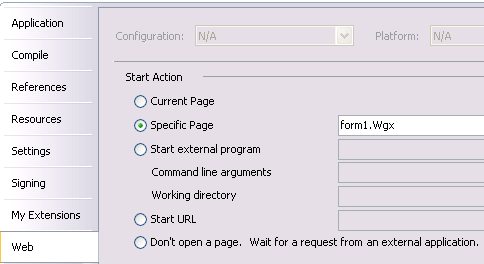
Open the project property page and set the start form of the application to Form1.Wgx in the Web Section.
Lets run our application.
To summarize:
We have seen how to use Visual WebGui without having to install Visual studio by using SharpDevelop and Visual Studio express.
You can read the original how to here
-- Eyal Albert @ Eyal.Albert (at) Gizmox.com
