Live From Redmond with Joe Stanger March 27th 2008 Web Cast: Visual WebGui Enterprise AJAX Application
The following quick start process is derived from Visual WebGui's March 27th Web Cast. It demonstrates some of the capabilities presented by Visual WebGui in enterprise application development.
Subject 1: Controls & Data Binding - create and use data-bounded controls
Open Visual studio 2008 and Create a new "Visual WebGui Application":
Make sure it's target .NET Framework is .NET 3.5:
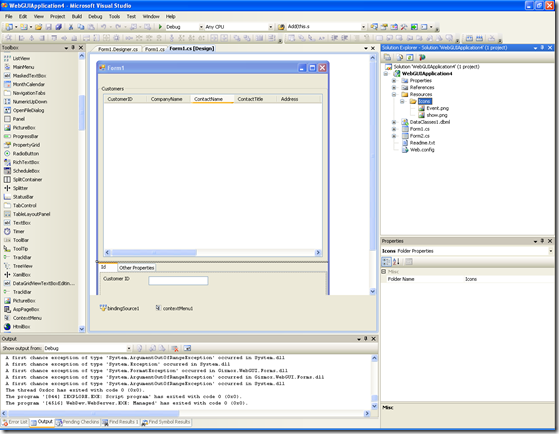
Drag the following controls into Form1 design surface:
1. Listview - Name it listView1
2. DateTimePicker - Name it insertDate
3. 3 Labels - Name them customerId, contactName and company
4. NumericUpDown - Name it postalCode
5. ComboBox - Name it country
In order to enable add a reference to the System.Data.Linq and System.Configuration assemblies:
Create a data source using the LINQ to SQL:
Bind the newly created data source to the Northwind DB and include the following tables:
1. Customers
2. Orders
3. Products
Bind listView1 to the Customer object and recompile the project:
From Form1 events view, attach to the Form1_Load event handler:
Bind the data source to Customers:
Add a button and name it Insert New:
Add the following code to insert a new record on the button1_Click event handler:
private void button1_Click(object sender, EventArgs e)
{
DataClasses1DataContext mobjDataClass1 = new DataClasses1DataContext();
Customer objCustomer = new Customer();
objCustomer.PostalCode = postalCode.Value.ToString();
objCustomer.CompanyName = companyName.Text;
objCustomer.ContactName = contactName.Text;
objCustomer.CustomerID = customerId.Text;
objCustomer.Country = country.Text;
mobjDataClass1.Customers.InsertOnSubmit(objCustomer);
mobjDataClass1.SubmitChanges();
listView1.DataSource = mobjDataClass1.Customers;
listView1.Update();
}
Remove the Insert New button and bind all other input controls to the same bindingSource:
** Be sure to attach listView1_SelectedIndexChaned in order to create a server event!
Now all of the controls are bonded to the same bindingsource:
Subject 2: Layout - Tidy-up the controls layout
1. Add a GroupBox, change its text to "Customers" and dock it to top.
2. Drag listView1 into it.
3. Drag a new Splitter object under the group box's and dock it to top.
4. Resize listView1 to catch most of the group-box's area and Anchor it to Left + Top + Right + Bottom.
Add a new TabControl and change Tab1's text to "Id" and Tab2's text to "Other Properties":

Now drag the input controls into the tab pages according to their category and then dock the
TabControl to fill the rest of the form:
Run the application; its layout is now much tidier:
Subject 3: Windows and Object Model
Add a new form - Form2:
Creating an "Inspector" Window:
1. Add a Lable - dock it to top
2. Add a PropertyGrid - anchor it to Left + Top + Right + Bottom
3. Add a button - anchor it to Right + Bottom and set its text to "Apply Changes"
Attach the button1 click event and add the following code in Form1_Load and in button1_Click:
private Control mobjControl = null;
public Form2()
{
InitializeComponent();
}
public Form2(Control objControl)
: this()
{
mobjControl = objControl;
label1.Text = objControl.Name;
propertyGrid1.SelectedObject = objControl;
}
private void button1_Click(object sender, EventArgs e)
{
mobjControl.Update();
this.Close();
}
Add a ContextMenu and a menu-item named "Properties...":
Implement the menuItem1_Click event:
private void OpenPropertyGrid(Control objControl)
{
Form2 objForm2 = new Form2(objControl);
objForm2.ShowDialog();
}
private void menuItem1_Click(object sender, EventArgs e)
{
OpenPropertyGrid(listView1);
}
Attach the contextMenu1 to listView1:
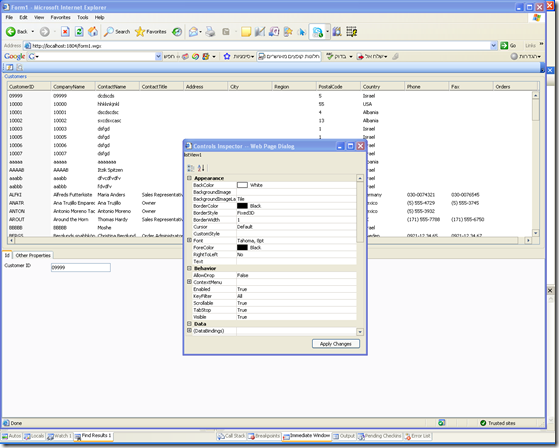
Run the application.
Right-Click on the ListView and select "Properties..." from the menu.
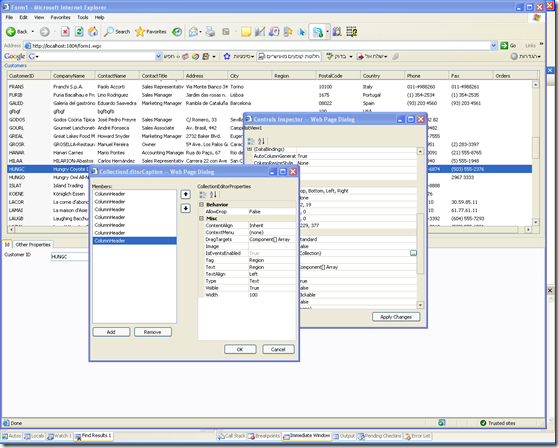
You will get the "Inspector Window" which will enable you to change the ListView's properties,
for example it is possible to remove columns:
Subject 3: Fun & Games
ToolBar: adding and utilizing toolbars
1. Add ToolBar - dock it to top
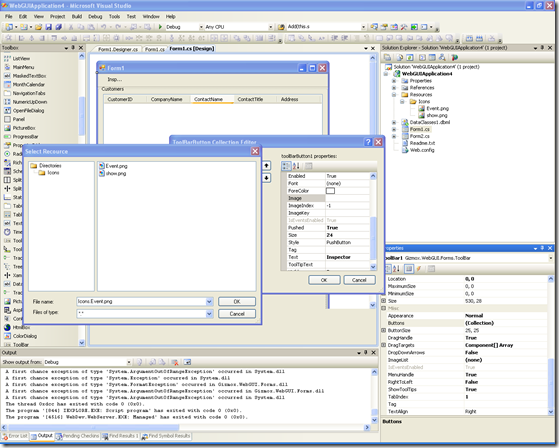
2. Add icons resources to the project with 2 Icons
Add 2 buttons with icons for one for the Inspector and the other as an extra that will
popup a new form in the next stages:
Attach the toolBar1_Click event and enter the open-property-grid opening code in case
the button is toolBarButton1":
private void toolBar1_Click(object objSource, ToolBarItemEventArgs objArgs)
{
switch (objArgs.ToolBarButton.Name)
{
case "toolBarButton1":
OpenPropertyGrid(listView1);
break;
}
}
Run the application and you will be able to open the Inspector using the new ToolBar button:
Drag & Drop: dragging products on orders
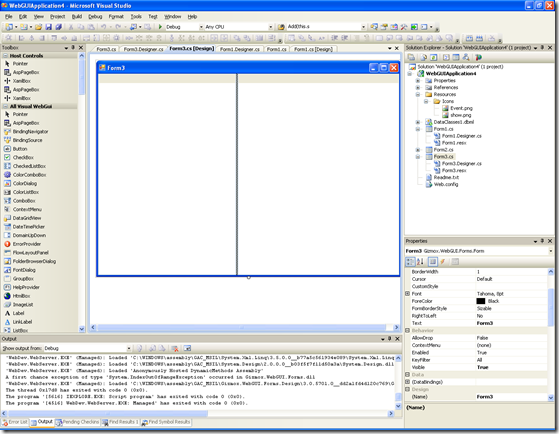
1. Add a new form named Form3
2. Add 2 List Views: listView1 docked left and listView2 docked fill and a splitter between them
In Form3_Load:
1. Set the DragTargets of listView1 to contain listView2:
2. Attach the DragDrop Event Handler
3. Attach listVew2's DragDrop event
4. Implement the event handler as follows
private void Form3_Load(object sender, EventArgs e)
{
DataClasses1DataContext objDataContext = new DataClasses1DataContext();
listView1.DataSource = objDataContext.Products;
listView2.DataSource = objDataContext.Orders;
listView1.DragTargets = new Gizmox.WebGUI.Forms.Component[] { listView2 };
listView2.AllowDrop = true;
listView2.DragDrop += new DragEventHandler(listView2_DragDrop);
}
void listView2_DragDrop(object sender, DragEventArgs e)
{
if (e is DragDropEventArgs)
{
DragDropEventArgs objDragDropEventArgs = e as DragDropEventArgs;if (objDragDropEventArgs.Source is ListView)
{
if (listView1.SelectedItem != null)
{
MessageBox.Show(string.Format("Product {0} dropped on Order {1}",
listView1.SelectedItem.SubItems[0].ToString(),
((ListViewItem)objDragDropEventArgs.TargetMember).SubItems[0].ToString()));
}
}
}}
Write a code that opens Form3 by clicking the other toolBarButton2:
private void toolBar1_Click(object objSource, ToolBarItemEventArgs objArgs)
{
switch (objArgs.ToolBarButton.Name)
{
case "toolBarButton1":
OpenPropertyGrid(listView1);
break;
case "toolBarButton2":
OpenManageOrders();
break;
}
}
private void OpenManageOrders()
{
Form3 objForm3 = new Form3();
objForm3.ShowDialog();
}
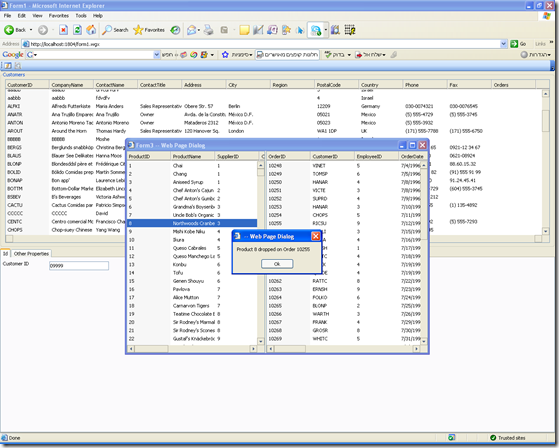
Run the application:
1. Click the second tool-bar button
2. Select a product on the right hand list and drag it on an order on the left hand list.
Gateways - Taking control of the request/response
1. Implement the IGatewayControl in Form1:
public partial class Form1 : Form, IGatewayControl
{
...
}
2. Implement Printing Capability in a new window with an HTML table:
private void PrintList()
{
Link.Open(new GatewayReference(this, "Print"));
}#region IGatewayControl Members
IGatewayHandler IGatewayControl.GetGatewayHandler(IContext objContext, string strAction)
{
if (strAction == "Print")
{
StringBuilder objCode = new StringBuilder("<body onload='window.print()'><table border='1'><tr>");
foreach (ColumnHeader objColumn in listView1.Columns)
{
objCode.AppendFormat("<td>{0}</td>", objColumn.Label);
}
objCode.Append("</tr>");foreach (ListViewItem objItem in listView1.Items)
{
objCode.Append("<tr>");
foreach (ListViewItem.ListViewSubItem objSubItem in objItem.SubItems)
{
objCode.AppendFormat("<td>{0} </td>", objSubItem.Text);
}
objCode.Append("</tr>");
}
objCode.Append("</table></body>");objContext.HttpContext.Response.Write(objCode.ToString());
}
return null;
}#endregion
3. Create a 3rd toolbar button which invokes the PrintList() method:
private void toolBar1_Click(object objSource, ToolBarItemEventArgs objArgs)
{
switch (objArgs.ToolBarButton.Name)
{
case "toolBarButton1":
OpenPropertyGrid(listView1);
break;
case "toolBarButton2":
OpenManageOrders();
break;
case "toolBarButton3":
PrintList();
break;
}
}
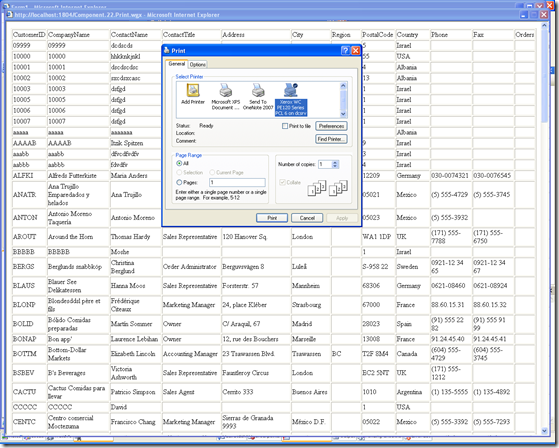
Run the application and click on Print List new toolbar button:
You may download the VS2008 application code here and the web cast's MS Power Point presentation here.


