INSTALLATION AND CONFIGURATION OF E-MAIL ROUTER FOR CRM 2011 ONLINE
Before you run the installer make sure you’re:
· Installing the router on a Windows 7 32-bit (you’d need the 32-bit E-mail Router version in this case) or 64-bit system, or Windows Server 2008 64-bit system
· Logged in as a Domain User and have Administrator privileges
INSTALLATION
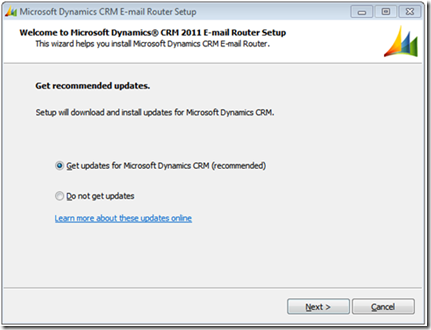
1) Run the SetupEmailRouter.exe. You’ll be prompted to choose between getting the latest updates for Dynamics CRM or install it as it is. Select “Get Updates” and click “Next”.
2) Next step is License Agreement. Please read it carefully and check “I accept”.
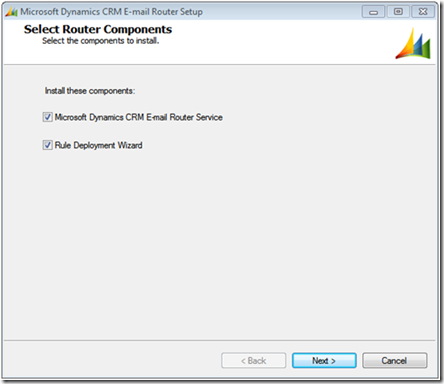
3) You’re now asked to select the components you’d like to install: Dynamics CRM Router Service and Rule Deployment Wizard (the last one gives you the chance to apply mailbox forwarding rules, so it’s recommended to select it as well).
4) Specify the destination folder where the router will be installed.
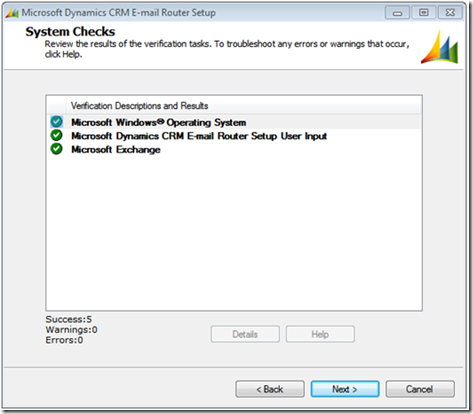
5) The system will check that everything is correct and ready for installation to continue. (Note that if you’ve selected the Rule Deployment Wizard component in step 3 you need to have the Microsoft Exchange Server Messaging API installed, otherwise the system won’t let you go forward)
6) A review is displayed with the options you selected. Click “Install” to finish the installation and proceed to configure it.
CONFIGURATION
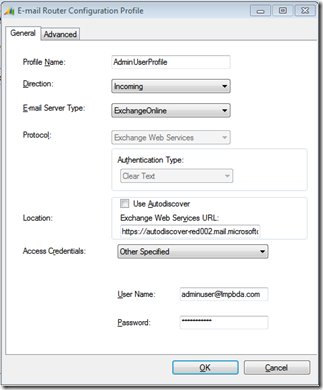
1) Start the E-mail Router Configuration Manager. First thing you need to do is to create a new Incoming Profile in Configuration Profiles tab.
Profile Name: Anything you like and can identify later.
Direction: Select Incoming.
Email Server Type: The Exchange Server type your organization is currently using.
Protocol and Authentication Type: The protocol and authentication type your Exchange Server uses. In this case (Exchange Online) there are no further options to choose from.
Location: The Exchange Online web server URL of your organization.
Access credentials: Select “Other Specified” and enter the credentials of an Exchange Server active account.
(Note: Unless you intend to use a different port other than the default one, the “Advanced” tab doesn’t need any changes or configuration)
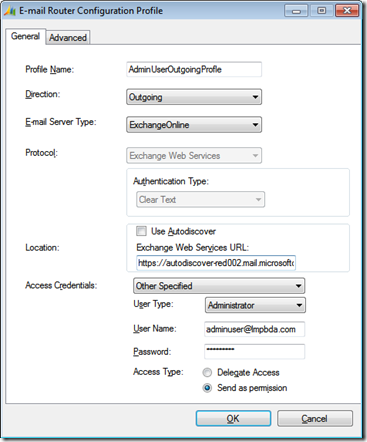
2) Now follow the same procedure to create an Outgoing Profile with some minor differences:
Direction: Select Outgoing.
Access Credentials: Select Administrator for user type.
Access Type: If you select “Delegate Access” e-mails will be sent displaying “Sent on behalf of (CRM User)” as the sender. If you chose “Send as permission” emails will be presented as if sent by the CRM user itself.
(Note: Remember to always publish your changes before going any further)
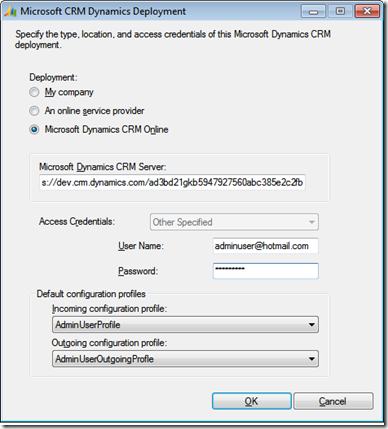
3) In “Deployments” tab create a new deployment.
Deployment: Microsoft Dynamics CRM Online.
Dynamics CRM Server: Replace <Organization Name> with your organization’s unique name (can be found in Settings\Customizations\Developer Resources).
Access Credentials: Select “Other Specified” and enter the credentials of a valid CRM user.
Default Configuration Profiles: Select the Incoming and Outgoing profiles you created before.
4) In the last tab, “Users, Queues and Mailboxes”, select the appropriate deployment (in case you’ve created more than one) and click “Load data”. It’ll display the users enabled to use the E-mail Router (you must enable first this option for each user in your organization or they won’t have access to it)
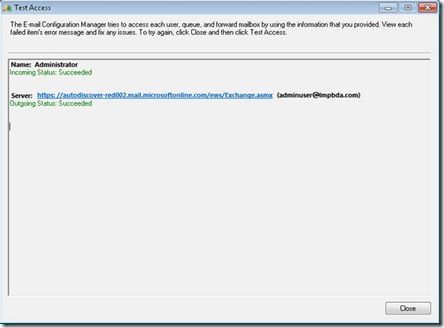
5) Finally click on “Test Access” to be sure everything works correctly. You should get “Succeeded” confirmation.
Nico V.
UruIT Dynamix www.uruitdynamix.com
