Binding multiple websites to HTTPS on your development machine
On your development machine you can use host headers to bind to different websites within IIS, allowing you to host multiple websites on a single development machine (you can do this too in production but this article is focusing on the development environment).
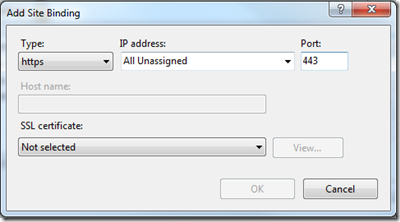
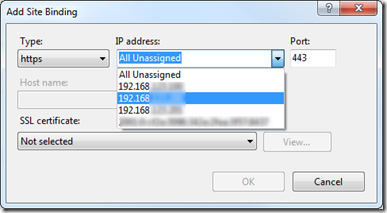
Host headers work only with HTTP since IIS is not able to see the host header information in an HTTPS request until it reaches the website so it would not know which site to bind to. For this reason, IIS does not allow you to specify a host header when setting up an HTTPS binding:
When you select the Binding Type of HTTPS, then the Host name box is disabled.
You then have two other choices to allow multiple websites on your development IIS environment to both run with HTTPS. You can either vary the Port or the IP Address between the two. Changing the Port is not desirable because this would usually mean extra code to make sure a special port number was used in requests (and then would not match a production environment). So this leaves you with IP address.
Most development machines have only a single network card and therefore, by default, a single IP address. So only having one IP address will not help you run more than one site under SSL.
But hidden within the Network Connection properties dialog is a way to specify a second (or third) IP address for your development machine; which is exactly what is needed to allow multiple websites to use SSL on your development machine.
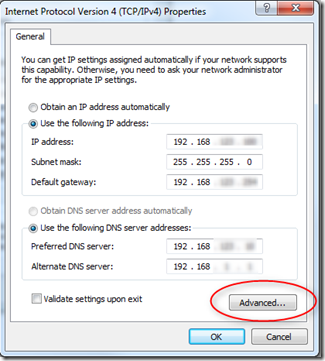
Go to Control Panel > Network and Sharing Center > Change adapter settings (or just get to the properties of your Network Adapter).
Here is where you will see the primary IP address for your machine (either it will be as above if you have a static IP address, or more likely you have a dynamic IP address and then both of the Obtain IP address and DNS server automatically options will be selected. But there is a way to add a second (or third) IP address. Just click that Advanced button in the lower right.
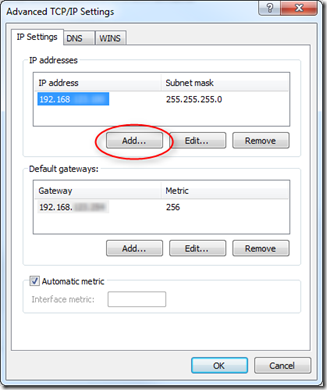
Now click the Add… button where you will be able to add a static IP address (you will need a static IP address to be able to do this).
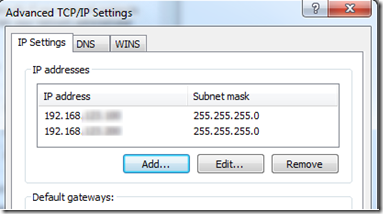
OK your way out and now your machine will have two IP addresses.
Returning back to the IIS Add Site Binding dialog and now in the IP Address drop down you will see your second IP address (or in the case of the screenshot below a third too).
Just choose one of these IP addresses for one site and the other for the other site that you also want to allow HTTPS (SSL) requests on.
Now there is one last thing to take care of and that is to make sure the request to this site is resolving to the correct IP address. In most cases, if you are using host headers to host multiple websites on your development machine, then you have entered entries into your Hosts file using the local loopback IP address 127.0.0.1. But now you will need to make sure you change these to the IP addresses that you specified for that particular website.
You can confirm that the host header is resolving to the correct IP address by pinging that host header.
