jQuery UI Accordion in ASP.NET – Client side implementation (Part 1)
Accordion is a well-known web control that allows you to have multiple web panes and display them one at a time. It’s like having several ASP.NET panels in one website and are dependant on each other so that only one panel is shown at a time while other are collapsed. If you are familiar with the jQuery UI, you probably already know about jQuery UI Accordion which exactly gives you the same ability what I’ve described previously.
In this blog, you will see how you can implement accordion and feed the accordion with data directly served from database using ASP.NET Web Services.
First, lets create a client-side accordion feature using jQuery UI and jQuery Theming.
For those that don’t know,
jQuery UI provides abstractions for low-level interaction and animation, advanced effects and high-level, themeable widgets, built on top of the jQuery JavaScript Library, that you can use to build highly interactive web applications.
from jQuery UI Website
jQuery UI library is also hosted on the Microsoft CDN (Content Delivery Network), so you can reference it directly from there and you won’t need to host the scripts inside your local project ;).
First, lets create simple ASPX Website, call it Accordion.aspx
Once you’ve created it, add the following two scripts:
<script type="text/javascript" src="http://ajax.aspnetcdn.com/ajax/jquery.ui/1.8.6/jquery-ui.js"></script>
Both scripts are from the Microsoft CDN. The first script is the latest jQuery Core Library version available in Microsoft CDN, while the second script is the latest jQuery UI Library version.
Now, lets create sample HTML page inside our Accordion.aspx page with the following structure:
<h3><a href="#">Product 1</a></h3>
<div>
<!-- text will go here -->
</div>
<h3><a href="#">Product 2</a></h3>
<div>
<!-- text will go here -->
</div>
<h3><a href="#">Product 3</a></h3>
<div>
<!-- text will go here -->
</div>
</div>
As you can see, its simple HTML page which have one main div with id #products and style with defined width of 500 pixels. Of course you can change it as you prefer for yourself.
Now, lets add the accordion required jQuery code in order to make this work as an accordion control.
In the <head> of the <html> right after the jQuery Core Library and jQuery UI Library script tags, add the following code:
$(function () {
$("#products").accordion();
});
</script>
As you can see, I’ve added the #products ID to be created as an Accordion. inside the accordion. I’ve set it like this, firstly we will load some HTML. Here is the complete HTML so far:
<html xmlns="http://www.w3.org/1999/xhtml">
<head runat="server">
<title>jQuery Accordion</title>
<script type="text/javascript" src="http://ajax.aspnetcdn.com/ajax/jquery/jquery-1.4.4.js"></script>
<script type="text/javascript" src="http://ajax.aspnetcdn.com/ajax/jquery.ui/1.8.6/jquery-ui.js"></script>
<script language="javascript" type="text/javascript">
$(function () {
$("#products").accordion();
});
</script>
</head>
<body>
<form id="form1" runat="server">
<div id="products" style="width:500px;">
<h3><a href="#">Product 1</a></h3>
<div>
<p>
Lorem ipsum dolor sit amet, consectetur adipiscing elit. Phasellus in tortor metus, a aliquam dui.
Mauris euismod lorem eget nulla semper semper. Vestibulum pretium rhoncus cursus. Vestibulum rhoncus,
magna sit amet fermentum fringilla, nunc nisl pellentesque libero, nec commodo libero ipsum a tellus.
Maecenas sed varius est. Sed vel risus at nisi imperdiet sollicitudin eget ac orci. Duis ac tristique sem.
</p>
</div>
<h3><a href="#">Product 2</a></h3>
<div>
<p>
Aliquam pretium scelerisque nisl in malesuada. Proin dictum elementum rutrum.
Etiam eleifend massa id dui porta tincidunt. Integer sodales nisi nec ligula lacinia tincidunt vel in purus.
Mauris ultrices velit quis massa dignissim rhoncus. Proin posuere convallis euismod.
Vestibulum convallis sagittis arcu id faucibus.
</p>
</div>
<h3><a href="#">Product 3</a></h3>
<div>
<p>
Quisque quis magna id nibh laoreet condimentum a sed nisl. In hac habitasse platea dictumst.
Proin sem eros, dignissim sed consequat sit amet, interdum id ante.
Ut id nisi in ante fermentum accumsan vitae ut est.
Morbi tellus enim, convallis ac rutrum a, condimentum ut turpis.
Proin sit amet pretium felis.
</p>
<ul>
<li>List item one</li>
<li>List item two</li>
<li>List item three</li>
</ul>
</div>
</div>
</form>
</body>
</html>
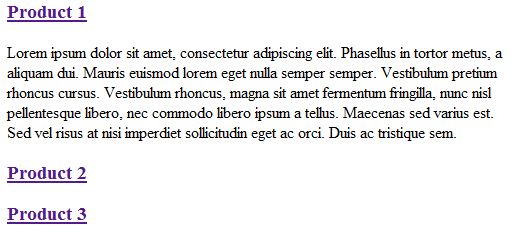
Ok. You can see that I’ve added some custom text just for testing purpose.
The result is as follows:

If you click on the headers, it will slide down and up, depending which header you click.
Now, lets apply style to the accordion.
You can use the jQuery ThemeRoller to create your own custom style, or you can chose some already defined nice styles from the Microsoft CDN.
Then, reference the CSS in your head of the ASPX page.
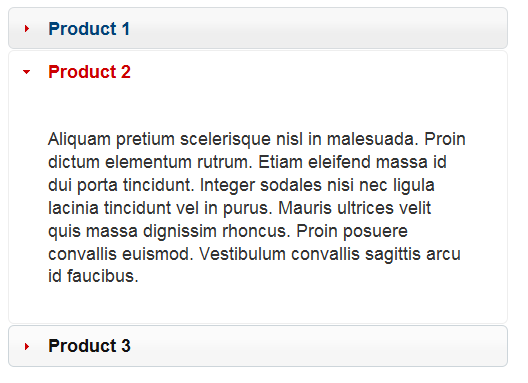
I’ve chosen the Blitzer style from the Microsoft CDN and I’ve referenced it like this
Now, if I run my website, here is how my Accordion look like:

So far so good. We’ve implemented the client-side accordion.
In the next blog you will see how to feed the accordion with data directly retrieved from database using ASP.NET WebForms.
Hope you liked it.
Regards,
Hajan