DotNetStories

I have been involved with a ASP.Net project recently and I have implemented using the awesome DevExpress ASP.Net controls.
In this post I will show you how to implement Master-Detail functionality using the ASPxGridView control.
If you want to implement this example you need to download the trial version of these controls unless you are a licensed holder of DevExpress products.
We will need a database to work with.I will use the AdventureWorkLT database. If you need the installation scripts for the sample AdventureWorkLT database, click here
Ι will use the ProductCategory and the Product tables the database that are related through the ProductCategoryID.The relationship is one to many.
We will need an instance of SQL Server running in our machine.You can download and install the free SQL Server Express edition from here.
1) Launch Visual Studio 2010 (express edition will work fine). Create a new empty website and choose a suitable name for it. Choose C# as the development language.
2) Add a new item to your site, a web form. Leave the default name, Default.aspx
3) Drag and drop a ASPxGridView control on the form.Leave the default name. I am using the latest build from DevEpress which is 11.2.11
4) Click the ASPxGridView's Smart Tag and select "Select Choose Data Source".From the drop-down list, select New Data Source to srart with the Data Source Configuration Wizard. From the available option select Database and leave the default data source name SqlDataSource1.Then click OK
5) In the Choose Your Data Connection window, click the New Connection button.In the Add Connection window,select your server name and the AdventureWorksLT database.Test your connection and if it works click OK.Then click Next.In the next step leave the default name for connection string name in the configuration file.Click Next.
6) In the Configure the Select Statement select the ProductCategory table and select the * check box for a Select * query.Click Next.Click Test Query and then the Finish button.
7) Click the ASPxGridView's Smart Tag and from the available options choose AutoFormat and select the SoftOrange theme.
8) Drag and drop another ASPxGridView control on the form.Leave the default name.
9) Click the ASPxGridView's Smart Tag and select "Select Choose Data Source".From the drop-down list, select New Data Source to start with the Data Source Configuration Wizard. From the available option select Database and leave the default data source name SqlDataSource2.Then click OK.
10) In the Choose Your Data Connection window, select the (AdventureWorksLTConnectionString). Click Next.
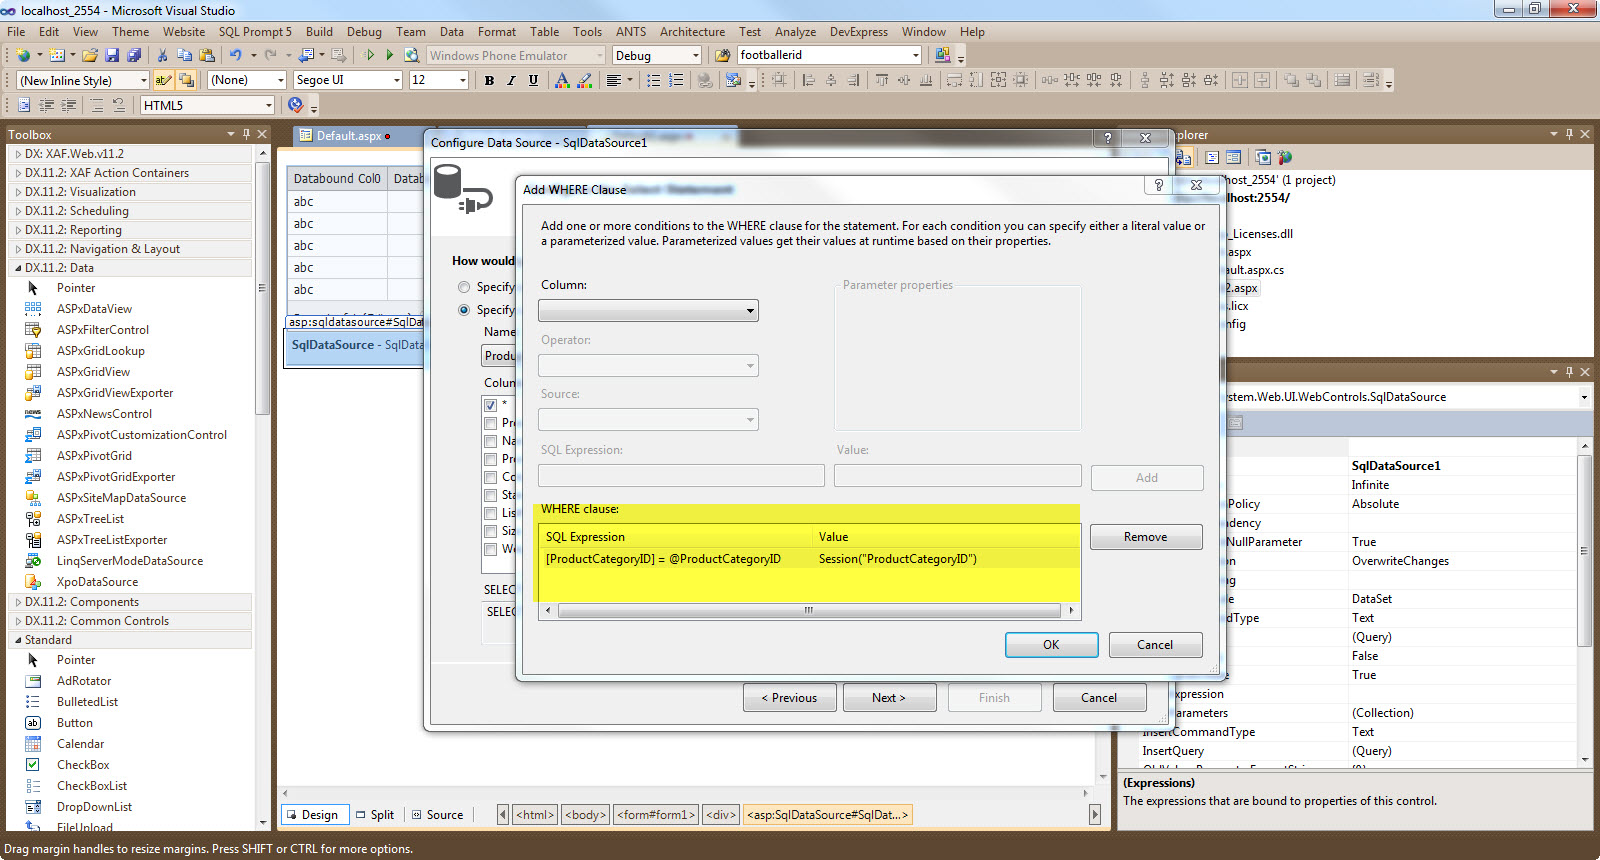
11) In the Configure the Select Statement select the Product table and select the * check box for a Select * query.Click the WHERE button to configure the WHERE clause to get the ProductCategoryID from a Session variable.
Have a look at the picture below to see the actual settings
12) Click OK,Next and Finish.
13) Choose the first AspxGridView control ( master grid - ASPxGridView1 ). Click the ASPxGridView1's Smart Tag and from the available options,choose Edit Template.
Pick the DetailRow template and drag and drop inside it, the detail grid - ASPxGridView2.
14) Change the SettingsDetail property for the master grid - ASPxGridView1, change the ShowDetailRow to True.
15) Then we need to type the only code we have to in order to implement the master-detail implementation.We need to add a BeforePerformDataSelect event handling routine for the detail grid - ASPxGridView2. The code follow
    protected void ASPxGridView2_BeforePerformDataSelect(object sender, EventArgs e)
    {
Session["ProductCategoryID"] = (sender as ASPxGridView).GetMasterRowKeyValue();
    }
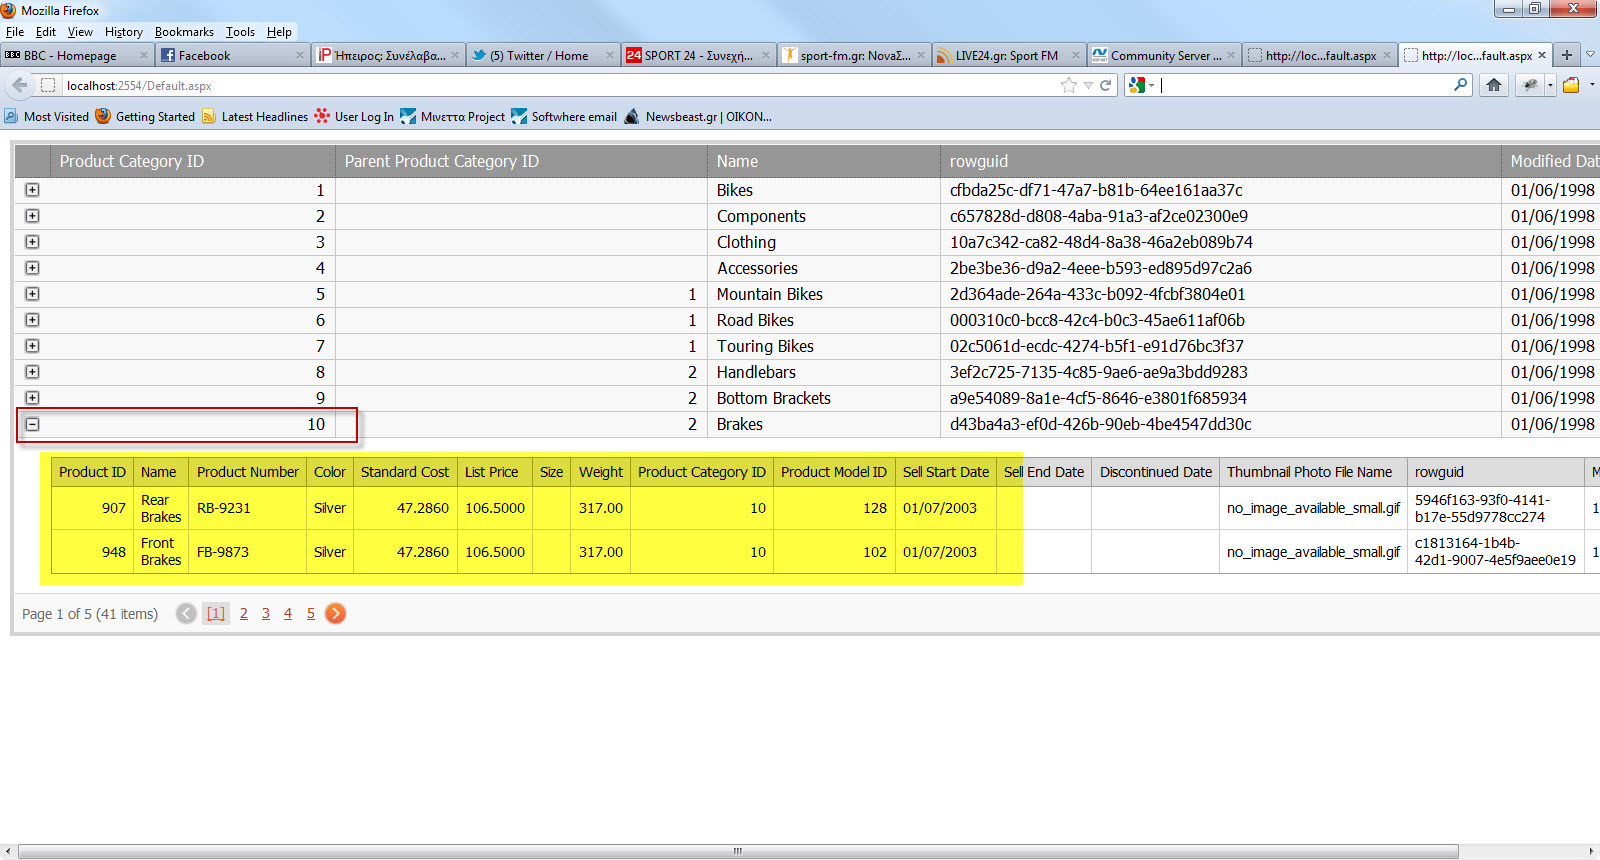
16) Build and run your application. You have a master - detail implementation with very little code. Have a look at the picture below.
Hope it helps!!!!!