Contents tagged with Visual Studio
-
Getting Started with ASP.NET MVC 3, Logging, and Depency Injection
I started a new ASP.NET MVC project recently and wanted to give you a little insight on kicking off new projects. There’s some setup time you want to spend setting up your solution and getting the plumbing in order before you dive into writing unit tests and building out your site.
For a full on, blow my mind, ultimate guide you *have* to go watch Rob Conery and his 90 minute walkthrough of setting up his MVC projects. I’ve watched this video a few times and Rob is awesome and knows his stuff. The tips he gives are gold. You can also check out the MVC 3 Starter Kit on CodePlex which is based on his MVC 2 Starter code but I found it was lacking a few features. In any case, go watch his video for the full meal deal either here on YouTube or here on TekPub. This post is just a mere shadow of his work but updates the use of Ninject with MVC 3.
Okay, so we’re going to be doing some simple plumbing to get this going. We’ll put together the Hello World MVC 3 app, add in a logging system, and plumb in dependency injection in just a few minutes.
You’ll need Visual Studio 2010 with MVC 3 and NuGet installed. You can get MVC 3 from the main site here. Next install NuGet from here. The MVC 3 framework is obviously needed (Visual Studio 2010 only comes with MVC 2 out of the box) and NuGet is used to install our additional libraries (trust me, if you haven’t used NuGet before it will blow your mind).
First steps is to build a new MVC 3 app. File > New Project. Then select Visual C# > Web > ASP.NET MVC 3 Application and give it a name.

Click OK and you’ll see the options dialog for a new MVC 3 Application.

Pick Internet application as it will work for most everyone (Windows authentication works fine too but for this post it’s just easier to go with Internet). Let’s choose Razor for the view engine (ASPX is so 2011) and use HTML 5 markup (hey, it’s just a demo). We won’t create a unit test project but in a real project you’ll create one (or create a class library separately so you can use other unit testing frameworks).
We’re creating a project based on the template to give us a controller as we’ll inject our dependency into it later, otherwise we would have to create those. In a real project we might start with an empty template and create our own controllers from scratch (again, demo land, remember?).
Once you do that you’ll be at the Hello World project of the MVC world.

Okay, now we’re going to install two NuGet packages, Ninject and NLog. Ninject is an open source dependency injection framework and makes working with external dependencies (like infrastructure and services) a breeze. NLog is a free logging solution for .NET and allows you to write anything to almost any target including files, event logs, web services, mail, forms. You name it, it can write to it. I was using log4net for all my projects but lately I’ve switched over to NLog. It’s super-simple to use and highly flexible. Did I mention it’s available as a NuGet package?
Right click on the References in your project and choose Manage NuGet Packages…

Make sure you’re looking at the Online packages (sometimes the dialog will open up to installed packages or updatable ones). Type in “nlog” into the search box and you’ll see the filtered search results. Choose NLog Configuration from the options. If you already had a log configuration file you can just choose NLog to install the logger but since we’re starting from scratch we need a config file to start with. Selecting NLog Configuration and you’ll see it has a dependency on NLog so you can just install the one package which installs a starter config file and then drags along the library with it. Easy.

Once you’ve installed NLog you can enter “ninject” in the search box. This will bring up a list of packages for the dependency injection library Ninject by Nate Kohari. You’ll want to install the Ninject.MVC3 package by Remo Gloor and Ian Davis. This package will install Ninject itself and the extensions for MVC 3 (along with the bootstrapper for web projects. Ninject requires you to review and accept the license agreement before it will install so go ahead and do that.
Two packages and all of their dependencies but you’re now only a few minutes (yes, minutes) away from dependency injection heaven and MVC 3.
The first thing we’re going to do is create an interface that will be our logging system. We have a logger (NLog) but that’s an implementation and while we could scatter NLog statements all over the place, we would be tied directly to that library. If we decided to phase out NLog and replace it with another library (such as how I’ve shifted from log4net to NLog) we would have to go through everywhere in our code and replace the NLog calls with the next best thing.
This the one of the principles of dependency injection, abstraction, and SOLID. Creating an abstraction of an implementation to code against without tying ourselves to any one system (so to speak). At the end of the day we’ll still be calling into NLog functions but we’ll be doing it through an implementation class via our interface.
The other key thing about this approach is that we we can mock or stub out the actual implementation of our logger for unit testing. You can really do that (very well) with concrete implementations. Imagine having to start up a database, file system logger, and the Windows Event log service just to unit test some business code.
In addition to being able to test our code, we can also code to interfaces meaning that we don’t need the actual implementation until it comes time to actually perform the work. For example the project I’m currently working on is going to require to call out to web services and databases. These components are not built yet and won’t be for another month or so. I don’t want to halt the development of my app so I create service interfaces and repositories that will abstract these away from my system, allowing me to build a fully working (and tested) system (which just happens to use hard coded values for now). Later when those services appear I just build an implementation to talk to them and voila, my system is still working exactly the way it does today.
Okay, enough talk. Here’s the interface for our logging system. I’m borrowing from Rob’s approach by creating a folder called Infrastructure with a subfolder called Logging. In it I’ll create an ILogger interface that will let me write an information message (most logging systems have various levels of logging like Information, Warning, Errors, etc.)

And here’s my ILogger interface:
1: namespace MvcStarter.Infrastructure.Logging
<pre style="border-bottom-style: none; text-align: left; padding-bottom: 0px; line-height: 12pt; background-color: #f4f4f4; margin: 0em; border-left-style: none; padding-left: 0px; width: 100%; padding-right: 0px; font-family: 'Courier New', courier, monospace; direction: ltr; border-top-style: none; color: black; border-right-style: none; font-size: 8pt; overflow: visible; padding-top: 0px"><span style="color: #606060" id="lnum2"> 2:</span> {</pre><pre style="border-bottom-style: none; text-align: left; padding-bottom: 0px; line-height: 12pt; background-color: white; margin: 0em; border-left-style: none; padding-left: 0px; width: 100%; padding-right: 0px; font-family: 'Courier New', courier, monospace; direction: ltr; border-top-style: none; color: black; border-right-style: none; font-size: 8pt; overflow: visible; padding-top: 0px"><span style="color: #606060" id="lnum3"> 3:</span> <span style="color: #0000ff">public interface</span> ILogger</pre><pre style="border-bottom-style: none; text-align: left; padding-bottom: 0px; line-height: 12pt; background-color: #f4f4f4; margin: 0em; border-left-style: none; padding-left: 0px; width: 100%; padding-right: 0px; font-family: 'Courier New', courier, monospace; direction: ltr; border-top-style: none; color: black; border-right-style: none; font-size: 8pt; overflow: visible; padding-top: 0px"><span style="color: #606060" id="lnum4"> 4:</span> {</pre><pre style="border-bottom-style: none; text-align: left; padding-bottom: 0px; line-height: 12pt; background-color: white; margin: 0em; border-left-style: none; padding-left: 0px; width: 100%; padding-right: 0px; font-family: 'Courier New', courier, monospace; direction: ltr; border-top-style: none; color: black; border-right-style: none; font-size: 8pt; overflow: visible; padding-top: 0px"><span style="color: #606060" id="lnum5"> 5:</span> <span style="color: #0000ff">void</span> Info(<span style="color: #0000ff">string</span> message);</pre><pre style="border-bottom-style: none; text-align: left; padding-bottom: 0px; line-height: 12pt; background-color: #f4f4f4; margin: 0em; border-left-style: none; padding-left: 0px; width: 100%; padding-right: 0px; font-family: 'Courier New', courier, monospace; direction: ltr; border-top-style: none; color: black; border-right-style: none; font-size: 8pt; overflow: visible; padding-top: 0px"><span style="color: #606060" id="lnum6"> 6:</span> }</pre><pre style="border-bottom-style: none; text-align: left; padding-bottom: 0px; line-height: 12pt; background-color: white; margin: 0em; border-left-style: none; padding-left: 0px; width: 100%; padding-right: 0px; font-family: 'Courier New', courier, monospace; direction: ltr; border-top-style: none; color: black; border-right-style: none; font-size: 8pt; overflow: visible; padding-top: 0px"><span style="color: #606060" id="lnum7"> 7:</span> }</pre>Next we need an implementation. We’ll create one for NLog. This is a simple class that implements ILogger and provides the Info method (along with the setup needed for NLog to work). Here’s the NLogLogger class:
1: using NLog;
<pre style="border-bottom-style: none; text-align: left; padding-bottom: 0px; line-height: 12pt; background-color: #f4f4f4; margin: 0em; border-left-style: none; padding-left: 0px; width: 100%; padding-right: 0px; font-family: 'Courier New', courier, monospace; direction: ltr; border-top-style: none; color: black; border-right-style: none; font-size: 8pt; overflow: visible; padding-top: 0px"><span style="color: #606060" id="lnum2"> 2:</span> </pre><pre style="border-bottom-style: none; text-align: left; padding-bottom: 0px; line-height: 12pt; background-color: white; margin: 0em; border-left-style: none; padding-left: 0px; width: 100%; padding-right: 0px; font-family: 'Courier New', courier, monospace; direction: ltr; border-top-style: none; color: black; border-right-style: none; font-size: 8pt; overflow: visible; padding-top: 0px"><span style="color: #606060" id="lnum3"> 3:</span> <span style="color: #0000ff">namespace</span> MvcStarter.Infrastructure.Logging</pre><pre style="border-bottom-style: none; text-align: left; padding-bottom: 0px; line-height: 12pt; background-color: #f4f4f4; margin: 0em; border-left-style: none; padding-left: 0px; width: 100%; padding-right: 0px; font-family: 'Courier New', courier, monospace; direction: ltr; border-top-style: none; color: black; border-right-style: none; font-size: 8pt; overflow: visible; padding-top: 0px"><span style="color: #606060" id="lnum4"> 4:</span> {</pre><pre style="border-bottom-style: none; text-align: left; padding-bottom: 0px; line-height: 12pt; background-color: white; margin: 0em; border-left-style: none; padding-left: 0px; width: 100%; padding-right: 0px; font-family: 'Courier New', courier, monospace; direction: ltr; border-top-style: none; color: black; border-right-style: none; font-size: 8pt; overflow: visible; padding-top: 0px"><span style="color: #606060" id="lnum5"> 5:</span> <span style="color: #0000ff">public</span> <span style="color: #0000ff">class</span> NLogLogger : ILogger</pre><pre style="border-bottom-style: none; text-align: left; padding-bottom: 0px; line-height: 12pt; background-color: #f4f4f4; margin: 0em; border-left-style: none; padding-left: 0px; width: 100%; padding-right: 0px; font-family: 'Courier New', courier, monospace; direction: ltr; border-top-style: none; color: black; border-right-style: none; font-size: 8pt; overflow: visible; padding-top: 0px"><span style="color: #606060" id="lnum6"> 6:</span> {</pre><pre style="border-bottom-style: none; text-align: left; padding-bottom: 0px; line-height: 12pt; background-color: white; margin: 0em; border-left-style: none; padding-left: 0px; width: 100%; padding-right: 0px; font-family: 'Courier New', courier, monospace; direction: ltr; border-top-style: none; color: black; border-right-style: none; font-size: 8pt; overflow: visible; padding-top: 0px"><span style="color: #606060" id="lnum7"> 7:</span> <span style="color: #0000ff">private</span> Logger _logger;</pre><pre style="border-bottom-style: none; text-align: left; padding-bottom: 0px; line-height: 12pt; background-color: #f4f4f4; margin: 0em; border-left-style: none; padding-left: 0px; width: 100%; padding-right: 0px; font-family: 'Courier New', courier, monospace; direction: ltr; border-top-style: none; color: black; border-right-style: none; font-size: 8pt; overflow: visible; padding-top: 0px"><span style="color: #606060" id="lnum8"> 8:</span> </pre><pre style="border-bottom-style: none; text-align: left; padding-bottom: 0px; line-height: 12pt; background-color: white; margin: 0em; border-left-style: none; padding-left: 0px; width: 100%; padding-right: 0px; font-family: 'Courier New', courier, monospace; direction: ltr; border-top-style: none; color: black; border-right-style: none; font-size: 8pt; overflow: visible; padding-top: 0px"><span style="color: #606060" id="lnum9"> 9:</span> <span style="color: #0000ff">public</span> NLogLogger()</pre><pre style="border-bottom-style: none; text-align: left; padding-bottom: 0px; line-height: 12pt; background-color: #f4f4f4; margin: 0em; border-left-style: none; padding-left: 0px; width: 100%; padding-right: 0px; font-family: 'Courier New', courier, monospace; direction: ltr; border-top-style: none; color: black; border-right-style: none; font-size: 8pt; overflow: visible; padding-top: 0px"><span style="color: #606060" id="lnum10"> 10:</span> {</pre><pre style="border-bottom-style: none; text-align: left; padding-bottom: 0px; line-height: 12pt; background-color: white; margin: 0em; border-left-style: none; padding-left: 0px; width: 100%; padding-right: 0px; font-family: 'Courier New', courier, monospace; direction: ltr; border-top-style: none; color: black; border-right-style: none; font-size: 8pt; overflow: visible; padding-top: 0px"><span style="color: #606060" id="lnum11"> 11:</span> _logger = LogManager.GetCurrentClassLogger();</pre><pre style="border-bottom-style: none; text-align: left; padding-bottom: 0px; line-height: 12pt; background-color: #f4f4f4; margin: 0em; border-left-style: none; padding-left: 0px; width: 100%; padding-right: 0px; font-family: 'Courier New', courier, monospace; direction: ltr; border-top-style: none; color: black; border-right-style: none; font-size: 8pt; overflow: visible; padding-top: 0px"><span style="color: #606060" id="lnum12"> 12:</span> }</pre><pre style="border-bottom-style: none; text-align: left; padding-bottom: 0px; line-height: 12pt; background-color: white; margin: 0em; border-left-style: none; padding-left: 0px; width: 100%; padding-right: 0px; font-family: 'Courier New', courier, monospace; direction: ltr; border-top-style: none; color: black; border-right-style: none; font-size: 8pt; overflow: visible; padding-top: 0px"><span style="color: #606060" id="lnum13"> 13:</span> </pre><pre style="border-bottom-style: none; text-align: left; padding-bottom: 0px; line-height: 12pt; background-color: #f4f4f4; margin: 0em; border-left-style: none; padding-left: 0px; width: 100%; padding-right: 0px; font-family: 'Courier New', courier, monospace; direction: ltr; border-top-style: none; color: black; border-right-style: none; font-size: 8pt; overflow: visible; padding-top: 0px"><span style="color: #606060" id="lnum14"> 14:</span> <span style="color: #0000ff">public</span> <span style="color: #0000ff">void</span> Info(<span style="color: #0000ff">string</span> message)</pre><pre style="border-bottom-style: none; text-align: left; padding-bottom: 0px; line-height: 12pt; background-color: white; margin: 0em; border-left-style: none; padding-left: 0px; width: 100%; padding-right: 0px; font-family: 'Courier New', courier, monospace; direction: ltr; border-top-style: none; color: black; border-right-style: none; font-size: 8pt; overflow: visible; padding-top: 0px"><span style="color: #606060" id="lnum15"> 15:</span> {</pre><pre style="border-bottom-style: none; text-align: left; padding-bottom: 0px; line-height: 12pt; background-color: #f4f4f4; margin: 0em; border-left-style: none; padding-left: 0px; width: 100%; padding-right: 0px; font-family: 'Courier New', courier, monospace; direction: ltr; border-top-style: none; color: black; border-right-style: none; font-size: 8pt; overflow: visible; padding-top: 0px"><span style="color: #606060" id="lnum16"> 16:</span> _logger.Info(message);</pre><pre style="border-bottom-style: none; text-align: left; padding-bottom: 0px; line-height: 12pt; background-color: white; margin: 0em; border-left-style: none; padding-left: 0px; width: 100%; padding-right: 0px; font-family: 'Courier New', courier, monospace; direction: ltr; border-top-style: none; color: black; border-right-style: none; font-size: 8pt; overflow: visible; padding-top: 0px"><span style="color: #606060" id="lnum17"> 17:</span> }</pre><pre style="border-bottom-style: none; text-align: left; padding-bottom: 0px; line-height: 12pt; background-color: #f4f4f4; margin: 0em; border-left-style: none; padding-left: 0px; width: 100%; padding-right: 0px; font-family: 'Courier New', courier, monospace; direction: ltr; border-top-style: none; color: black; border-right-style: none; font-size: 8pt; overflow: visible; padding-top: 0px"><span style="color: #606060" id="lnum18"> 18:</span> }</pre><pre style="border-bottom-style: none; text-align: left; padding-bottom: 0px; line-height: 12pt; background-color: white; margin: 0em; border-left-style: none; padding-left: 0px; width: 100%; padding-right: 0px; font-family: 'Courier New', courier, monospace; direction: ltr; border-top-style: none; color: black; border-right-style: none; font-size: 8pt; overflow: visible; padding-top: 0px"><span style="color: #606060" id="lnum19"> 19:</span> }</pre>We create a private variable of type NLog.Logger and create it in our constructor using the LogManager from NLog. Then to write using NLog we just call the Info method on the class, passing it our message.
There are a lot of other methods we can call and add to our interface so later maybe we’ll extend that but this is enough to get you started.
One more thing is that the default config file that was installed with the package is just that, blank. You need to tell it at least what target to use and what rules to apply to each target. The entire config file is documented online but you can just uncomment the sample implementation. Make sure to match up the logger rule (Trace in the config file) with your method you’re calling in the implementation. I just changed the minLevel of the NLog config file from Trace to Info to match our code.
That’s all you need to have logging working but how do we call it? And how does Ninject fit in?
Back when we installed Ninject it created a file for us. Go back to your project and check out the App_Start folder. Expand it and you’ll see a new file there called NinjectWebCommon.cs

This sucker is responsible for kickstarting Ninject for you. If you watched Rob’s video or saw some tutorials on the net they talk about changing the base HttpApplication to a Ninject one. That’s one approach but with MVC 3 and the NuGet package this way is much simpler. There’s nothing for you to do except tell Ninject what dependencies you want to deal with and how to resolve them.
Open up NinjectWebCommon.cs and scroll down to the RegisterServices method. This is where you’ll specify you own interfaces and concrete classes so Ninject can do it’s magic.
With a single line we’re going to tell Ninject this:
1: /// <summary>
<pre style="border-bottom-style: none; text-align: left; padding-bottom: 0px; line-height: 12pt; background-color: #f4f4f4; margin: 0em; border-left-style: none; padding-left: 0px; width: 100%; padding-right: 0px; font-family: 'Courier New', courier, monospace; direction: ltr; border-top-style: none; color: black; border-right-style: none; font-size: 8pt; overflow: visible; padding-top: 0px"><span style="color: #606060" id="lnum2"> 2:</span> <span style="color: #008000">/// Load your modules or register your services here!</span></pre><pre style="border-bottom-style: none; text-align: left; padding-bottom: 0px; line-height: 12pt; background-color: white; margin: 0em; border-left-style: none; padding-left: 0px; width: 100%; padding-right: 0px; font-family: 'Courier New', courier, monospace; direction: ltr; border-top-style: none; color: black; border-right-style: none; font-size: 8pt; overflow: visible; padding-top: 0px"><span style="color: #606060" id="lnum3"> 3:</span> <span style="color: #008000">/// </summary></span></pre><pre style="border-bottom-style: none; text-align: left; padding-bottom: 0px; line-height: 12pt; background-color: #f4f4f4; margin: 0em; border-left-style: none; padding-left: 0px; width: 100%; padding-right: 0px; font-family: 'Courier New', courier, monospace; direction: ltr; border-top-style: none; color: black; border-right-style: none; font-size: 8pt; overflow: visible; padding-top: 0px"><span style="color: #606060" id="lnum4"> 4:</span> <span style="color: #008000">/// <param name="kernel">The kernel.</param></span></pre><pre style="border-bottom-style: none; text-align: left; padding-bottom: 0px; line-height: 12pt; background-color: white; margin: 0em; border-left-style: none; padding-left: 0px; width: 100%; padding-right: 0px; font-family: 'Courier New', courier, monospace; direction: ltr; border-top-style: none; color: black; border-right-style: none; font-size: 8pt; overflow: visible; padding-top: 0px"><span style="color: #606060" id="lnum5"> 5:</span> <span style="color: #0000ff">private</span> <span style="color: #0000ff">static</span> <span style="color: #0000ff">void</span> RegisterServices(IKernel kernel)</pre><pre style="border-bottom-style: none; text-align: left; padding-bottom: 0px; line-height: 12pt; background-color: #f4f4f4; margin: 0em; border-left-style: none; padding-left: 0px; width: 100%; padding-right: 0px; font-family: 'Courier New', courier, monospace; direction: ltr; border-top-style: none; color: black; border-right-style: none; font-size: 8pt; overflow: visible; padding-top: 0px"><span style="color: #606060" id="lnum6"> 6:</span> {</pre><pre style="border-bottom-style: none; text-align: left; padding-bottom: 0px; line-height: 12pt; background-color: white; margin: 0em; border-left-style: none; padding-left: 0px; width: 100%; padding-right: 0px; font-family: 'Courier New', courier, monospace; direction: ltr; border-top-style: none; color: black; border-right-style: none; font-size: 8pt; overflow: visible; padding-top: 0px"><span style="color: #606060" id="lnum7"> 7:</span> kernel.Bind<ILogger>().To<NLogLogger>().InSingletonScope();</pre><pre style="border-bottom-style: none; text-align: left; padding-bottom: 0px; line-height: 12pt; background-color: #f4f4f4; margin: 0em; border-left-style: none; padding-left: 0px; width: 100%; padding-right: 0px; font-family: 'Courier New', courier, monospace; direction: ltr; border-top-style: none; color: black; border-right-style: none; font-size: 8pt; overflow: visible; padding-top: 0px"><span style="color: #606060" id="lnum8"> 8:</span> } </pre>What are we saying here? Simple. We’re telling Ninject to:
- Whenever you see the ILogger interface needed (e.g. passed into a constructor of a class)
- Resolve to the NLogLogger class
- Make it a singleton (i.e. only do it once and reuse it over and over again)
We’re making our logger a singleton because we don’t need to start NLog every time we want to log a message. You can also specify other scopes (like by thread or on demand) but for logging a singleton works.
Oh yeah, that’s it to hook up your dependency injection engine. And logging is ready to go.
Let’s give it a whirl. Crack open the HomeController class and add a constructor that takes in an ILogger interface then using that interface, write out a message when the Index method is called (i.e. our home page is visited). Here’s the modified HomeController class:
1: using System.Web.Mvc;
<pre style="border-bottom-style: none; text-align: left; padding-bottom: 0px; line-height: 12pt; background-color: #f4f4f4; margin: 0em; border-left-style: none; padding-left: 0px; width: 100%; padding-right: 0px; font-family: 'Courier New', courier, monospace; direction: ltr; border-top-style: none; color: black; border-right-style: none; font-size: 8pt; overflow: visible; padding-top: 0px"><span style="color: #606060" id="lnum2"> 2:</span> <span style="color: #0000ff">using</span> MvcStarter.Infrastructure.Logging;</pre><pre style="border-bottom-style: none; text-align: left; padding-bottom: 0px; line-height: 12pt; background-color: white; margin: 0em; border-left-style: none; padding-left: 0px; width: 100%; padding-right: 0px; font-family: 'Courier New', courier, monospace; direction: ltr; border-top-style: none; color: black; border-right-style: none; font-size: 8pt; overflow: visible; padding-top: 0px"><span style="color: #606060" id="lnum3"> 3:</span>  </pre><pre style="border-bottom-style: none; text-align: left; padding-bottom: 0px; line-height: 12pt; background-color: #f4f4f4; margin: 0em; border-left-style: none; padding-left: 0px; width: 100%; padding-right: 0px; font-family: 'Courier New', courier, monospace; direction: ltr; border-top-style: none; color: black; border-right-style: none; font-size: 8pt; overflow: visible; padding-top: 0px"><span style="color: #606060" id="lnum4"> 4:</span> <span style="color: #0000ff">namespace</span> MvcStarter.Controllers</pre><pre style="border-bottom-style: none; text-align: left; padding-bottom: 0px; line-height: 12pt; background-color: white; margin: 0em; border-left-style: none; padding-left: 0px; width: 100%; padding-right: 0px; font-family: 'Courier New', courier, monospace; direction: ltr; border-top-style: none; color: black; border-right-style: none; font-size: 8pt; overflow: visible; padding-top: 0px"><span style="color: #606060" id="lnum5"> 5:</span> {</pre><pre style="border-bottom-style: none; text-align: left; padding-bottom: 0px; line-height: 12pt; background-color: #f4f4f4; margin: 0em; border-left-style: none; padding-left: 0px; width: 100%; padding-right: 0px; font-family: 'Courier New', courier, monospace; direction: ltr; border-top-style: none; color: black; border-right-style: none; font-size: 8pt; overflow: visible; padding-top: 0px"><span style="color: #606060" id="lnum6"> 6:</span> <span style="color: #0000ff">public</span> <span style="color: #0000ff">class</span> HomeController : Controller</pre><pre style="border-bottom-style: none; text-align: left; padding-bottom: 0px; line-height: 12pt; background-color: white; margin: 0em; border-left-style: none; padding-left: 0px; width: 100%; padding-right: 0px; font-family: 'Courier New', courier, monospace; direction: ltr; border-top-style: none; color: black; border-right-style: none; font-size: 8pt; overflow: visible; padding-top: 0px"><span style="color: #606060" id="lnum7"> 7:</span> {</pre><pre style="border-bottom-style: none; text-align: left; padding-bottom: 0px; line-height: 12pt; background-color: #f4f4f4; margin: 0em; border-left-style: none; padding-left: 0px; width: 100%; padding-right: 0px; font-family: 'Courier New', courier, monospace; direction: ltr; border-top-style: none; color: black; border-right-style: none; font-size: 8pt; overflow: visible; padding-top: 0px"><span style="color: #606060" id="lnum8"> 8:</span> <span style="color: #0000ff">private</span> <span style="color: #0000ff">readonly</span> ILogger _logger;</pre><pre style="border-bottom-style: none; text-align: left; padding-bottom: 0px; line-height: 12pt; background-color: white; margin: 0em; border-left-style: none; padding-left: 0px; width: 100%; padding-right: 0px; font-family: 'Courier New', courier, monospace; direction: ltr; border-top-style: none; color: black; border-right-style: none; font-size: 8pt; overflow: visible; padding-top: 0px"><span style="color: #606060" id="lnum9"> 9:</span>  </pre><pre style="border-bottom-style: none; text-align: left; padding-bottom: 0px; line-height: 12pt; background-color: #f4f4f4; margin: 0em; border-left-style: none; padding-left: 0px; width: 100%; padding-right: 0px; font-family: 'Courier New', courier, monospace; direction: ltr; border-top-style: none; color: black; border-right-style: none; font-size: 8pt; overflow: visible; padding-top: 0px"><span style="color: #606060" id="lnum10"> 10:</span> <span style="color: #0000ff">public</span> HomeController(ILogger logger)</pre><pre style="border-bottom-style: none; text-align: left; padding-bottom: 0px; line-height: 12pt; background-color: white; margin: 0em; border-left-style: none; padding-left: 0px; width: 100%; padding-right: 0px; font-family: 'Courier New', courier, monospace; direction: ltr; border-top-style: none; color: black; border-right-style: none; font-size: 8pt; overflow: visible; padding-top: 0px"><span style="color: #606060" id="lnum11"> 11:</span> {</pre><pre style="border-bottom-style: none; text-align: left; padding-bottom: 0px; line-height: 12pt; background-color: #f4f4f4; margin: 0em; border-left-style: none; padding-left: 0px; width: 100%; padding-right: 0px; font-family: 'Courier New', courier, monospace; direction: ltr; border-top-style: none; color: black; border-right-style: none; font-size: 8pt; overflow: visible; padding-top: 0px"><span style="color: #606060" id="lnum12"> 12:</span> _logger = logger;</pre><pre style="border-bottom-style: none; text-align: left; padding-bottom: 0px; line-height: 12pt; background-color: white; margin: 0em; border-left-style: none; padding-left: 0px; width: 100%; padding-right: 0px; font-family: 'Courier New', courier, monospace; direction: ltr; border-top-style: none; color: black; border-right-style: none; font-size: 8pt; overflow: visible; padding-top: 0px"><span style="color: #606060" id="lnum13"> 13:</span> }</pre><pre style="border-bottom-style: none; text-align: left; padding-bottom: 0px; line-height: 12pt; background-color: #f4f4f4; margin: 0em; border-left-style: none; padding-left: 0px; width: 100%; padding-right: 0px; font-family: 'Courier New', courier, monospace; direction: ltr; border-top-style: none; color: black; border-right-style: none; font-size: 8pt; overflow: visible; padding-top: 0px"><span style="color: #606060" id="lnum14"> 14:</span>  </pre><pre style="border-bottom-style: none; text-align: left; padding-bottom: 0px; line-height: 12pt; background-color: white; margin: 0em; border-left-style: none; padding-left: 0px; width: 100%; padding-right: 0px; font-family: 'Courier New', courier, monospace; direction: ltr; border-top-style: none; color: black; border-right-style: none; font-size: 8pt; overflow: visible; padding-top: 0px"><span style="color: #606060" id="lnum15"> 15:</span> <span style="color: #0000ff">public</span> ActionResult Index()</pre><pre style="border-bottom-style: none; text-align: left; padding-bottom: 0px; line-height: 12pt; background-color: #f4f4f4; margin: 0em; border-left-style: none; padding-left: 0px; width: 100%; padding-right: 0px; font-family: 'Courier New', courier, monospace; direction: ltr; border-top-style: none; color: black; border-right-style: none; font-size: 8pt; overflow: visible; padding-top: 0px"><span style="color: #606060" id="lnum16"> 16:</span> {</pre><pre style="border-bottom-style: none; text-align: left; padding-bottom: 0px; line-height: 12pt; background-color: white; margin: 0em; border-left-style: none; padding-left: 0px; width: 100%; padding-right: 0px; font-family: 'Courier New', courier, monospace; direction: ltr; border-top-style: none; color: black; border-right-style: none; font-size: 8pt; overflow: visible; padding-top: 0px"><span style="color: #606060" id="lnum17"> 17:</span> ViewBag.Message = <span style="color: #006080">"Welcome to ASP.NET MVC!"</span>;</pre><pre style="border-bottom-style: none; text-align: left; padding-bottom: 0px; line-height: 12pt; background-color: #f4f4f4; margin: 0em; border-left-style: none; padding-left: 0px; width: 100%; padding-right: 0px; font-family: 'Courier New', courier, monospace; direction: ltr; border-top-style: none; color: black; border-right-style: none; font-size: 8pt; overflow: visible; padding-top: 0px"><span style="color: #606060" id="lnum18"> 18:</span> _logger.Info(<span style="color: #006080">"Home page visited"</span>);</pre><pre style="border-bottom-style: none; text-align: left; padding-bottom: 0px; line-height: 12pt; background-color: white; margin: 0em; border-left-style: none; padding-left: 0px; width: 100%; padding-right: 0px; font-family: 'Courier New', courier, monospace; direction: ltr; border-top-style: none; color: black; border-right-style: none; font-size: 8pt; overflow: visible; padding-top: 0px"><span style="color: #606060" id="lnum19"> 19:</span> <span style="color: #0000ff">return</span> View();</pre><pre style="border-bottom-style: none; text-align: left; padding-bottom: 0px; line-height: 12pt; background-color: #f4f4f4; margin: 0em; border-left-style: none; padding-left: 0px; width: 100%; padding-right: 0px; font-family: 'Courier New', courier, monospace; direction: ltr; border-top-style: none; color: black; border-right-style: none; font-size: 8pt; overflow: visible; padding-top: 0px"><span style="color: #606060" id="lnum20"> 20:</span> }</pre><pre style="border-bottom-style: none; text-align: left; padding-bottom: 0px; line-height: 12pt; background-color: white; margin: 0em; border-left-style: none; padding-left: 0px; width: 100%; padding-right: 0px; font-family: 'Courier New', courier, monospace; direction: ltr; border-top-style: none; color: black; border-right-style: none; font-size: 8pt; overflow: visible; padding-top: 0px"><span style="color: #606060" id="lnum21"> 21:</span>  </pre><pre style="border-bottom-style: none; text-align: left; padding-bottom: 0px; line-height: 12pt; background-color: #f4f4f4; margin: 0em; border-left-style: none; padding-left: 0px; width: 100%; padding-right: 0px; font-family: 'Courier New', courier, monospace; direction: ltr; border-top-style: none; color: black; border-right-style: none; font-size: 8pt; overflow: visible; padding-top: 0px"><span style="color: #606060" id="lnum22"> 22:</span> <span style="color: #0000ff">public</span> ActionResult About()</pre><pre style="border-bottom-style: none; text-align: left; padding-bottom: 0px; line-height: 12pt; background-color: white; margin: 0em; border-left-style: none; padding-left: 0px; width: 100%; padding-right: 0px; font-family: 'Courier New', courier, monospace; direction: ltr; border-top-style: none; color: black; border-right-style: none; font-size: 8pt; overflow: visible; padding-top: 0px"><span style="color: #606060" id="lnum23"> 23:</span> {</pre><pre style="border-bottom-style: none; text-align: left; padding-bottom: 0px; line-height: 12pt; background-color: #f4f4f4; margin: 0em; border-left-style: none; padding-left: 0px; width: 100%; padding-right: 0px; font-family: 'Courier New', courier, monospace; direction: ltr; border-top-style: none; color: black; border-right-style: none; font-size: 8pt; overflow: visible; padding-top: 0px"><span style="color: #606060" id="lnum24"> 24:</span> <span style="color: #0000ff">return</span> View();</pre><pre style="border-bottom-style: none; text-align: left; padding-bottom: 0px; line-height: 12pt; background-color: white; margin: 0em; border-left-style: none; padding-left: 0px; width: 100%; padding-right: 0px; font-family: 'Courier New', courier, monospace; direction: ltr; border-top-style: none; color: black; border-right-style: none; font-size: 8pt; overflow: visible; padding-top: 0px"><span style="color: #606060" id="lnum25"> 25:</span> }</pre><pre style="border-bottom-style: none; text-align: left; padding-bottom: 0px; line-height: 12pt; background-color: #f4f4f4; margin: 0em; border-left-style: none; padding-left: 0px; width: 100%; padding-right: 0px; font-family: 'Courier New', courier, monospace; direction: ltr; border-top-style: none; color: black; border-right-style: none; font-size: 8pt; overflow: visible; padding-top: 0px"><span style="color: #606060" id="lnum26"> 26:</span> }</pre><pre style="border-bottom-style: none; text-align: left; padding-bottom: 0px; line-height: 12pt; background-color: white; margin: 0em; border-left-style: none; padding-left: 0px; width: 100%; padding-right: 0px; font-family: 'Courier New', courier, monospace; direction: ltr; border-top-style: none; color: black; border-right-style: none; font-size: 8pt; overflow: visible; padding-top: 0px"><span style="color: #606060" id="lnum27"> 27:</span> }</pre>We add an ILogger interface to the constructor. This trigger Ninject to figure out what implementation to grab (our NLogLogger one) and create it for us (or reuse it since we told it we wanted a singleton). Then we use that implementation in our Index() method to log a message.
Compile and run the app to visit the home page of your app and you’ll see this in your log:
1: 2012-05-15 19:18:38.8471 INFO Home page visitedThat’s it. You have a logging system you can call anytime (just inject the interface into the class, Ninject will take care of the rest) and your project is setup with dependency injection and you’re ready to go. Now you can just add additional interfaces as you need them.
The awesome thing here is that a) you can now mock or stub out your logging implementation and test it and b) replace that implementation with some other logger any time and your code will still just work.
That’s the power of dependency injection.
As a bonus piece of information, now that you have the dependency injection setup you can use it any time in case you’re in a pinch and don’t need/want to inject the implementation into your class.
Here’s how you can call the logger from your Application_Start method (found in Global.asax.cs) before any controllers are fired up:
1: protected void Application_Start()
<pre style="border-bottom-style: none; text-align: left; padding-bottom: 0px; line-height: 12pt; background-color: #f4f4f4; margin: 0em; border-left-style: none; padding-left: 0px; width: 100%; padding-right: 0px; font-family: 'Courier New', courier, monospace; direction: ltr; border-top-style: none; color: black; border-right-style: none; font-size: 8pt; overflow: visible; padding-top: 0px"><span style="color: #606060" id="lnum2"> 2:</span> {</pre><pre style="border-bottom-style: none; text-align: left; padding-bottom: 0px; line-height: 12pt; background-color: white; margin: 0em; border-left-style: none; padding-left: 0px; width: 100%; padding-right: 0px; font-family: 'Courier New', courier, monospace; direction: ltr; border-top-style: none; color: black; border-right-style: none; font-size: 8pt; overflow: visible; padding-top: 0px"><span style="color: #606060" id="lnum3"> 3:</span> AreaRegistration.RegisterAllAreas();</pre><pre style="border-bottom-style: none; text-align: left; padding-bottom: 0px; line-height: 12pt; background-color: #f4f4f4; margin: 0em; border-left-style: none; padding-left: 0px; width: 100%; padding-right: 0px; font-family: 'Courier New', courier, monospace; direction: ltr; border-top-style: none; color: black; border-right-style: none; font-size: 8pt; overflow: visible; padding-top: 0px"><span style="color: #606060" id="lnum4"> 4:</span>  </pre><pre style="border-bottom-style: none; text-align: left; padding-bottom: 0px; line-height: 12pt; background-color: white; margin: 0em; border-left-style: none; padding-left: 0px; width: 100%; padding-right: 0px; font-family: 'Courier New', courier, monospace; direction: ltr; border-top-style: none; color: black; border-right-style: none; font-size: 8pt; overflow: visible; padding-top: 0px"><span style="color: #606060" id="lnum5"> 5:</span> RegisterGlobalFilters(GlobalFilters.Filters);</pre><pre style="border-bottom-style: none; text-align: left; padding-bottom: 0px; line-height: 12pt; background-color: #f4f4f4; margin: 0em; border-left-style: none; padding-left: 0px; width: 100%; padding-right: 0px; font-family: 'Courier New', courier, monospace; direction: ltr; border-top-style: none; color: black; border-right-style: none; font-size: 8pt; overflow: visible; padding-top: 0px"><span style="color: #606060" id="lnum6"> 6:</span> RegisterRoutes(RouteTable.Routes);</pre><pre style="border-bottom-style: none; text-align: left; padding-bottom: 0px; line-height: 12pt; background-color: white; margin: 0em; border-left-style: none; padding-left: 0px; width: 100%; padding-right: 0px; font-family: 'Courier New', courier, monospace; direction: ltr; border-top-style: none; color: black; border-right-style: none; font-size: 8pt; overflow: visible; padding-top: 0px"><span style="color: #606060" id="lnum7"> 7:</span>  </pre><pre style="border-bottom-style: none; text-align: left; padding-bottom: 0px; line-height: 12pt; background-color: #f4f4f4; margin: 0em; border-left-style: none; padding-left: 0px; width: 100%; padding-right: 0px; font-family: 'Courier New', courier, monospace; direction: ltr; border-top-style: none; color: black; border-right-style: none; font-size: 8pt; overflow: visible; padding-top: 0px"><span style="color: #606060" id="lnum8"> 8:</span> DependencyResolver.Current.GetService<ILogger>().Info(<span style="color: #006080">"Application Started"</span>);</pre><pre style="border-bottom-style: none; text-align: left; padding-bottom: 0px; line-height: 12pt; background-color: white; margin: 0em; border-left-style: none; padding-left: 0px; width: 100%; padding-right: 0px; font-family: 'Courier New', courier, monospace; direction: ltr; border-top-style: none; color: black; border-right-style: none; font-size: 8pt; overflow: visible; padding-top: 0px"><span style="color: #606060" id="lnum9"> 9:</span> }</pre>See that last line? DependencyResolver.Current.GetService will use whatever IoC you have configured and return the implementation of that interface.
Okay, that’s enough to get started. Again, I encourage you to watch Rob’s *entire* video of setting up a new MVC project. Even though the video is for MVC 2, there are still a lot of idea that hold water in MVC 3 and it’s a great learning too (and free too).
Enjoy!
-
Visual Studio Achievements - Remember Kids They're Just For Fun
I followed a neat project for the last couple of months which today became a reality, Visual Studio Achievements. Achievements are something the gaming world are very familiar with. They're milestones of recognition to meet like "Blowing up 30 Enemies with 1 Grenade" or "Destroy a Super Tank playing the Classic Game". There are a lot of sites around the Internet to track them including one dedicated to just XBox 360 ones here.
They're fun and you get a bit of an internal high when you see this on your screen:

The Visual Studio Achievements follows the same idea and, once installed, are based on your activity as you work. Achievements are measured and discovered in the background when you compile. And hey, it's cool and fun to see this after a compile:

However when you look through the list of achievements one thing jumps out to those that try to follow good coding practices. These are certainly not that. In fact if I caught you writing a class with 10 levels of inheritance I would rip you a new one at the next daily stand up that would make even the likes of Gordon Ramsay shake in his knees.
Ahh but you say these are for fun. Yes, yes they are and far from me to be the party pooper. What sparked me to write this blog response is to emphasize F-U-N and not practice. Seriously you won't believe (or maybe you will) how many developers I talked to around me that thought this was a cool thing to install in their work environment.
Wait. Let's think about this for a minute.
-
Install achievemnts add-on in work environment.
-
Do work
-
Get achievment
Okay, the first step is fine. The second step is what we do. The third step? Hang on. Didn't I just say that having 10 levels of inheritance is a bad thing? So if you get the achievement during your daily work it should be a *bad* thing, not something to celebrate.
It's like breaking the build (which we all do at some point and certainly people get ridiculed for it, it's all fun right). Breaking the build is a bad thing but it's a good spin. It means we recognize something went wrong and whatever mechanism you have to let you know (since everyone on the team should get notified) means you get up, rally around, and fix the problem. Good stuff. Build fixed, work continues.
Where's the rallying here? The only thing that will happen is the dev will see the achievement, pat himself on the back and have a chuckle then what? What *should* happen if you installed this and got an achievment should be:
-
Do work
-
Get achievement
-
Chuckle
-
Silently say "Oh shit"
-
Fix problem
-
Lather, Rinse, Repeat
Hopefully this is the case, but again I've asked a few people and they miss the point of the fun aspect here. This shouldn't be something you strive to achieve, the achievements here (as they stand currently) should be something to avoid. In fact it should set of an internal whoop-whoop alarm and cause you to think "What the Hell was I thinking".
Before you dismiss me, I'm all for fun. I'm the guy that has robot zombies and posters of Close Encounters in my cubicle and challenges developers to games of magnetic Angry Birds after stand-up. I'm all that. However I just want people to be aware that this is fun and there might be a message here. Keep focused on good practices and not bad ones. In the game achievement world, we *try* to achieve these tasks. Heck when I get a game and I'm bored I look through the achievements and set myself up to try to accomplish it (mostly failing since I literally suck at almost every game).
However developers should not be looking at these achievements as something they should be striving for (except just to get the achievement and make it onto the site). What would I really like to see? Some actual achievements that developers can strive for and be proud to achieve. How about "Eliminate 10% of the codebase without removing functionality" or "Mock a service and pass 10 unit tests against it" as achievements.
Herein lies the real problem though. Getting the *fun* achievements is easy. They're tangible and simple to measure. How do you measure "good code"? Can you scan code with a computer and determine separation of concern? Or if your code follows SOLID principles or not? Somethings are detectable but most of the good stuff is not. That's the real trick here (and if you figure it out in a system where you can automatically detect it and award and achievment for, all the better).
Like I said, have fun with this addon. It's neat and I applaud the developers for coming up with it. I don't discourage its use but keep in mind what it is and what the message behind it is. Hopefully one day with might have some positive achievements to strive for as well as the fun ones.
-
-
Demystifying the Windows 8 Grid Application
If you’re looking to “re-imagine” your apps on the Windows 8 platform in Metro style you can start with the Grid Application template that’s provided in the Visual Studio 2011 preview.
From Visual Studio choose New Project and select Grid Application under Windows Metro Style in the template tree:

When you start you’ll get a fully blown Windows 8 Metro application, ready to begin filling in with your own content.
How did all that stuff get there and where does it go?
First open up the Sample Data folder in the solution. In there you’ll find a file called SampleDataSource.cs. This contains some sample data to work with and is bound to the Xaml pages in the solution at runtime. You’ll of course replace this with runtime data but the sample helps you visualize your app along with understanding where stuff goes on the screen.
Or does it? The default app is all in Lorem Ipsum speak and while this is great for visualizing a fully populated application, I thought it was a little confusing to know how it fit together. To make it clearer where everything goes I’ve modified the first collection and item in the SampleDataSource.cs calls with more descriptive labels. Here’s a better picture of the GroupedCollectionPage.xaml, the “Home” page in the app:

Note the collection title appears above the group but only the description and category for the item appears for each item. So if you’re relying on users finding things by the item title (maybe it’s the title of a recipe or a newsfeed) then you might want to modify the layout for this to bind the title somewhere. You can get creative for example and overlay the title on top of the image.
And here’s the DetailPage.xaml, what you see when the users clicks on a single item in the collection:

The Collection Title is the prominent title here but it does show the Item Subtitle. Again this might not be the desired location for titles. For example the Item Title is a small item below the image and category. Personally I would swap out the Item Title and Item Subtitle here or even use the Item Title in place of the Collection Title and leave the Item Subtitle alone (removing the Item Title below the image).
There may be some Metro guidelines coming out to help understand the reasoning behind this positioning and maybe my brain isn’t thinking “Metro” just yet, but it doesn’t make a lot of sense to me the way the default locations are.
And here’s the CollectionSummaryPage.xaml, you would navigate to this if you clicked on the Back Arrow in the screen above (next to Collection Title).

Interesting to note with this is that the Collection Content isn’t used here, only the Collection Description. I would probably modify this to include the content or drop that property entirely and just use the description.
You don’t necessarily need to follow all of the structures the default Grid Application layout offers but do keep true to the Metro style and keep things consistent. I urge you strongly to watch Jensen Harris’ keynote on the 8 traits of a Metro app and realize that by using the default setup they give you, you’ll achieve a consistent look to your app that will fit harmoniously within the Windows 8 operating system.
Make more sense now?
Enjoy.
-
Getting Started with PowerConsole
Visual Studio 2010 is quite an improvement over it’s predecessors in many areas. Extensions for Visual Studio is a big thing and gives you the ability to install simple add-ons that interact and work with your solutions and projects, right from within the IDE. If you’re a tool author and haven’t looked into creating your own extensions you should check out this link to get started.
Here’s a funky little extension called PowerConsole that was written by Jianchun Xu at Microsoft. It’s a PowerShell console window that lives inside of the Visual Studio. Rather than just being a dumb shell, it actually ties into the Visual Studio DTE [explain]. This allows you to access parts of Visual Studio itself like your solution, project, files and even code.
First you’ll need to install the console into Visual Sudio. To do this, select Tools > Extension Manager… from the main menu:

Once the Extension Manager dialog appears, select Online Gallery from the left hand navigation:

Enter “powerconsole” in the search box and select PowerConsole from the search results:

Click on the Download button then click Install when the dialog appears:

Some extensions need you to restart Visual Studio after they’re installed. This is one of them. Click on Restart and Visual Studio will shut down and start up again:

Once Visual Studio is restarted you’ll have a new window you can open. A PowerConsole window! Click on View > Other Windows > Power Console (or press Ctrl+W then Ctrl+V) to open it:

Now the fun begins!

With PowerConsole you have access to some of the Visual Studio parts. There’s a built-in variable created for you when PowerConsole loads. Type “$dte” in the PowerConsole and press enter and you’ll see something like this.

$dte is the Microsoft Visual Studio object that will give you access to parts of the system, including your own solutions and files.
Now lets load up a solution to play around with. Here’s a blank ASP.NET MVC 2 app. There are a lot of great things you can do with the $dte variable.
$dte.Solution gives you access to the current solution itself:

Which you can then parse out and extract say the name of each project and it’s type:

The PowerShell Get-Member cmdlet will list all the methods and properties you can access in the $dte object:

How about displaying what edition of Visual Studio you’re running?

This is just a sliver of what this add-on can do. You also get full Intellisense to your files and any cmdlets you install and there’s extensibility too. There are a ton of things you can do with this and all it takes is a little scripting and some imagination!
Check out the PowerConsole site here and give it a try today.
-
Coffee, Code, or Me?
The gauntlet has been thrown down. It's duelling laptops as John Bristowe and I square off at the Kawa Expresso Bar in Calgary this Friday and bring you the Cowtown version of Coffee and Code (with a little Ultimate Fighter Championship thrown in for good measure).
Last month Joey “Accordion Guy” deVilla, a Microsoft Canada Developer Evangelist, realized his vision. It’s called Coffee and Code and basically you sit around a coffee shop, outfitted with computers and a wireless connection, and work all day. Yeah, that’s right. Work all day in a coffee shop always connected to the big series of tubes, never having to serve an double chai latte mocha half fat with whipped cream to anyone.
My good buddy John Bristowe is hosting the first Calgary Coffee and Code at the Kawa Expresso Bar on Friday, March 13. He’ll spend the day lounging around while James Kovacs and I actually provide the code. I’m sure John has some purpose. Maybe we’ll get him to show off his Barista skills or drag and drop some demo for onlookers. In any case it’s going to be blast. John will be there most of the day (9AM to 4PM) and I’ll hang out for as much as I can bear. I’m bringing a few goodies to help answer any questions and perform geek tricks including one of my virtual SharePoint rigs, my XNA development setup (sorry, no XBox), and my Facebook development in case anyone wants to look at icky PHP code.
Basically come on down, hang out, have some coffee, bring your laptops and chat it up. James has promised to be the ALT.NET guy (although I’ll be there as his understudy in case he breaks another wrist) and John, well, John will have pretty PowerPoint slides to show you about Windows 7 and other mythical products from Microsoft.
Also, be sure to get there early to see our Interpretive Dance version of “Watchmen, The Live Motion Comic”. John will be playing The Night Owl, James will take on Rorschach, and I’ll be doing all the other roles.
Check out this link for a map to the Expresso Bar and see you there!
-
Setting the Publish Status to Include for 3rd Party Files with XBAP deployments
I was trying to deploy a new WPF app via XBAP today and we were experiencing an odd deployment error.
When we deployed and launched the app we were getting this error:
Startup URI: http://localhost/XbapNHibernateDeploymentSpike/XbapNHibernateDeploymentSpike.xbap
Application Identity: http://localhost/XbapNHibernateDeploymentSpike/XbapNHibernateDeploymentSpike.xbap#XbapNHibernateDeploymentSpike.xbap, Version=1.0.0.5, Culture=neutral, PublicKeyToken=8c4ee06d2506bc6f, processorArchitecture=msil/XbapNHibernateDeploymentSpike.exe, Version=1.0.0.5, Culture=neutral, PublicKeyToken=8c4ee06d2506bc6f, processorArchitecture=msil, type=win32
System.Runtime.Serialization.SerializationException: Unable to find assembly 'NHibernate, Version=2.0.0.4000, Culture=neutral, PublicKeyToken=aa95f207798dfdb4'.This was odd because I knew that NHibernate.dll was being distributed with the app. I confirmed. There it was in the manifest file and in the deployment directory. Checking the Application Files settings inside of Visual Studio (this was just a test deployment, please don't deploy apps from inside Visual Studio) it was there and included:

The generated manifest file showed it was included as well:
<dependency>
<dependentAssembly dependencyType="install" allowDelayedBinding="true" codebase="NHibernate.dll" size="1638400">
<assemblyIdentity name="NHibernate" version="2.0.0.4000" publicKeyToken="AA95F207798DFDB4" language="neutral" processorArchitecture="msil" />
<hash>
<dsig:Transforms>
<dsig:Transform Algorithm="urn:schemas-microsoft-com:HashTransforms.Identity" />
</dsig:Transforms>
<dsig:DigestMethod Algorithm="http://www.w3.org/2000/09/xmldsig#sha1" />
<dsig:DigestValue>hUljboZ3kBAzBFbanjzLCJCMua0=</dsig:DigestValue>
</hash>
</dependentAssembly>
</dependency>This didn’t make any sense. It was in the manifest, in the published directory, and everything looked like it should work. Google wasn’t much help here as I was in uncharted territory so I just starting poking around.
Finally I came to the problem and a solution. The hibernate.cfg.xml file was being included as a data file and spec’d out in the manifest like this:
<file name="hibernate.cfg.xml" size="604" writeableType="applicationData">
<hash>
<dsig:Transforms>
<dsig:Transform Algorithm="urn:schemas-microsoft-com:HashTransforms.Identity" />
</dsig:Transforms>
<dsig:DigestMethod Algorithm="http://www.w3.org/2000/09/xmldsig#sha1" />
<dsig:DigestValue>eICryxpUlz1ZHRpxHt+P2z8kBJo=</dsig:DigestValue>
</hash>
</file>Changing it from “Data File” to “Include” solved the problem.
In the working version of the manifest file, the NHibernate config file is spec’d out as this:
<file name="hibernate.cfg.xml" size="604">
<hash>
<dsig:Transforms>
<dsig:Transform Algorithm="urn:schemas-microsoft-com:HashTransforms.Identity" />
</dsig:Transforms>
<dsig:DigestMethod Algorithm="http://www.w3.org/2000/09/xmldsig#sha1" />
<dsig:DigestValue>eICryxpUlz1ZHRpxHt+P2z8kBJo=</dsig:DigestValue>
</hash>
</file>Note the difference in the file declaration. The non-working one includes an attribute: writeableType="applicationData"
This is pretty obscure and maybe I’m just a simple guy, but telling me that you can’t find NHibernate.dll when you were really looking for a different isn’t very intuitive. Yes, I checked the stack trace, thinking that maybe the config file wasn’t there and it was an NHibernate exception being thrown or gobbled up, no such luck. The error was being reported out of PresentationHost.exe long before NHibernate was even being called.
Don’t ask me why changing the Publish Status from Data File to Include fixes the issue, I just work here.
Update: Sure enough, after you publish something on the internet along comes the information you were looking for. Buried somewhere on the web I found this tidbit:
If you set the 'Publish Status' of the xml data file to "Data File", this file will reside in the Data directory in the end user's Local Settings folder after installation. If you set the 'Publish Status' of the xml data file to "Include", the file will be output to the Application directory.
For xbap applications, the "Application directory" is the IE cache but when the Publish Status was set to "Data File" rather than "Include" it was going to nowhere land.
-
Reintroducing Terrarium, now with 2.0 goodness!
 To skip to the chase… http://www.codeplex.com/terrarium2
Origins
A long time ago, on a development team far, far, away, some bright dude (or dudette) came up with the idea of Terrarium.
Terrarium was a .NET 1.x game/learning tool that was aimed at getting people interested in .NET and building cool stuff. In Terrarium, you can create herbivores, carnivores, or plants and then introduce them into a peer-to-peer, networked ecosystem where they complete for survival. Terrarium demonstrates some of the features of the .NET Framework, including Windows Forms integration with DirectX®; XML Web services; support for peer-to-peer networking; support for multiple programming languages; the capability to update smart client, or Windows-based, applications via a remote Web server; and the evidence-based and code access security infrastructure.
Terrarium was created by members of the .NET Framework team in the .NET Framework 1.0 timeframe and was used initially as an internal test application. At conferences and via online chats, Terrarium provided a great way for developers to learn about the new .NET programming model and languages as they developed creatures and introduced them into a peer-to-peer ecosystem.
The Windows SDK team evolved the game in the .NET Framework 2.0 timeframe, but it wasn’t worked on for over two years. As a result, the source code for Terrarium 2.0 doesn’t use the very latest .NET technologies.
Now here we are and it’s 2008, long past that 1.x product. A few months ago I got the bright idea to resurrect the project. After all, 1.x was long gone from the developers toolkit but the premise of building battle bugs and having them duke it out in a virtual eco-system was still just too plain cool to pass up. I thought it would make for an interesting project and get some renewed interest in .NET, and more specifically upgrade it to the latest framework and goodies out there. Hey, XNA is here and writing DirectX goo is a thing of the past.
The Long And Winding Road
So with my ambition and fearlessness of the Microsoft release monster, I trudged into the mouth of the beast. I hit up as many people I could find that were still around and pinged them about Terrarium.
Terrari-who?
That’s the general response I got for the most part. It’s been 6+ years and most of the original team has moved on. The challenge was to get anyone in Microsoft to find the unreleased source to this project, let alone even remember it.

I pictured a giant warehouse much like the last scene in Raiders of the Lost Ark. Boxes and boxes with cryptic product codes and license keys on them, all packaged up for someone to unearth someday. That someone was going to be me. Terrarium is my Lost Ark. So I persevered and continued to bug everyone I knew, finally ending up at Scott Guthrie who finally put me in touch with Lisa Supinski, Group Manager with the current Windows SDK team.
Lisa was instrumental at getting everything going and handling all the details of making this a reality. Without her, it wouldn’t have come to this point. From there the journey was fraught with danger, snakes, legal papers to read, source code to fix, and agreements to sign (did I mention the snakes?) and lots of emails, phone calls, and secret handshakes.
The fruit of our labour is upon us so now I proudly present…
Terrarium 2, Electric Boogaloo!

(okay, we’ll drop the Electric Boogaloo part)
Here We Go
The new Terrarium comes in two forms, the client and the server. The client consists of a few parts including a local Terrarium client executable (which also doubles as a screensaver), and SDK documentation and samples for building your own creations. The local Terrarium client and run your own critters but you’ll need a server to connect to if you want it to interact with other creations.
The client can run in two modes:
- Terrarium Mode – 1) The user may run alone, without peers. In this case, the ecosystem presented on the screen represents the whole of the ecosystem. This is good for creature testing purposes. 2) The user may also elect to join with a select group of peers, expanding the ecosystem across all of the participating peer computers. This is simple to do. Each participating user opts into a special, private network by entering an agreed upon character string in the “channel” textbox on the Terrarium console. Upon entering that string, the user’s computer is matched with only those computers which also entered that same string.
- Ecosystem Mode – This is the standard mode, in which the user’s computer runs just a small slice of an ecosystem which spans all of the participating peer computers, worldwide.
In both modes, you can develop your own creatures or you can watch as other developers’ creatures battle it out for survival by running Terrarium as a standalone application or as a screensaver.
The server is two parts. First there’s the web server part which consists of a single web server that provides a user interface for monitoring a Terrarium server (and all the critters uploaded to it) and there are web services that are consumed by the client (for uploading creatures, getting stats, interacting with peers, etc.). The server also includes some SQL scripts and installation instructions for setting up the database. Any flavour of SQL Server will work (2000, 2005, Express). 2008 is untested but should work fine. The scripts are pretty simple (the tables are pretty basic) and there are some stored procedures which could be ported to work with other servers (MySQL, Firebird, etc.) but that’s an exercise I’ll leave to the reader.
Custom Creatures
When creating a creature, you have control over everything from genetic traits (eyesight, speed, defensive power, attacking power, etc.) to behaviour (the algorithms for locating prey, moving, attacking, etc.) to reproduction (how often a creature will give birth and what “genetic information,” if any, will be passed on to its offspring). Upon completing the development process, the code is compiled into an assembly (dynamically linked library, or DLL) that can be loaded into the local ecosystem slice, viewable through the Terrarium console. When a creature is initially introduced in Ecosystem Mode, ten instances of it are scattered throughout the local ecosystem. No more instances of that creature may be introduced by that user or any other on the network until the creature has died off completely. By contrast, if running in Terrarium Mode, an infinite number of instances of a given creature may be entered into the environment.
Once the creature is loaded into Terrarium, it acts on the instructions supplied by its code. Each creature is granted between 2 and 5 milliseconds (depending on the speed of the machine) to act before it is destroyed. This prevents any one creature from hogging the processor and halting the game.
Within each peer in the network, a blue “teleporter” ball rolls randomly about. If the user is running with active peers logged in (either in Ecosystem Mode or using a private channel in Terrarium Mode), whenever this blue ball rolls over a creature, that creature is transported to a randomly selected peer machine.
In the SDK zip file there’s a help file and several samples to get you up and running instantly with a local Terrarium. Feel free to modify these or use them as a starter for your own new creations. Code samples are in both VB.NET and C#.
The Road Ahead

Putting Terrarium on CodePlex was intentional as it’s meant to be a collaborative piece. Getting the system out there is three fold and having it on CodePlex supports this:
- Get the code out there for all to see and dissect
- Get people setting up Terrarium servers and creating bugs (virtual ones for the game, not defects)
- Extending the game as a learning tool and introducing new features to breathe new life into this puppy
Like I said, the current build is for 2.0. I didn’t want to delay the release while I upgraded it to 3.5 since I wasn’t going to be adding any value (yet) to the codebase and there might be some challenges with 3.5 and the DirectX code (I haven’t tried an upgrade yet, so it could “just work”). The other challenge is driven by you, being the fact that not everyone is building in Visual Studio 2008 and targeting the 3.5 framework. So I didn’t want to exclude a large number of developers by forcing them to 3.5. I think time will tell (via the CodePlex forums and feedback on this project) when the right time to move to 3.5 will be (and how, for example will we maintain a 2.0 and 3.5 codebase?). I don’t have all the answers but I’m here to listen and juggle the kittens for everyone.
What’s planned? Here’s my product backlog that will probably make it’s way onto the Issues page on the CodePlex project. These are just seeds for ideas, I’m sure you guys can come up with better ones.
- 3.5 framework/Visual Studio 2008 upgrade (possibly split off and have dual solutions/project files?)
- Leverage 2.0 language features. Much of the code was 1.1 so generics and other goodness wasn’t there. The current codebase is compiled and built on Visual Studio 2005/2.0 Framework but not really making use of the features (yet). For example, all WinForms are 1.1 style (i.e. no partial classes). Same with the 3.5 upgrade where more cool stuff could be done all over the codebase.
- Extend the current system by adding new features. Not sure off the top of my head what those features would be but there’s plenty of room for improvement.
- Bug hunt. I don’t have a list from Microsoft of bugs that were there but no software is perfect. I’m sure things will crop up. We’ll log them in the Issue tracker, you guys should vote on them, and we’ll fix them up as they’re prioritized by popularity.
- ClickOnce install of the Terrarium Client from a Terrarium Server. This would be a nice-to-have since ClickOnce is a breeze to keep clients updated. However it would require some reshuffling of the current client as it requires additional files and ClickOnce has limitations on what it can put on a users machine.
- VSI project template add-ons so people can create new creatures in Visual Studio quickly and easily (this would be a value-added mod and pretty simple to do).
- XNA upgrade/port. This is pretty major as DirectX isn’t really all that abstracted away in the current system but the hope would be to bring Terrarium to the Xbox 360 (complete with networking support). This is probably a 4.0 release that could be a year or so away (but would kick the llamas’ butt)
- Documentation isn’t awesome yet. The SDK help file has been updated and is current (built with the latest release of Sandcastle) but some of the documentation files are a little out of date.
- The server project website is a bit of a mess (read:disaster). It was built in the 1.1 days and never updated. It contains a mixture of code behind files, raw class files, and aspx pages with embedded code. In short, it needs to be rewritten. The web services are okay, although with moving to 3.5 we should probably look at using WCF instead.
Jumping into the project is not for the casual developer. As this codebase came from Microsoft there are some guidelines and constraints we’re going to follow. The first being team members. Please understand this is neither the Blue Monster talking or me being an uber-control freak, it’s just how it is. So if you’re interested in joining the team and contributing there are a few things that have to happen:
- First off, you’ll need to submit a patch to me as a sample of what you’re planning to do or an example of how you’re looking to extend things. This would be something meaningful, but doesn’t have to be an epic contribution (like porting DirectX to XNA). The patch itself won’t go in by me, it’s your golden ticket into the world of the Terrarium team. You will have to modify the codebase with the changes once you gain access (below). I know, it’s rather convoluted and you can beat me up next time you catch me on the street. I don’t make up the rules, I just make sure everyone in the sandbox is playing by them.
- Second, you’ll need to be committed to development. The “submit a patch and run” technique won’t cut it here so we’re looking for some kind of commitment to the project. There’s a signup process involved (requiring you to digitally sign a Microsoft agreement, don’t worry it’s quick, painless, and pretty cool technology to boot) so becoming a team member is a bit more involved than your average open source project.
Like I said, it’s a little more tasking than a typical CodePlex project and there are constraints we can talk about via email or whatever if you’re really interested in enhancing or extending Terrarium and becoming a member of the team.

You can grab the various packages now from the release page on CodePlex here. There are packages in various formats:
- Client – This is the client installer. You can run a local terrarium for testing creations and connecting to remote servers.
- Server – This is the server installer and consists of a webserver along with some SQL server files (and instructions for installation). This allows you to setup a server for other people to upload their beasties to.
- SDK – This contains the documentation for building new animals along with some samples (in both VB and C#). You’ll need the client installed first in order to use this package.
- Source – This is the source code package for the entire system. Unzip this and load it up to do customizations. See the notes above for contributing back to the project.
Just a couple of final notes.
Client/Server versions are very sensitive. This is due to security and not allowing clients to “take over” the server or upload malicious code. So if you’ve decided to create your own fork of the code or are running a “custom” server, be aware that only clients that are keyed to your server (based on version) will work. Other clients may have issues connecting or interacting with your server.
The server setup is not fully automated (and probably could be via a MSBuild script or PowerShell script) so there’s some manual intervention needed. The website installs via an installer but you’ll need to create a database and run the scripts provided then do some manual editing of the web.config file to connect to the db. This is all documented in the server package. If you do spin a server up let us know (via the CodePlex project). Maybe we’ll have a dedicated wiki page with active servers people can connect to or something.
I’m also thinking of setting up a new domain and website for a creature exchange program. Upload your creatures, put them to battle, and show them off. Sort of a Digg for Terrarium. Let me know if you have ideas on this or want to help out (I always have 10x more ideas than I have time for). In any case, they’ll be more blog posts to come on building critters and the fine art of Terrarium A.I. (the “A” is for Artificial and the “I” is for intelligence. Wait, what’s the “A” for again?).
I do have a Terrarium 2.0 server up and running at http://terrariumserver.com that you can use for testing (which may or not be fully operational when you read this due to power outages in Vancouver). It’s a playground but can be used for checking out your battle bugs before you unleash them on other unsuspecting victims. This server will always be running the latest version of the server and have the most current (working) features available.
This is a “1.0” type release since it’s the first release of the source code. A few things (as you’ve read) have been done along the way and it’s by no means perfect or complete. It’s just the first step of the journey.
Differences from the Previous Version
For those that remember (or even still have copies of the old version of the program) I wanted to point out a few differences that you (or may not) notice in comparison.
- Several custom executable are missing from the 2.0 release, namely the custom skin tool and some other utilities. We’re working on finding these and/or rebuilding them.
- The custom charting component was removed from the server website and is not available. The project is trying to stay true to an out-of-the-box experience so the decision was not to clutter up the core project with 3rd party utilities and libraries. This functionality may return in some form, once there’s a way to do it with the core .NET framework
- Documentation you find may refer to items or concepts that are non-existent in the 2.0 version (this is mainly prevalent in the Client UI as that has changed quite a bit). The documentation is an on-going effort and will evolve over time.
- Some “features” in the Client are not working or wired up. For example the “Report a bug” button does nothing. They’ll be various bits and pieces that are like this which, again, will come with time.
Credit where credit is due
While this was my labour of love the past couple of months, I really want to thank everyone involved from the Microsoft side in getting this project going. Shout outs especially to Lisa from the Windows SDK team who’s become my best friend over the past couple of months and really got things moving on the MS side. Without her the Ark would still be boxed up somewhere in that warehouse.
Communities are not created, they’re grown and it takes time. I’m taking a chance on this project (as is Microsoft) in the hopes that it *will* spark some creativity and contribution. The discussion forums on CodePlex are there to talk about it and the Issue Tracker is to suggest features and report bugs. Who knows, given time to grow, we may be talking about this same time next year with a plethora of Terrarium resources out there. At least that would be a nice place to be and it can happen with you.
So there you go. Have at it. Build some creatures, learn some .NET and game programming, but above all… have fun!
-
Microsoft StyleCop, Totalitarian Rules
I got turned onto a fairly new tool by a friend and was interested in checking it out. It's called Microsoft StyleCop and done in the style of FxCop but rather than analyzing assemblies it looks at code for formatting and style rules.
The original use was within Microsoft for keeping code across all teams consistent. Imagine having to deal with hundreds of developers moving around an organization like Microsoft where there are dozens of major teams (Windows, Office, Visual Studio, Games, etc.) and millions of lines of code. It helps if the code is consistent in style so people moving between teams don't have to re-learn how the "style" of that new team works. Makes sense and I can see where there's benefit, even in smaller organizations.
As an example, here's a small User Interface utility class for long(ish) running operations. It's simple but works and is easy to use:
using System;
using System.Windows.Forms;
namespace UserInterface.Common
{/// <summary>
/// Utility class used to display a wait cursor
/// while a long operation takes place and
/// guarantee that it will be removed on exit.
/// </summary>
/// <example>
/// using(new WaitCursor())
/// {
/// // long running operation goes here...
/// }
/// </example>
internal class WaitCursor : IDisposable
{private readonly Cursor _cursor;
public WaitCursor()
{_cursor = Cursor.Current;
Cursor.Current = Cursors.WaitCursor;
}
public void Dispose()
{Cursor.Current = _cursor;
}
}
}
One could even argue here that the class documentation header is somewhat excessive, but this is meant to be a framework class that any application could use and maybe deserves the <example/> tag.
Maybe it's my formatting style but I like using the underscore prefix for class fields. This is for two reasons. First, I don't have to use "this." all over the place (so the compile can tell between a parameter variable, local variable, and class variable. Secondly, I can immediately recognize that "_cursor" is a class wide variable. Sometimes we have a policy of only referencing variables via Properties so for example I could tell if this was a problem if I saw a method other than a getter/setter use this variable. The debate on underscore readability can be fought some other time, but for me it works.
After running StyleCop on this single file (I wasn't about to deal with all the voilations in the entire solution) it created this list of violations:
-
SA1600: The field must have a documentation header.
-
SA1600: The constructor must have a documentation header.
-
SA1600: The method must have a documentation header.
-
SA1633: The file has no header, the header Xml is invalid, or the header is not located at the top of the file.
-
SA1309: Field names must not start with an underscore.
-
SA1200: All using directives must be placed inside of the namespace.
-
SA1200: All using directives must be placed inside of the namespace.
-
SA1101: The call to _cursor must begin with the "this." prefix to indicate that the item is a member of this class.
-
SA1101: The call to _cursor must begin with the "this." prefix to indicate that the item is a member of this class.
Hmmm, that's a lot of problems for such a little file. Now grant you, when you run FxCop against any assembly (even Microsoft ones) you get a whack of "violations". They range from actual, real, critical errors that should be fixed, to annoyances like not enough members in a namespace. Any team using FxCop generally has to sift through all the violations and decide, as a team, what makes sense to enforce and what to ignore. StyleCop has similar capabilities through it's SourceAnalysisSettingsEditor program (buried in the Program Files directory where the tool is installed or via right-click on the Project you're performing analysis on). It allows rules to be ignored but it's pretty simplistic.
I think one of the biggest issues with the tool is the fact that it goes all Chef Ramsey on your ass, even if its code created by Microsoft in the first place. For example create a new WinForms project and run source analysis on it. You'll get 20+ errors (even if you ignore the .Designer generated file). You can exclude designer files and generated files through the settings of the tool, but still its extra work and more friction to use the tool this way. It might be debated that the boilerplate code Visual Studio generates for new files (which you can modify but again, more work) should conform to the StyleCop guidelines. After all Microsoft produced both tools. However this would probably anger the universe as the "new" boilerplate code would look different from the "old".
There are other niggly bits like the tool insisting on documenting private variables so pretty much every property, method, and variable (public, private, or otherwise) will all have at least an extra 3 lines added to it should you enforce this rule. More work, more noise.
I'm somewhat torn on the formatting issues here. What it suggests doesn't completely jive with me, but that might be style. After all, the tool is designed to provide consistency of code formatting across multiple disparate sources. However unless you're a company with *no* code and start with this tool, you'll probably be ignoring certain rules (or groups of rules) or doing a lot of work to try to bring your code to match the violations you'll stumble on. It's like writing unit tests after the fact. Unit tests are good, but writing them after the code is done (and even shipped) has a somewhat diminished cost to benefit ratio.
In getting this simple class up to snuff I had to not have the urge to hit Ctrl+Alt+F in ReSharper (ReSharper's default formatting totally blows the violations) and hold my nose on a few things (like scattering the code with "this." prefixes and seemingly redundant documentation headers). Documentation is a good thing but my spidey-sense has taught me that comments mean something might be wrong with the code (not descriptive enough, should have been refactored into a well-named method, etc.). It only took a few minutes to shuffle things around, but I look at large codebases that you could point this tool at and think of weeks of code reformatting and what a cost that would be.
In any case, here's the final class with the changes to "conform" to StyleCop's way of life:
//-----------------------------------------------------------------------// <copyright file="WaitCursor.cs" company="MyCompany">// Copyright MyCompany. All rights reserved.// </copyright>//-----------------------------------------------------------------------namespace UserInterface.Common
{using System;
using System.Windows.Forms;
/// <summary>
/// Utility class used to display a wait cursor
/// while a long operation takes place and
/// guarantee that it will be removed on exit.
/// </summary>
/// <example>
/// using(new WaitCursor())
/// {
/// // long running operation goes here...
/// }
/// </example>
internal class WaitCursor : IDisposable
{/// <summary>
/// Holds the cursor so it can be set on Dispose
/// </summary>
private readonly Cursor cursor;
/// <summary>
/// Default constructor
/// </summary>
public WaitCursor()
{this.cursor = Cursor.Current;
Cursor.Current = Cursors.WaitCursor;
}
/// <summary>
/// Resets the cursor back to it's previous state
/// </summary>
public void Dispose()
{Cursor.Current = this.cursor;
}
}
}
I feel this is a lot of noise. Sure, it could be consistent if all files were like this but readability is a funny thing. You want code to be readable and to me this last version (after StyleCop) is less readable than the first. Documenting default constructors? Pretty useless in any system. What more can you say except "Create an instance of <T>". Documenting private variables? Another nitpick but why should I? In this class you could probably rename it be _previousCursorStyle or something to be more descriptive and then what is documentation going to give me. Have I got anything extra from the tool as a result? I don't think so.
If it's all about consistency something we've done is to share a ReSharper reformatting file which tells R# how to format code (when you press Ctrl+Alt+F or choose Reformat Code from the ReSharper menu). It has let us do things like not wrap interface implementations in regions (regions are evil) and decide how our code should be formatted like curly braces, spacing, etc. However it completely doesn't match StyleCop in style or form. You could probably tweak ReSharper to match StyleCop "to a certain extent" but I disagree on certain rules that are baked into the tool.
For example take "this." having to prefix a variable. To me a file full of "this" prefixes is just more noise. ReSharper agrees with me because it flags "this.PropertyName" as redundant. Maybe the debate whether it's a parameter or a field is probably a non-issue. If a method is short, one can immediately identify the local variables and distinguish them from member fields and properties with a glance. If it is long, then there is probably a bigger issue than the code style: the method simply should be refactored. For whatever reason, Microsoft thinks "this." is important and more readable. Go figure.
Rules can be excluded but it's a binary operation. Currently StyleCop doesn't have any facility on differentiating between "errors" and "warnings" or "suggestions". Maybe it should but then with all the exclusions and errors->warnings you could configure, the value of the tool quickly diminishes. Enough errors being turned into warnings and you would have to argue the value of the tool at all, versus a ReSharper template.
In any case, feel free to try the tool out yourself. If you're starting with a brand new codebase and are willing to change your style to match a tool then this might work for you. For me, even with public frameworks I'm working on, the tool seems to be more regiment and rules than being fit for purpose. I suppose if you buy into the "All your StyleCop are belong to us" mentality, it'll go far for you.
For me it's just lots of extra noise that seems to provide little value but YMMV.
-
-
UI Exception Handling vs. AppDomain Exceptions
I'm building an uber-exception handling system for all of our apps at work (basically handle unexpected exceptions and post them to out bug tracker, JIRA) and wanted to clear up some confusion on the differences between unhandled exceptions. As an FYI, this information is just for WinForm apps.
By default if you create a new WinForm app any unhandled exceptions are tossed into a dialog box like this:
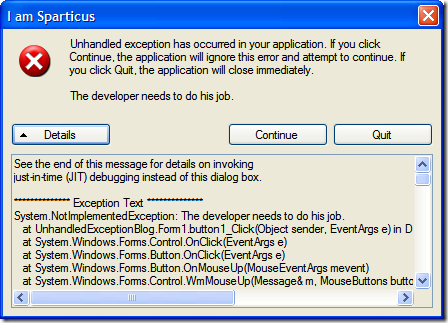
Perhaps while you're debugging you've seen this:
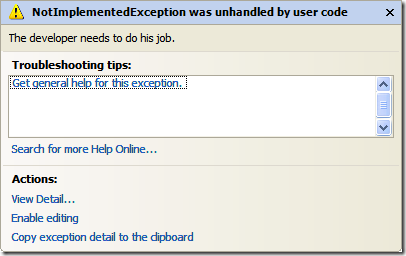
That's the built-in exception assistant Visual Studio provides. It kicks in when running your app from inside the IDE and lets you inspect your system. At this point you're basically screwed and something terrible has happened, so this is your last chance to maybe see what went wrong.
The exception assistant is useful as you can edit your code on the fly, crack open the exception (and investigate other values), or just continue along your merry way. If the exception assistant really irks you, you can go into the Debugger options for visual studio and disable it. When you do this, you'll get a dialog that looks like this:
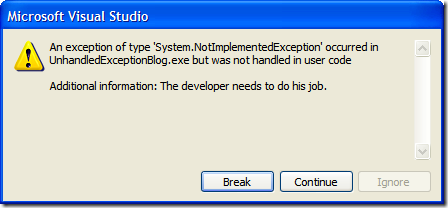
Not as descriptive as the exception assistant, but more intuitive if you just want to motor along (say to your own handler which is what we'll do).
Let's setup an unhandled exception catcher. Here's our main code before we add the handler:
[STAThread]
static void Main()
{
    Application.EnableVisualStyles();
    Application.SetCompatibleTextRenderingDefault(false);
    Application.Run(new Form1());
}
Now my kung-fu design skillz kick in and we'll build a highly sophisticated UI to drive our exception handler. Behold the mighty user interface to end all user interfaces:
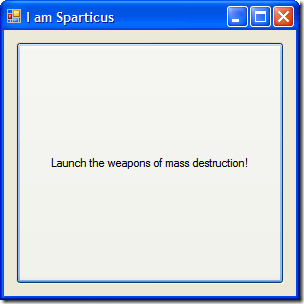
To create a handler we create a method and attach it to the ThreadException event handler. In our app we'll throw some exception and let the system handle it. Here's the updated code:
[STAThread]
static void Main()
{
    Application.EnableVisualStyles();
    Application.SetCompatibleTextRenderingDefault(false);
    Application.ThreadException += Application_ThreadException;
    Application.Run(new Form1());
}

static void Application_ThreadException(object sender, ThreadExceptionEventArgs e)
{
    MessageBox.Show("Something terrible has happened.");
}
We've tied into the ThreadException handler on the Application class with our own method that will dump the exception to a simple dialog box:
However in the AppDomain class there's an UnhandledException handler that you can tie into, just like we did with the ThreadException on the Application class above. The ThreadException is for dealing with exceptions thrown on that thread (and in this case, its our main form) but the AppDomain handler is for *any* unhandled exception thrown (for example, a SOAP call to a web service). So we should hook into that one as well like so:
[STAThread]
static void Main()
{
    ...
    AppDomain.CurrentDomain.UnhandledException += CurrentDomain_UnhandledException;
    ...
}

static void CurrentDomain_UnhandledException(object sender, UnhandledExceptionEventArgs e)
{
    MessageBox.Show("Something else has happened.");
}
You might also notice the signature is different. Rather then getting a ThreadExceptionEventArgs object we get an UnhandledExceptionEventArgs one. The differences are subtle:
- ThreadExceptionEventArgs contains a property of type Exception that is the exception that was thrown
- UnhandledExceptionEventArgs contains a property called ExceptionObject which is the exception thrown (except that it's of type object rather than an Exception)
- UnhandledExceptionEventArgs also contains a bool property called IsTerminating which tells you if the CLR is about to shut down
The question is, does that make our ThreadException handler obsolete? Not really but there's different behaviour around the exception handler based on another setting. In the Application class there's a method called SetUnhandledExceptionMode which lets you control how thread exceptions are handled:
[STAThread]
static void Main()
{
    ...
    Application.SetUnhandledExceptionMode(UnhandledExceptionMode.ThrowException);
    ...
}
Adding this to your setup can result in two different behaviours:
- If you set it to ThrowException, then your CurrentDomain_UnhandledException method is called (even before the Visual Studio IDE gets ahold of it) and the Application_ThreadException method is never called.
- If you set it to CatchException, then your Application_ThreadException method is called. If you're running inside Visual Studio, the IDE steps in before this with it's own exception handler first then control is passed onto your method if you continue with execution.
One little extra note, if you choose option #1 and call SetUnhandledExceptionMode to ThrowException your AppDomain handler gets called but running outside the IDE you'll get this lovely dialog box:
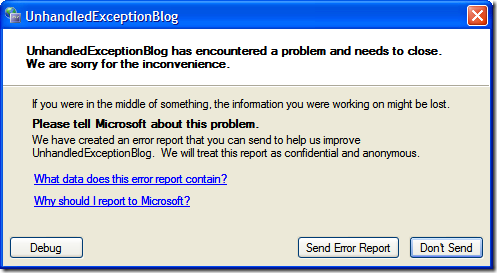
Your app generally shouldn't report information to Microsoft (unless you're really important), but this is what happens when running your app in normal user mode rather than developer mode. I'm not sure if there's a way to prevent having this bad boy popup on you when you hook into the AppDomain event handler (feel free to chime in on the blogs comments if you know how).
Hope that clears up a little on how exceptions work and the different behaviours you can get out of them. Happy exception handling!
-
Finding the AJAX Control Toolkit in VS2005
 This might be old information to some, but I wasn't able to find the answer (very clearly) on the web so here it is.
If you're building a new website with Visual Studio 2005 and want to use the AJAX Control Toolkit there are two different variations you can download, one with source and one without. The most excellent videos by Joe Stagner and co. only shows using the toolkit by building from the sources. For most people that just want to use the toolkit, it's a little confusing as to where they can browse the toolkit after installing the VSI package.
The non-source version of the toolkit includes a VSI package that will install a new template (for creating your own AJAX extensions) and the sample website. When you install the base AJAX extensions, you'll get a new section in your Visual Studio toolbox appropriately named "AJAX Extensions". However it only includes the basics (ScriptManager, UpdatePanel, etc.). What about all those mew uber-cool extenders you get with the Control toolkit? Well, you have to add those to your toolbox yourself. While you can copy the sample website somewhere and refer to that copy, there's already a copy of the toolkit installed when you install the VSI.
To add the Control Toolkit Controls to your Toolbox (say that 3 times fast kids) following the bouncing bullet points:
- In Visual Studio bring up your Toolbox (Ctrl+Alt+X)
- Right click on it and select "Add Tab"
- Enter a name for the new tab. "AJAX Control Tookit" works but you might decide to name it something more personable like "Alice" or "Ted".
- Right click in the new section and select "Choose Items..."
- Wait about 5 minutes while Visual Studio calls the mothership, indexes your entire hard drive, and makes a Starbucks coffee.
- In the "Choose Toolbox Items" dialog click on the "Browse..." button. This calls up a File Open dialog to pick an assembly that contains the controls you want to add.
- Select the appropriate assembly (see below) and click "Open"
- The new controls will automatically be checked so just click "OK" and they'll be added to your new Toolbox section. If you don't have an .aspx page opened, the tab section won't display anything so it's best to this when you have a page opened up (yeah, another silly quirk with Visual Studio that doesn't make a whole bunch of sense to most carbon based life forms)
Here's the "see below" section from above. The VSI package installs a new template for building new extenders, but new projects built from that template need a copy of the toolkit when they're created. So you already have the toolkit installed if you install the VSI, it's just buried in your Application Data directory. You'll find it in:
{Documents and Settings}\[username]\Application Data\Microsoft\VisualStudio\8.0\ProjectTemplatesCache
Depending on which VSI package you installed they'll be a copy in the "Visual C#\AjaxControlExtensionProjectCS.zip" or "Visual Basic\AjaxControlExtensionProjectVB.zip" folders. If you installed both, it'll be there in duplicate so it doesn't matter which one you pick.
Alternately, you can just install the VSI files (or not) and squirrel away the AjaxControlToolkit.dll away from the Sample Website folder somewhere to refer to later (under the {Program Files}\Microosft ASP.NET\ASP.NET 2.0 AJAX Extension folder where AJAX is installed to is a good place). Just remember to grab the whole tree with all the langauge resource files. You'll find them in the "bin" directory under the Sample Website.
HTH.
<rant number="1">The Application Data directory is something that bewilders me, much like anything Microsoft creates and produces. Let's say you want to do a back up of all your data (for re-imaging or just for kicks). One would think it might make sense to just copy the entire "Application Data" folder to a backup and all is golden. No. Files in here are locked by the OS so even if you shut everything down, you won't be able to copy the folder out (and don't even try to move it, that'll bring down the wrath of God upon your system). In addition the folder is hidden, so for those people (like your father in law who insists on "cleaning up" his hard drive by deleted folders in the Program Files folder) they'll never see it, much less know what it's for. Also, if you manage to make a copy of your Application Data folder and drop it onto a new system, don't expect anything to work right. It's a bad, bad, place I've been to a few times. The Application Data folder is a neat place to put stuff and a good idea on paper, all nice and tidy in a single location but other than a big storage place a little functionally useless when it comes to backups and restores</rant>
<rant number="2">When will Microsoft learn and stop burying important files deep in the OS? More importantly, we need a file system that doesn't have limitatations on path length and applications that won't bomb out because of it. The Ajax Control Toolkit above is, by default, located in a directory with 143 characters in it's name (depending on your user name). It's also a bugger to navigate to. Path lengths are so 1990s so why are we still living with them as a constraint? For example I had a developer who would checkout source code to his desktop. It was convienient because it was right there. Problem is that the Desktop is in reality under the {Documents and Settings}\username\blah\blah\blah folder, so his builds were breaking because by the time you got down into a 20 or 30 character folder/filename combo in our solution, you blew the path length. And Windows wasn't very forgiving on what the error was. You think "Path length too long" would be the approprirate error message but no, there would be some cryptic error from Visual Studio (or maybe the file system, or both) saying "Invalid assembly" or "Corrupted assembly file". Anyways, we need a better file system.</rant>


